Hexo 主题开发
安装
Hexo 是一款能将『 Markdown 』文件编译成『 html 』静态文件,可以提供『 Web 』服务,做『 Blog 』,使其能部署到『 gitpage 』上等等。首先要安装『 node.js 』,安装好了以后,就可以使用『 npm 』来安装了,可能会读取系统配置文件,所以需要给『 root 』权限,使用『 sodu 』执行以下命令
$ sudo npm install -g hexo-cli/usr/local/bin/hexo -> /usr/local/lib/node_modules/hexo-cli/bin/hexo
> fsevents@1.2.4 install /usr/local/lib/node_modules/hexo-cli/node_modules/fsevents
> node install
[fsevents] Success: "/usr/local/lib/node_modules/hexo-cli/node_modules/fsevents/lib/binding/Release/node-v57-darwin-x64/fse.node" already installed
Pass --update-binary to reinstall or --build-from-source to recompile
+ hexo-cli@1.1.0
added 171 packages in 6.255s这个时候可以测试以下,是否安装成功
$ hexo -versionhexo-cli: 1.1.0
os: Darwin 17.6.0 darwin x64
http_parser: 2.8.0
node: 8.11.3
v8: 6.2.414.54
uv: 1.19.1
zlib: 1.2.11
ares: 1.10.1-DEV
modules: 57
nghttp2: 1.32.0
napi: 3
openssl: 1.0.2o
icu: 60.1
unicode: 10.0
cldr: 32.0
tz: 2017c新建 Blog
新建一个目录,来搭建一个简易的『 Blog 』吧。
$ mkdir ~/hexo-blog
$ cd ~/hexo-blog
$ hexo init
INFO Cloning hexo-starter to ~/hexo-blog
Cloning into '/Users/wywk/hexo-blog'...
remote: Counting objects: 65, done.
remote: Total 65 (delta 0), reused 0 (delta 0), pack-reused 65
Unpacking objects: 100% (65/65), done.
Submodule 'themes/landscape' (https://github.com/hexojs/hexo-theme-landscape.git) registered for path 'themes/landscape'
Cloning into '/Users/wywk/hexo-blog/themes/landscape'...
remote: Counting objects: 824, done.
remote: Total 824 (delta 0), reused 0 (delta 0), pack-reused 823
Receiving objects: 100% (824/824), 2.54 MiB | 1.01 MiB/s, done.
Resolving deltas: 100% (435/435), done.
Submodule path 'themes/landscape': checked out '73a23c51f8487cfcd7c6deec96ccc7543960d350'
INFO Install dependencies
npm WARN deprecated titlecase@1.1.2: no longer maintained
> fsevents@1.2.4 install /Users/wywk/hexo-blog/node_modules/fsevents
> node install
[fsevents] Success: "/Users/wywk/hexo-blog/node_modules/fsevents/lib/binding/Release/node-v57-darwin-x64/fse.node" already installed
Pass --update-binary to reinstall or --build-from-source to recompile
> nunjucks@3.1.3 postinstall /Users/wywk/hexo-blog/node_modules/nunjucks
> node postinstall-build.js src
npm notice created a lockfile as package-lock.json. You should commit this file.
added 470 packages in 20.978s
INFO Start blogging with Hexo!初始化之后,看到如上信息,说明已经初始化成功了。接下来,直接启动服务,就可以大致浏览『 Blog 』了。
$ cd ~/hexo-blog
$ hexo s
INFO Start processing
INFO Hexo is running at http://localhost:4000/. Press Ctrl+C to stop.启动后,访问『 http://localhost:4000 』
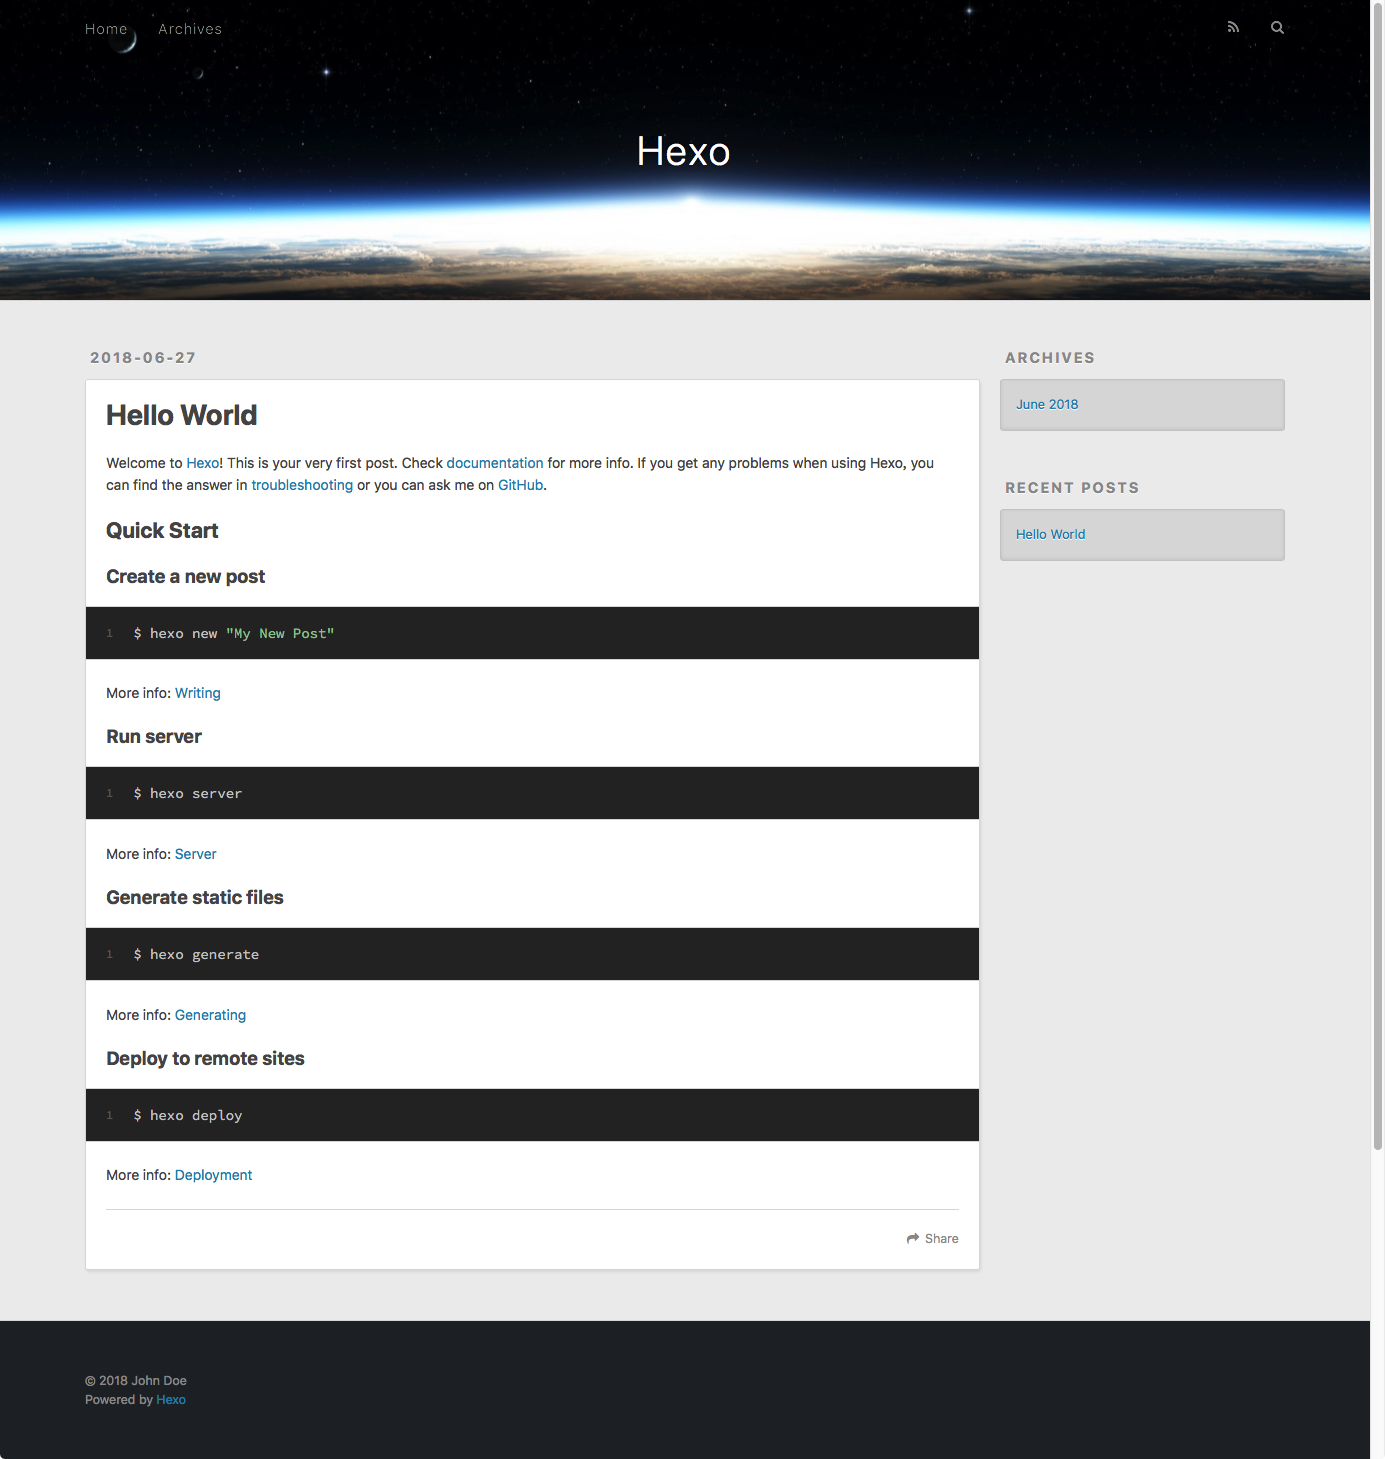
当然也可以使用一些其他的命令,可以通过帮助来查看
hexo help
Usage: hexo <command>

Commands:
  clean     Remove generated files and cache.
  config    Get or set configurations.
  deploy    Deploy your website.
  generate  Generate static files.
  help      Get help on a command.
  init      Create a new Hexo folder.
  list      List the information of the site
  migrate   Migrate your site from other system to Hexo.
  new       Create a new post.
  publish   Moves a draft post from _drafts to _posts folder.
  render    Render files with renderer plugins.
  server    Start the server.
  version   Display version information.

Global Options:
  --config  Specify config file instead of using _config.yml
  --cwd     Specify the CWD
  --debug   Display all verbose messages in the terminal
  --draft   Display draft posts
  --safe    Disable all plugins and scripts
  --silent  Hide output on console
主题下载
Hexo 有很多精彩的主题,可以去『 官方主题网站 』去查阅,找到自己喜欢的主题。
这次所写是自己基于Hexo的框架,编写一个自己喜欢的主题。我个人喜欢极简快速的主题,所以不太喜欢花哨的、很多插件、很多挂件的那种,感觉加载起来特别的卡,可能是作为性能测试人员的坏毛病,喜欢追求极致的速度。没有找到自己喜欢的极简风格,所以就自己写了一个简单的 wiki ,用于代替云笔记。
主题开发
目录结构
首先得创建一个自己 Blog 的文件夹,我这边建的文件夹叫『 wiki 』,然后在这个文件夹下,进行 Hexo 的初始化。
mkdir wiki
cd wiki
hexo init
初始化之后就会有一个这样的目录。
wiki ➔  tree -L 1
.
├── _config.yml       // 总体的配置文件
├── node_modules      // NodeJs 所依赖的包,后期也可以自己添加插件
├── package-lock.json // 支持 hexo 运行的 NodeJs 包
├── package.json      // 自定义的 NodeJs 包
├── scaffolds         // Hexo Markdown 加载时的关键字,如data,title等,它会在启动的时候默认加载
├── source            // md 源文件目录
└── themes            // 主题文件夹
    └── landscape     // 默认主题
我们编写 md 文档放在 『source』文件夹中,在运行『hexo generate』的时候,会根据『source』目录中的 md 文件自动生成一组 『html』格式的静态文件组,会在wiki目录下新建一个 『public』目录,存放在其中。
在『_config.yml』中的 73 行左右,可以看到配置的默认主题『theme: landscape』,所对应的是 themes 目录下的 landscape 目录。
# Extensions
## Plugins: https://hexo.io/plugins/
## Themes: https://hexo.io/themes/
theme: landscape
在『themes』目录下,新建一个自己的主题『wiki』,并且新建一些可以支持运行的文件与目录,按照如下目录格式创建,里面可以不写东西,下面写有注释的,就是我新建的文件。
wiki ➔  tree -L 1
.
├── _config.yml
├── node_modules
├── package-lock.json
├── package.json
├── scaffolds
├── source
└── themes
    ├── landscape
    └── wiki               // 自建的主题目录
        ├── _config.yml    // 主题配置文件
        ├── layout         // 主要构造 html 的模板
        │   ├── index.ejs  // 主页模板
        │   ├── layout.ejs // 布局模板
        │   └── post.ejs   // md 编译成 html 后的文件模板
        └── source         // 静态资源文件目录
            ├── css        // css 样式目录
            └── js         // JavaScript 脚本目录
在『_config.yml』中 73 行左右修改主题,指向刚创建的 wiki 目录。
这里的『_config.yml』指的是 Hexo 的配置文件。
后面如果要修改主题的配置文件,全部都会叫做 『themes._config.yml』。
想要了解更加详细的资料可以去查阅官网配置详解
# Extensions
## Plugins: https://hexo.io/plugins/
## Themes: https://hexo.io/themes/
## theme: landscape
theme: wiki
在 wiki 目录下,启动 hexo 进行测试
# 可以使用 hexo server 也可以直接简写 hexo s
hexo s
INFO  Start processing
INFO Hexo is running at http://localhost:4000 . Press Ctrl+C to stop.可以看到一个白色的界面
模块介绍
为了测试该界面,分别在刚刚新建的 layout.ejs、index.ejs、post.ejs 中加些文字。
『layout.ejs』 这个文件是用于布局的
这里是 layout.ejs『index.ejs』 这个文件是用于主页的
这里是 index.ejs『post.ejs』 这个文件是用于文章的
这里是 post.ejs刷新 http://localhost:4000/,可以看到有中文乱码。
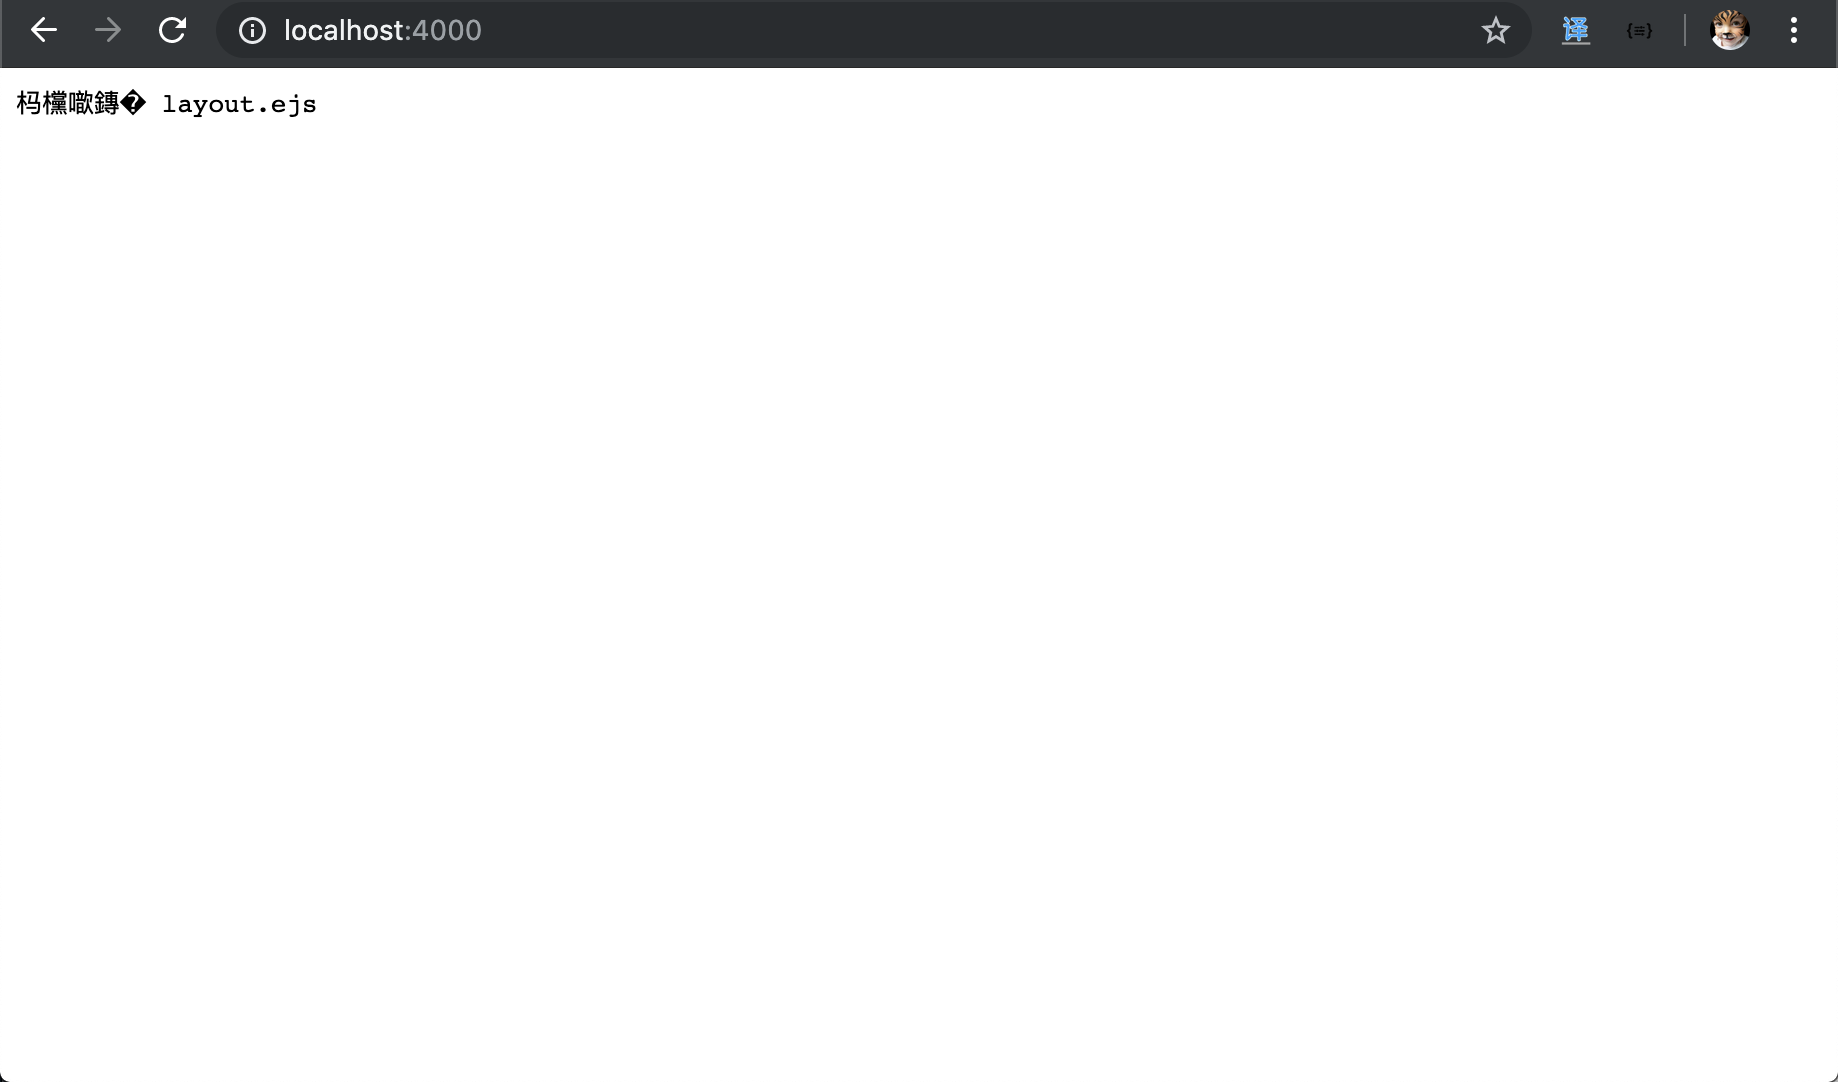
在 『layout.ejs』加上 html 代码,加上 utf-8 编码显示。
<!DOCTYPE html>
<html>
<head>
    <title></title>
    <meta charset="utf-8">
</head>
<body>

    这里是 layout.ejs

</body>
</html>
重启 hexo 服务 【注意: 这次要重启,还是乱码的请重启】
重启好了再刷新 http://localhost:4000/
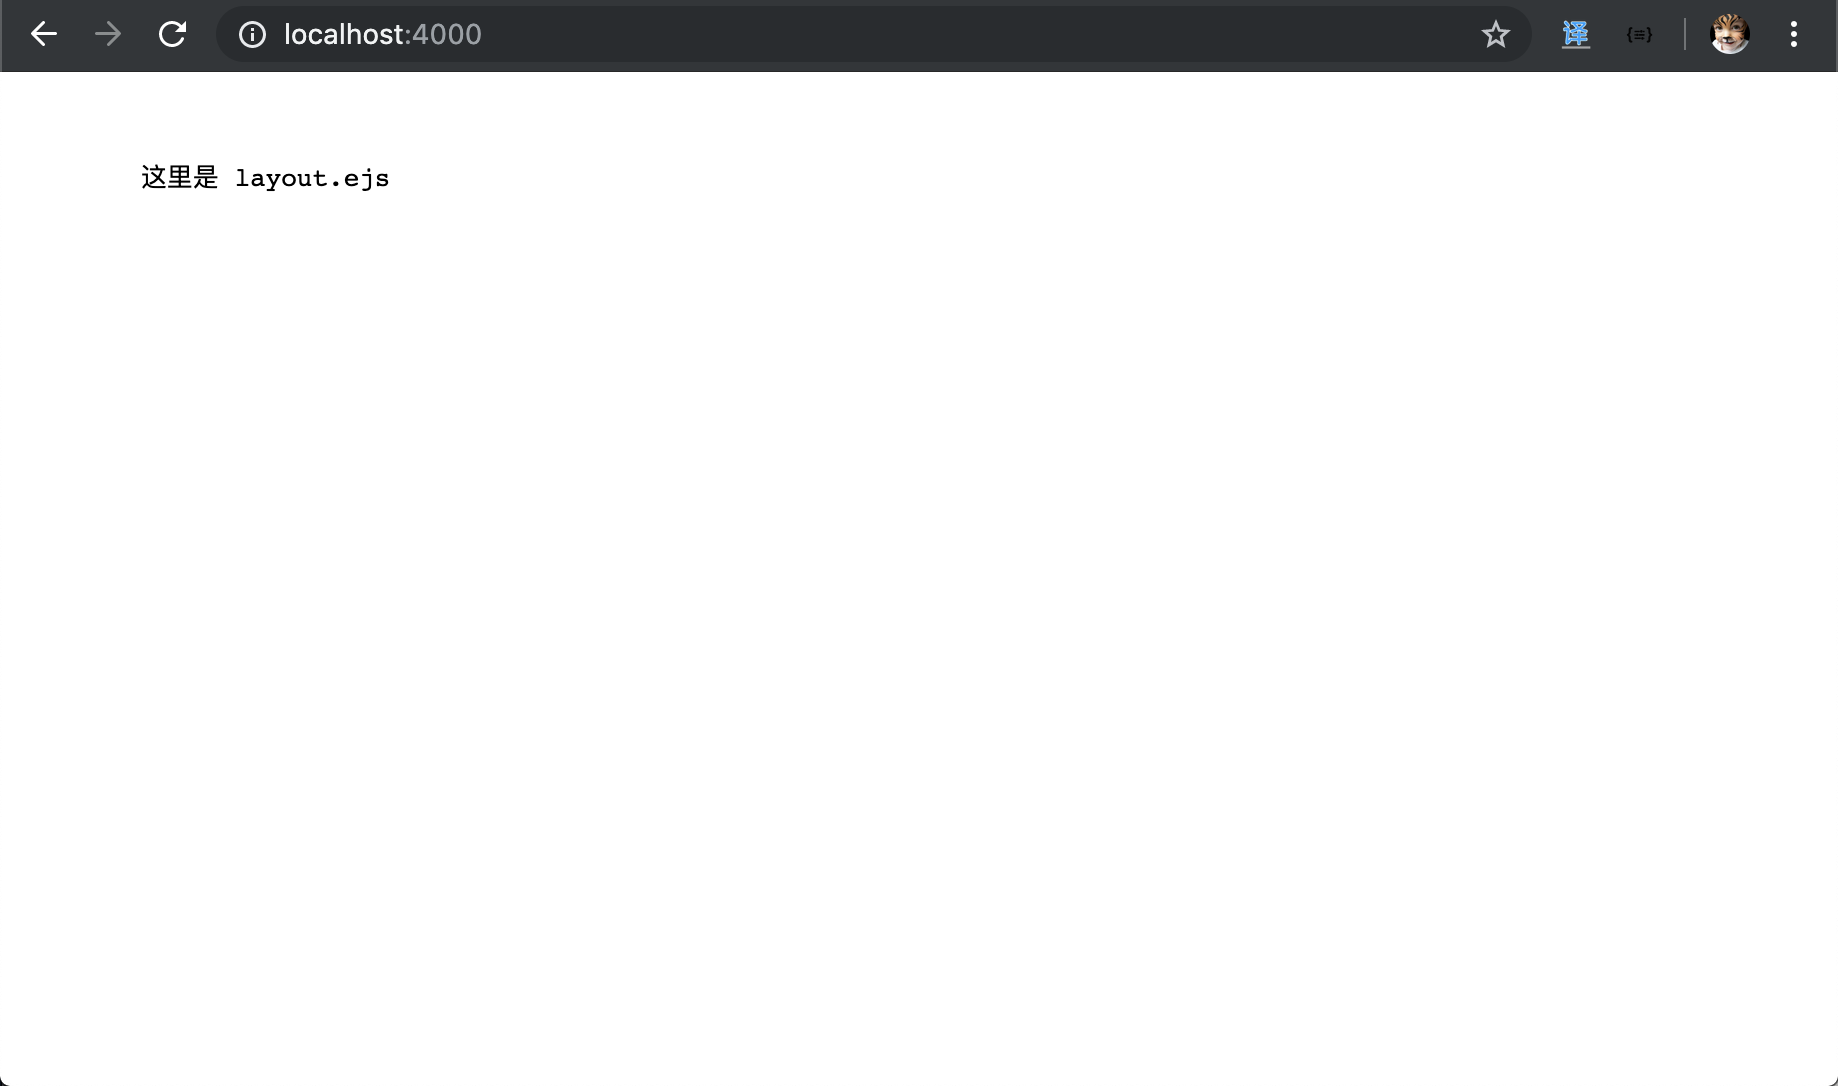
可以发现 layout.ejs 给默认展示出来了,但是 index.ejs 和 post.ejs 呢?
可以用 ejs 引入代码,将这两个模板给引入
<!DOCTYPE html>
<html>
<head>
    <title></title>
    <meta charset="utf-8">
</head>
<body>

    这里是 layout.ejs

    <%- include("index.ejs") %>

    <%- include("post.ejs") %>

</body>
</html>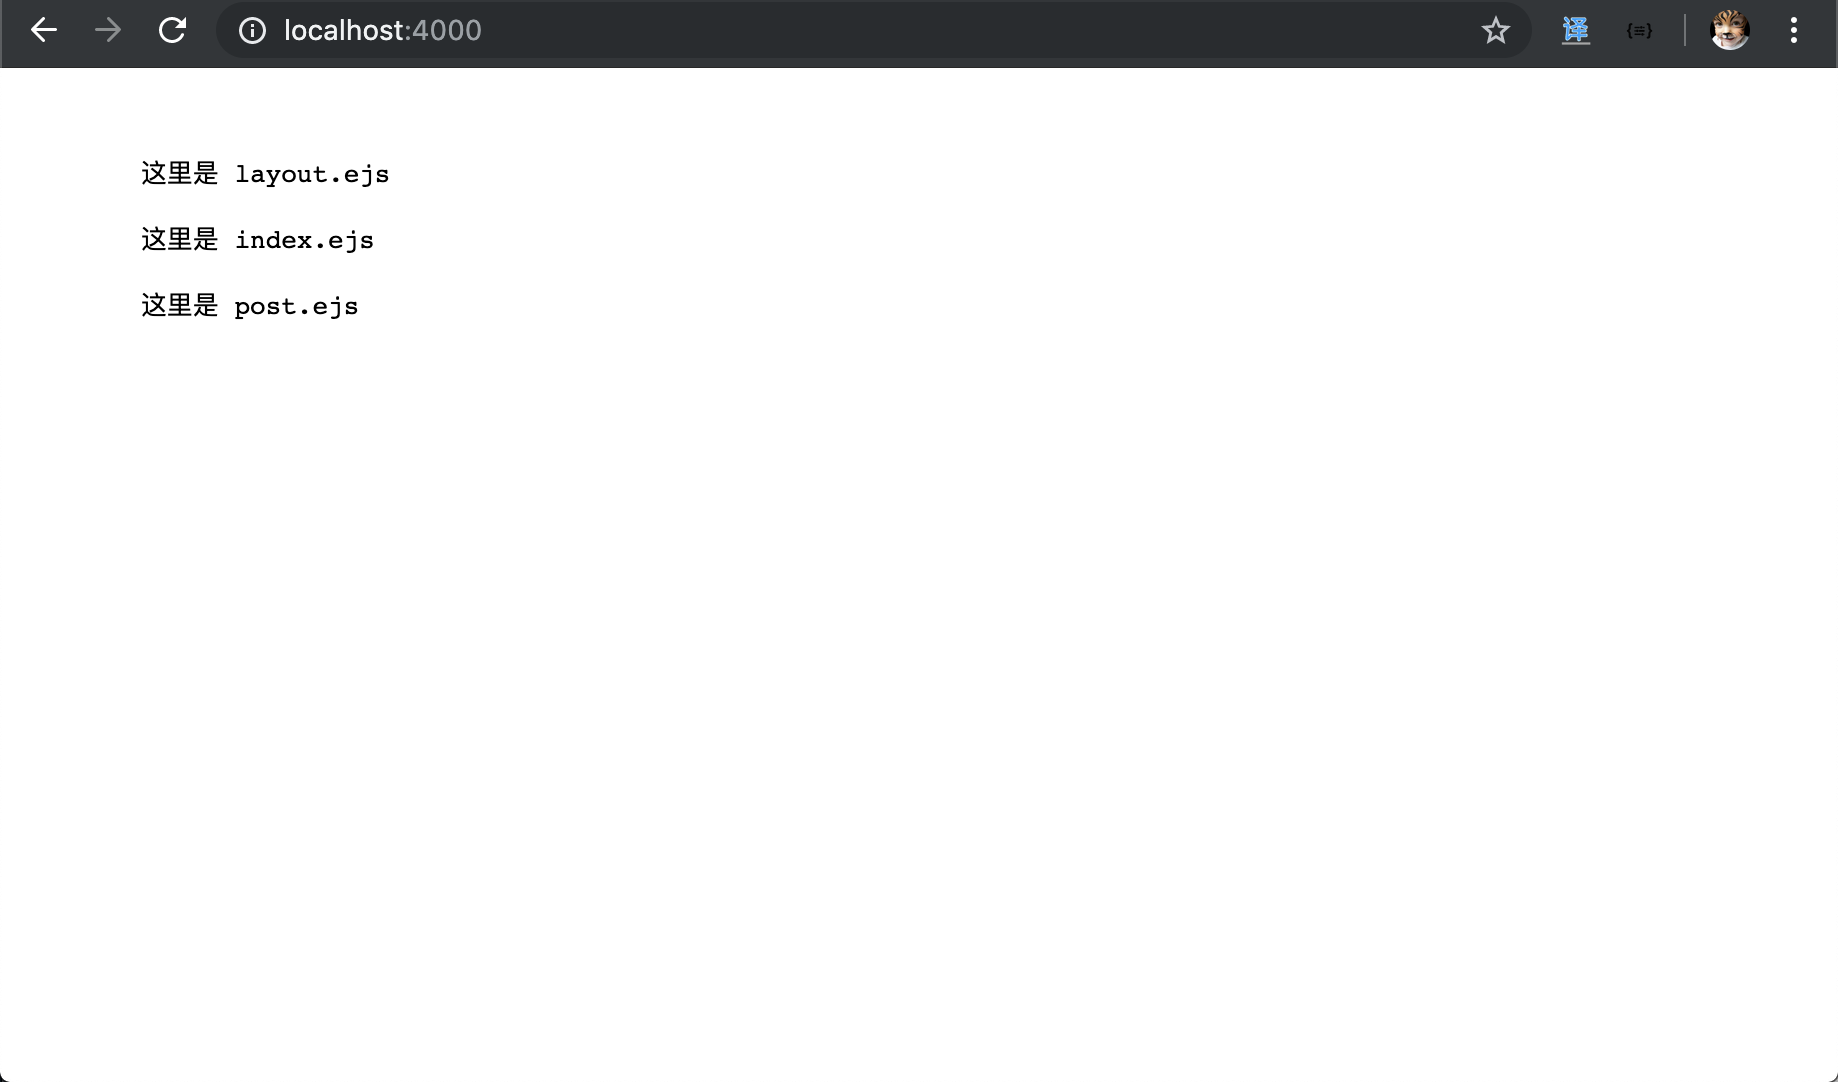
EJS 标签
这里简单介绍一下 ejs 语法,介绍几个用的到的标签也是就好了。想要了解更加详细的资料可以查阅 EJS文档。
| 标签 | 含义 |
|---|---|
| <% | 脚本标签,用于流程控制 |
| <%_ | 删除前面的空格符 |
| <%= | 输出数据到模板 |
| <%- | 输出非转义数据到模板 |
| <%# | 注释 |
| <%% | 输出字符串『<%』 |
| >% | 脚本结束标签 |
| -%> | 结束时,删除换行符 |
| _%> | 结束时,删除空格符 |
| <%- include(“index.ejs”) %> | 引入其他模板 |
上面代码就引入了各个 ejs 模板,可以更加方便用于模块开发。稍微测试一下
『layout.ejs』
<!DOCTYPE html>
<html>
<head>
    <title></title>
    <meta charset="utf-8">
</head>
<body>

    这里是 layout.ejs

    <%- include("index.ejs") %>

    <%- include("post.ejs") %>

    <!-- 一般在写逻辑的时候会用到这个标签,这个标签不会输出到页面上 -->
    <%  %>

    <!-- 这个标签会输出到页面上,是带着非转义符号的 -->
    <%
        var test = "基本上,就用这两组标签,其他的也用不上。";
    %>

    <%- test %>


</body>
</html>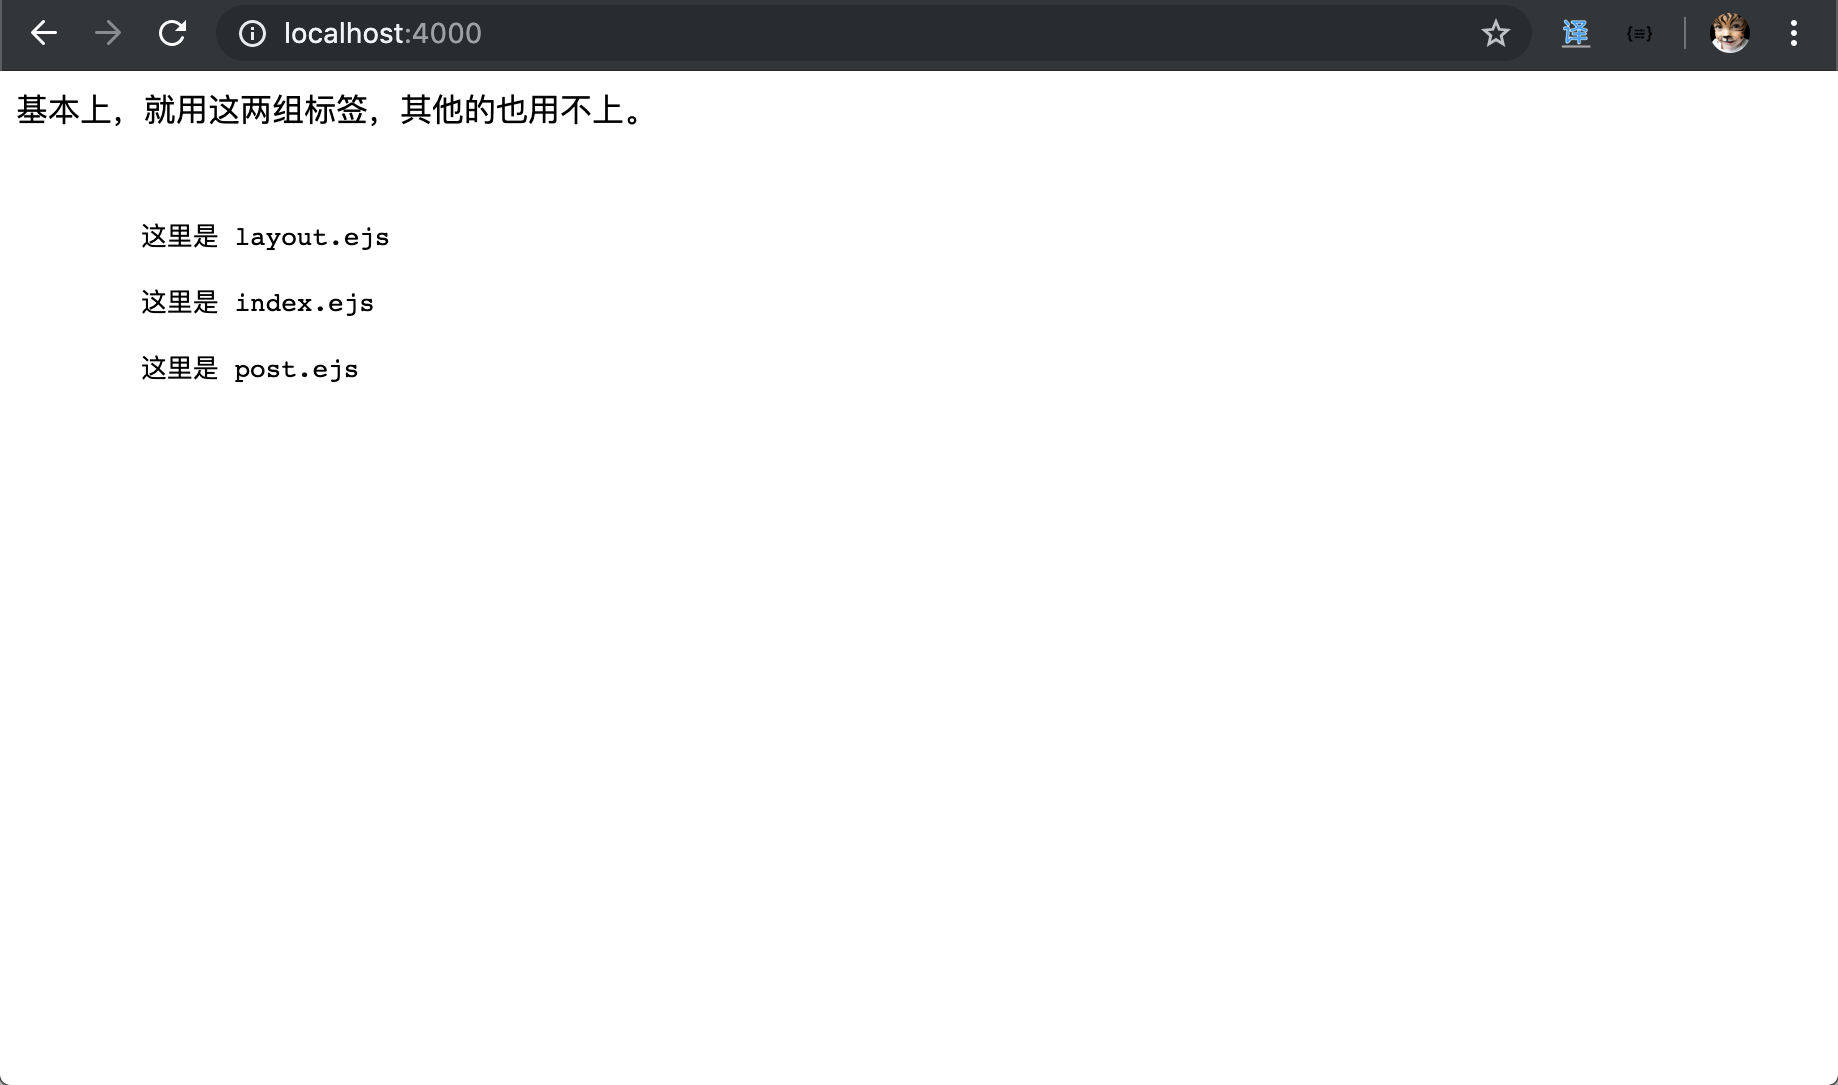
Hexo 变量
再一个就是要介绍一下,Hexo Api 我们会根据它提供的变量 api 来获取页面信息,进行 Blog 开发。同样介绍一下稍微常用的。
| 变量 | 描述 |
|---|---|
| site | 总体变量,几乎都是从这里开始的 |
| site.posts | 所有文章 |
| site.posts.path | 文章路径,带日期的 |
| site.posts.slug | 文章路径,根据项目文件夹的路径来的 |
| site.posts._id | 文章的唯一 id,后面会用于 active 对比 |
| site.posts.title | 文章的标题 |
| site.posts.date | 文章的时间 |
| page.date | 在直接访问文章路径下,文章的时间 |
| page.title | 在直接访问文章路径下,文章的标题 |
| page._id | 在直接访问文章路径下,文章的的唯一 id,后面会用于 active 对比 |
| page.content | 引入对应文章的正文 |
| config.xxx | 总体配置文件的引用 _config.yml |
| theme.xxx | 主题配置文件 theme._config.yml |
| <%- body %> | 同时引入 post.ejs 和 index.ejs |
| <%- css(path, …) %> | 引入 css 文件 |
| <%- js(path, …) %> | 引入 js 文件 |
同样是稍微的测试一下
『layout.ejs』
<!DOCTYPE html>
<html>
<head>
    <title></title>
    <meta charset="utf-8">
</head>
<body>

    这里是 layout.ejs

    <%- include("index.ejs") %>

    <%- include("post.ejs") %>

    <!-- 一般在写逻辑的时候会用到这个标签,这个标签不会输出到页面上 -->
    <%  %>

    <!-- 这个标签会输出到页面上,是带着非转义符号的 -->
    <%
        var test = "基本上,就用这两组标签,其他的也用不上。";
    %>

    <%- test %>

    <br />

    <% site.posts.forEach(function(post){ %>

        <%- post.path %>
        <br />
        <%- post.slug %>
        <br />
        <%- post._id %>
        <br />
        <%- post.title %>
        <br />
        <%- post.date %>
        <br />

        <a href="/<%- post.path %>"><%- post.title %></a>

    <% }); %>

  <%- body %>

</body>
</html>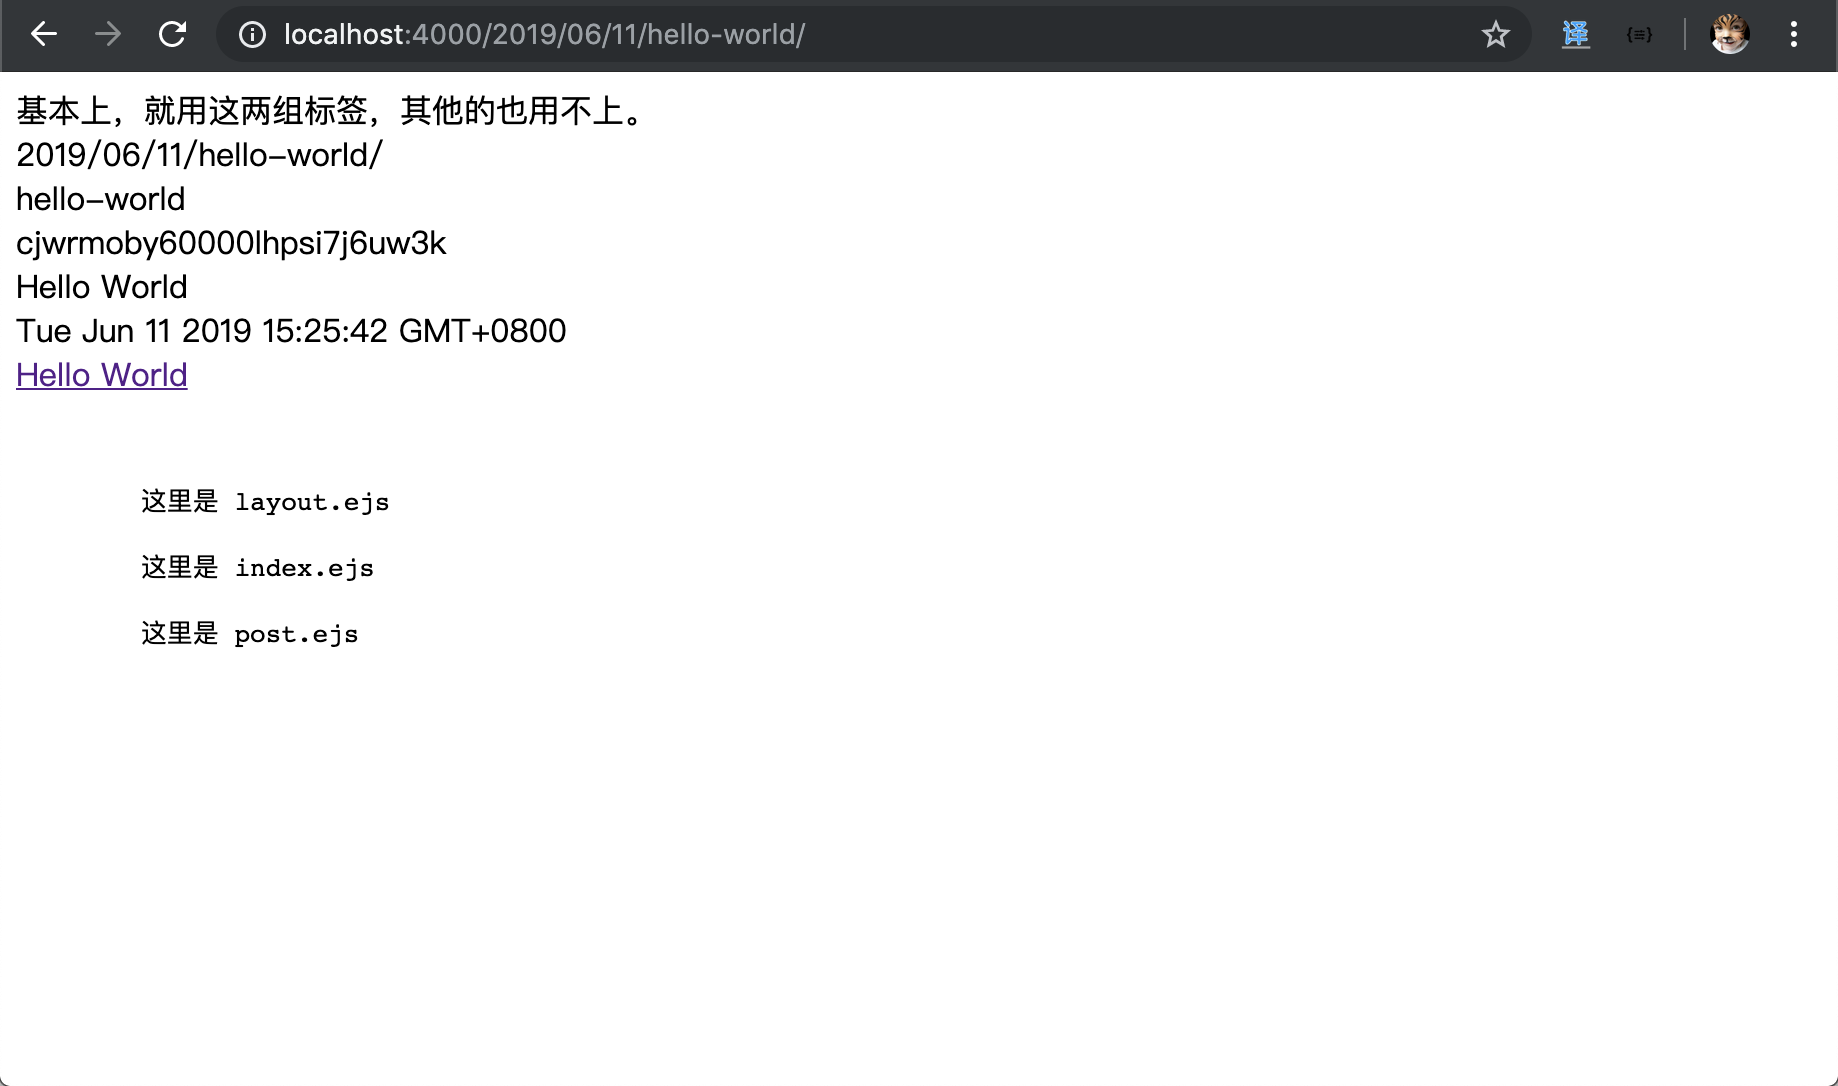
可以看到,点击了这个 Hello World 的超链接,跳转过去,并没有看到任何信息,是因为在 post.ejs 中没有引入文章,所以没有信息,这个时候在 post.ejs 中引入文章
『post.ejs』
这里是 post.ejs

<%- page.content %>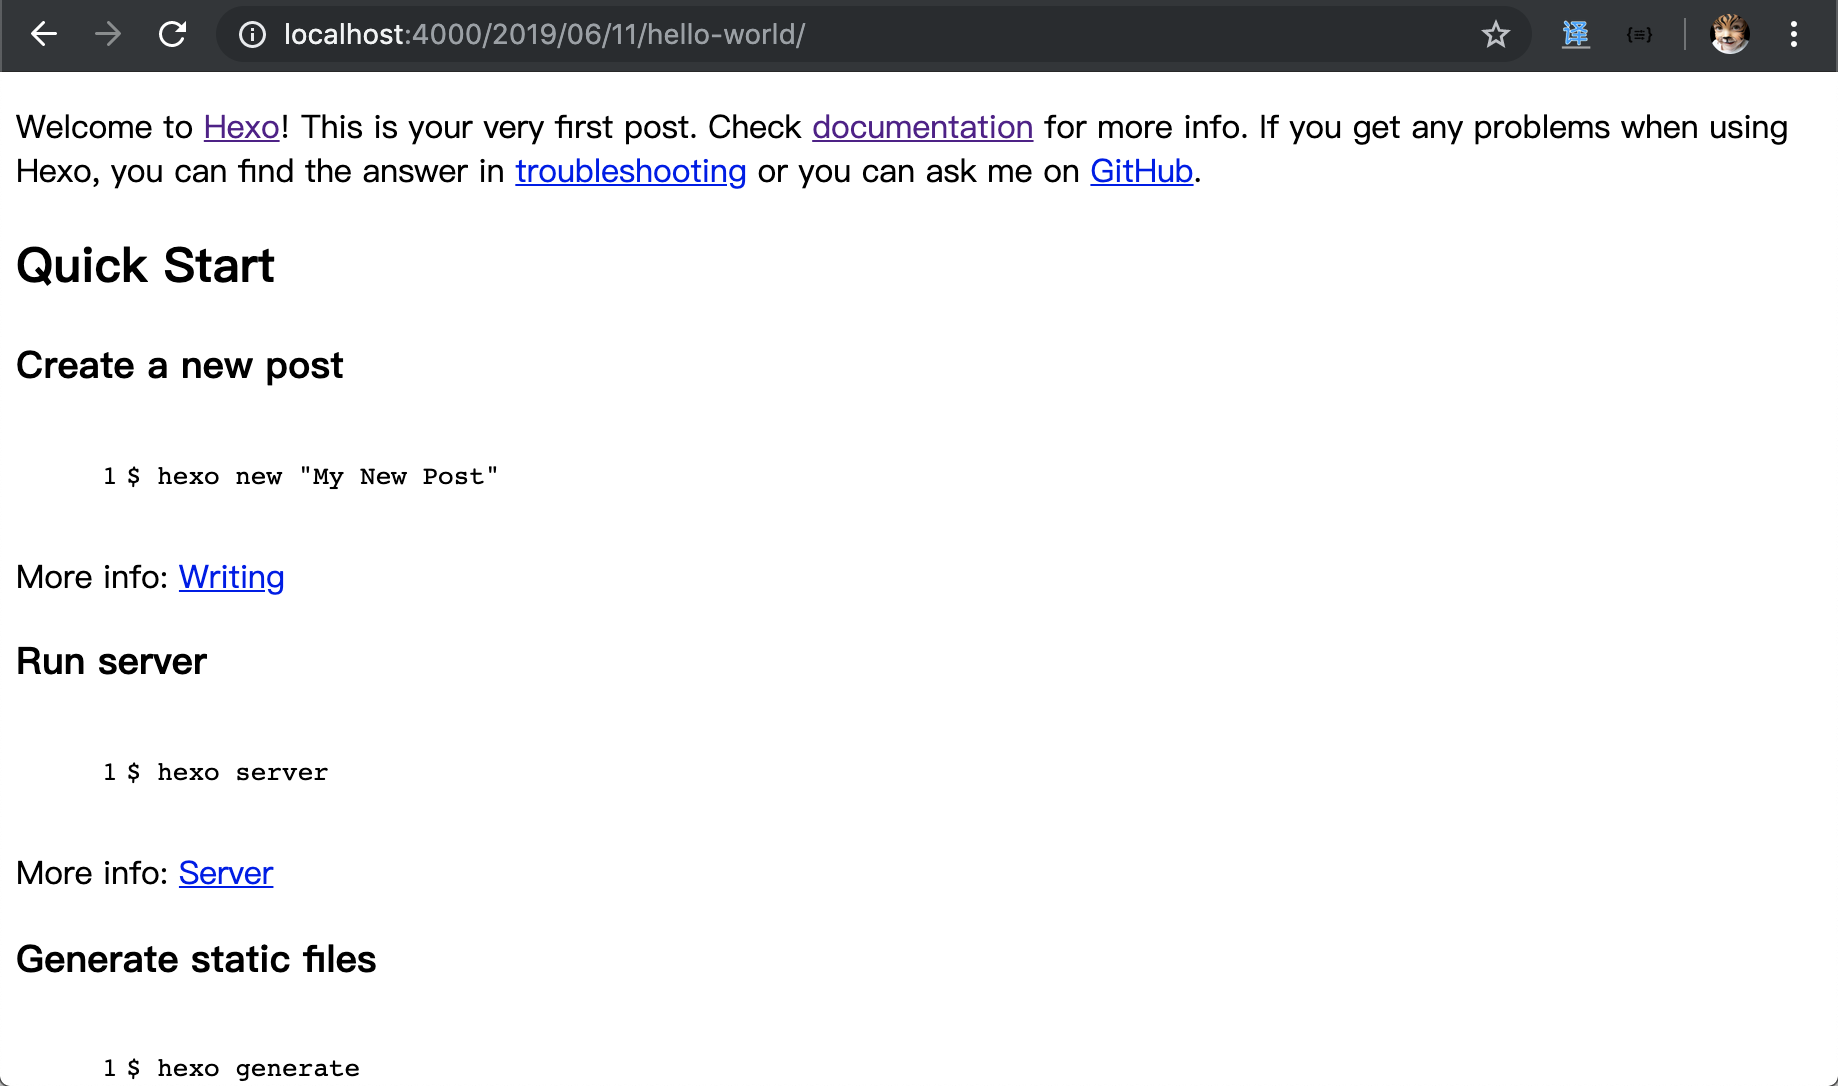
这个时候访问主页的 Hello World 之后,就会访问文章的 url 了,此时也有文章出现了。
如果想要看变量里面都是什么东西,可以使用 js 的 console.log() 来查看,在控制台中查看
『layout.ejs』
<!DOCTYPE html>
<html>
<head>
    <title></title>
    <meta charset="utf-8">
</head>
<body>

    <% console.log(site.posts) %>

</body>
</html>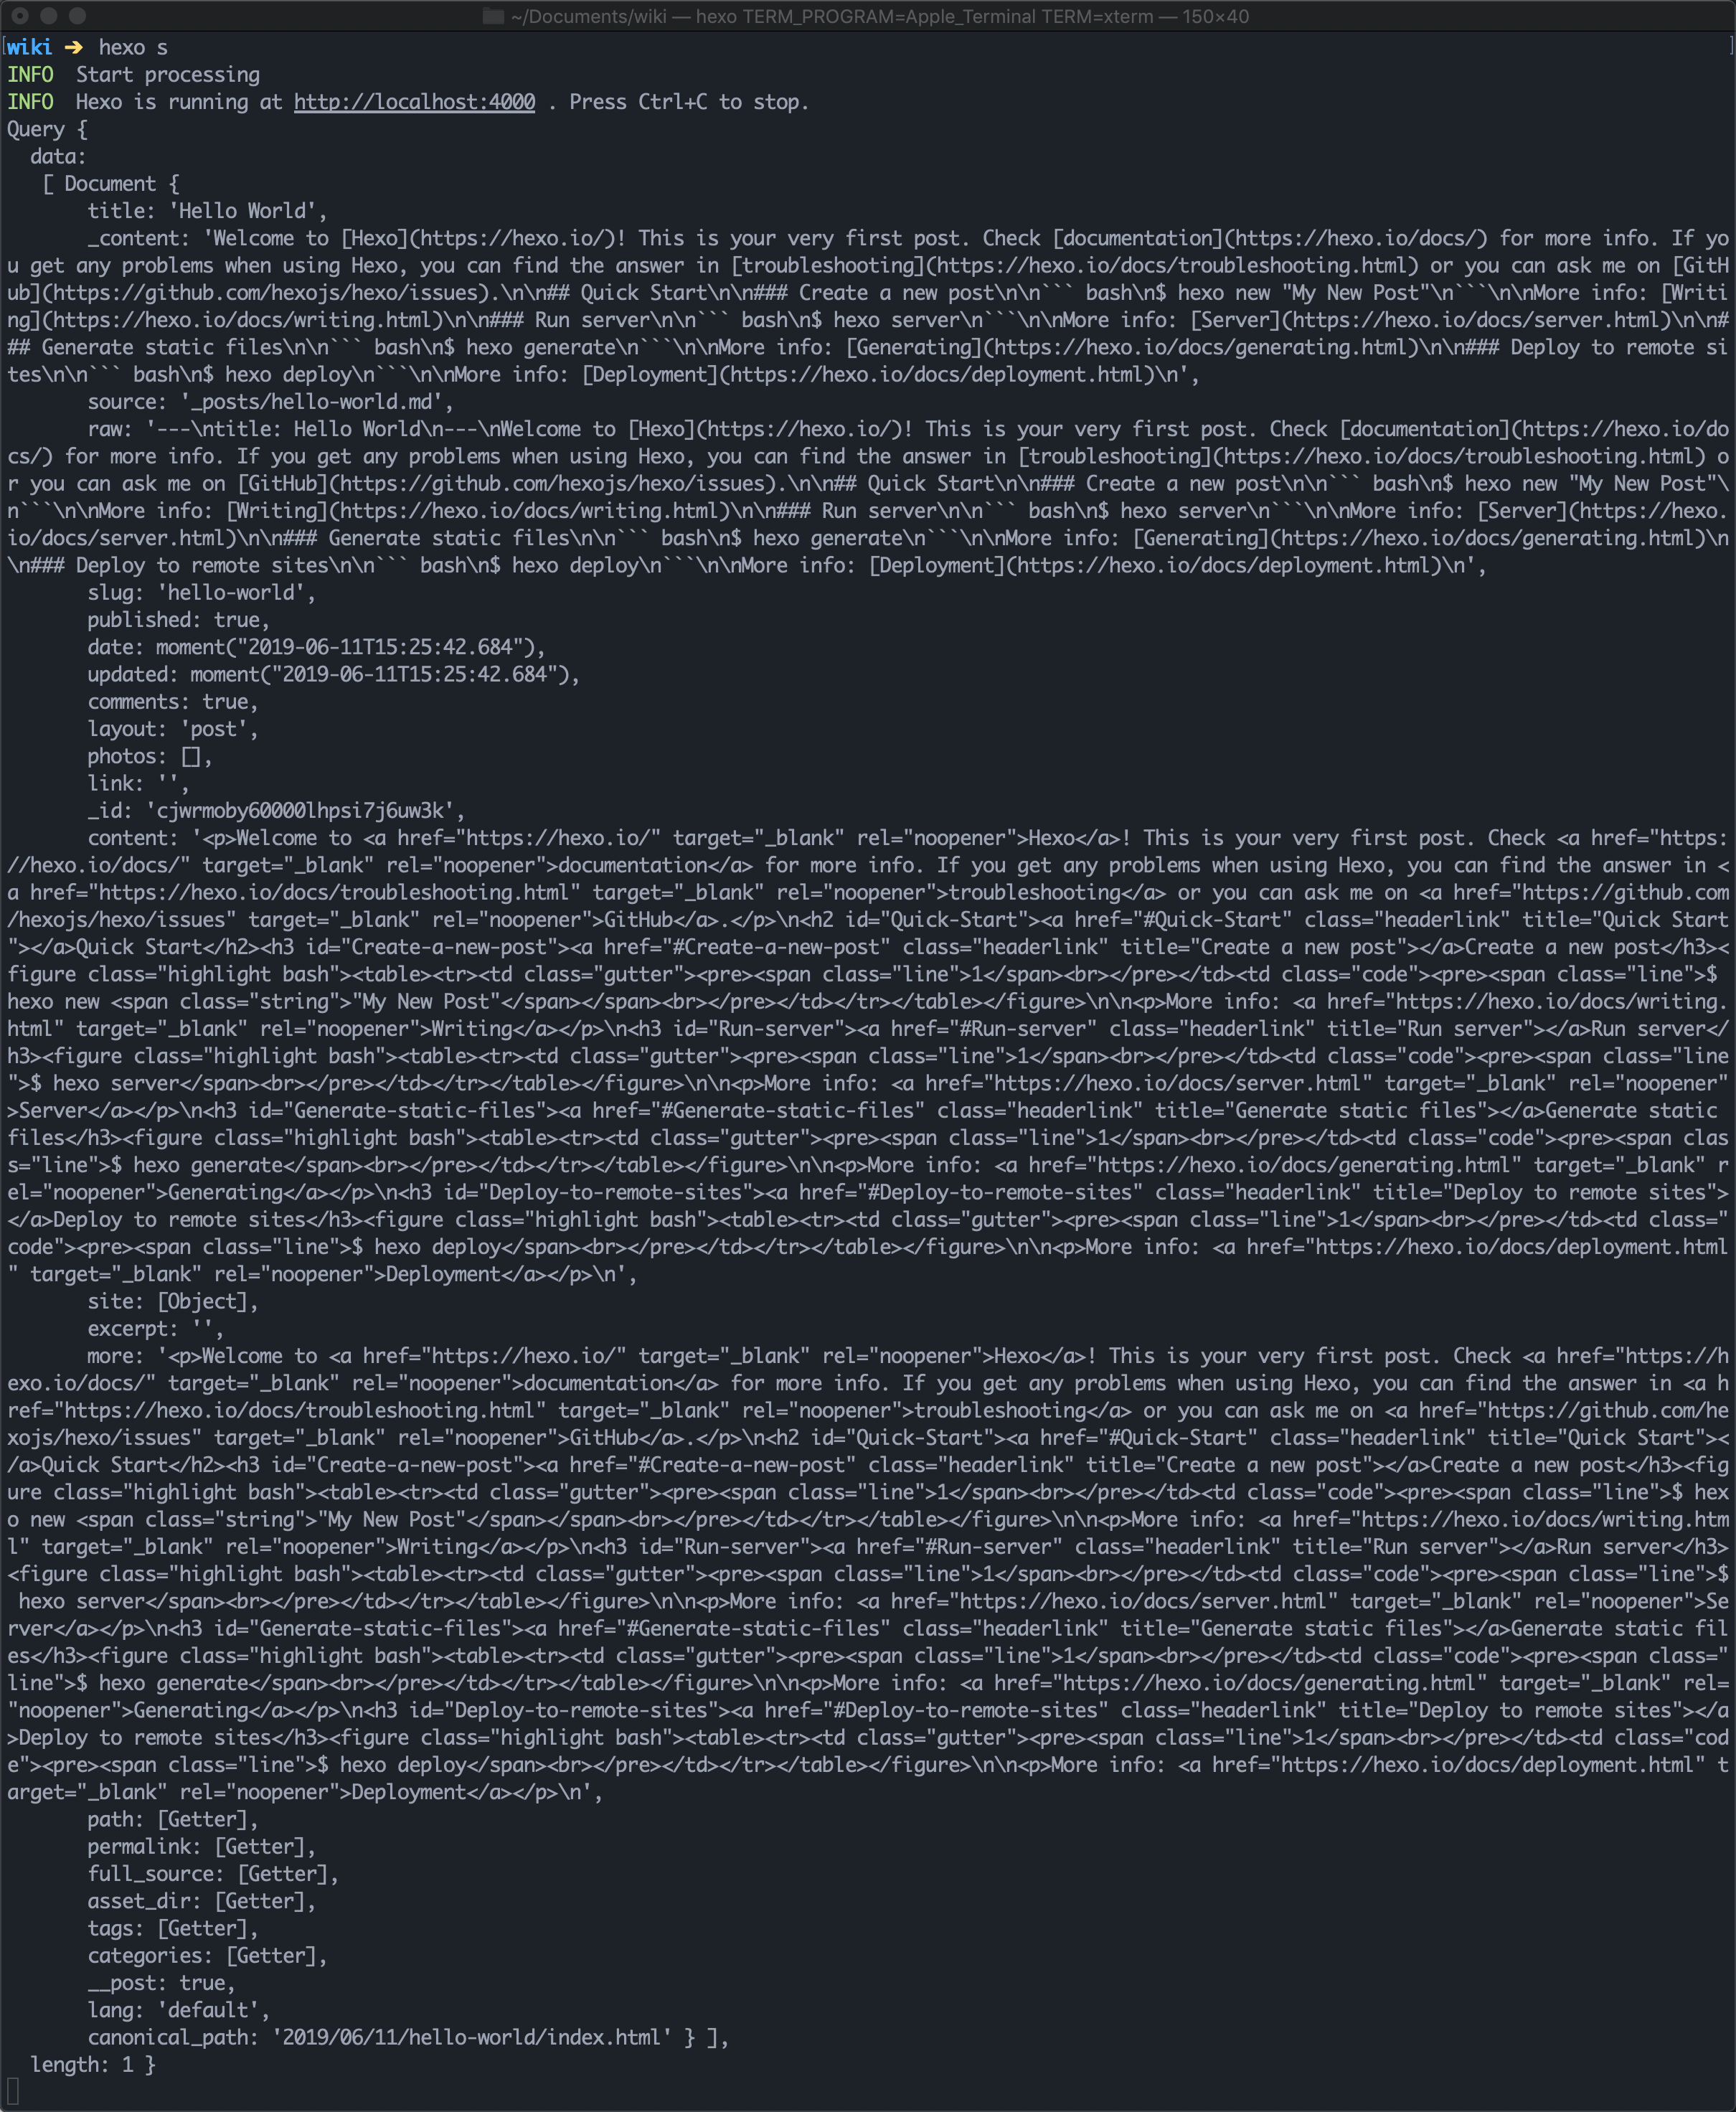
主题制作
主题布局
说道这里,万事俱备,就可以正儿八经的开始做事了。我想要一个这样布局的 wiki
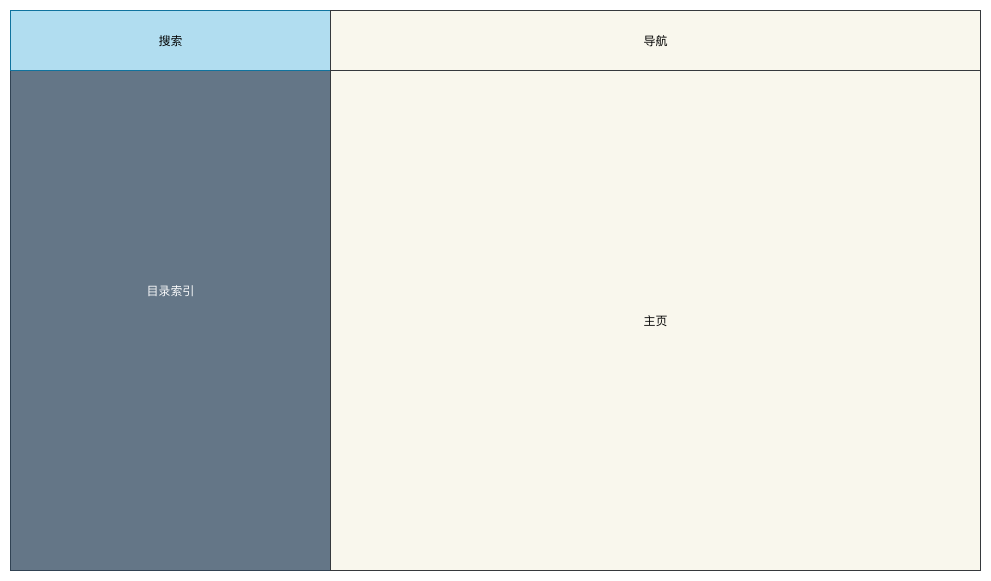
文件结构
新建静态资源文件,并且放一下测试的 md 文件进 _posts 中,整个 wiki 的目录如下。主要添加了 theme.wiki.source 中的静态资源和已经布局用的 ejs
wiki ➔  tree -N
.
├── _config.yml
├── db.json
├── node_modules
├── package-lock.json
├── package.json
├── scaffolds
├── source
│   └── _posts
│       ├── Docker
│       │   ├── 基础介绍
│       │   │   ├── 01. 镜像.md
│       │   │   ├── 02. 容器.md
│       │   │   ├── 03. 数据.md
│       │   │   ├── 04. 仓库.md
│       │   │   ├── 05. 网络.md
│       │   │   └── 06. Dockerfile.md
│       │   └── 镜像部署
│       │       ├── CentOS
│       │       │   └── success.png
│       │       ├── CentOS.md
│       │       ├── Git.md
│       │       ├── MongoDB.md
│       │       ├── MySQL.md
│       │       ├── Redis.md
│       │       └── Tomcat.md
│       ├── Hexo
│       │   ├── 安装
│       │   │   ├── image-20180627184245526.png
│       │   │   ├── image-20180627190554905.png
│       │   │   └── image-20180627190808193.png
│       │   ├── 安装.md
│       │   ├── 主题开发
│       │   │   ├── image-20180627190808193.png
│       │   │   ├── image-20190611175811781.png
│       │   │   ├── image-20190611180317902.png
│       │   │   ├── image-20190611180729426.png
│       │   │   ├── image-20190611181023821.png
│       │   │   ├── image-20190611210222968.png
│       │   │   ├── image-20190611212914872.png
│       │   │   ├── image-20190611213529727.png
│       │   │   ├── image-20190611214947308.png
│       │   │   └── 布局.png
│       │   └── 主题开发.md
│       └── test-hello-world.md
└── themes
    ├── landscape
    └── wiki
        ├── _config.yml
        ├── layout
        │   ├── aside.ejs                // 用于侧边栏
        │   ├── index.ejs                // 用于主页
        │   ├── layout.ejs            // 用于布局
        │   ├── nav.ejs                    // 用于导航
        │   └── post.ejs                // 用于文章
        └── source
            ├── css
            │   └── main.css
            ├── js
            │   └── main.js
            └── lib
主题配置文件
在 theme._config.yml 配置文件中,添加自己主题的标题,用于 layout.ejs 的引用。
title: IT Abyss Wiki

author: 猴子请来的救兵

menus:
  主页: /
  关于: /about

links:
  博客园: https://www.cnblogs.com/yyhh/
  github: https://github.com
设计主布局文件
『layout.ejs』
<!DOCTYPE html>
<html>
<head>
    <title><%- theme.title %></title>
    <meta charset="utf-8">

    <!-- 引入配置文件 -->
    <%- css('css/main.css') %>

</head>
<body>

    <div id="main">
        <!-- 引入侧边栏 -->
        <aside id="#aside">
            <%- include('aside.ejs') %>
        </aside>

        <!-- 引入导航 -->
        <nav>
            <%- include('nav.ejs') %>
        </nav>

        <!-- 引入正文 -->
        <div id="content">
      <%- body %>
        </div>

    </div>

    <!-- 引入 js 文件 -->
    <%- js('js/main.js') %>

</body>
</html>
订制 css 样式表中的测试样式,添加几个测试的颜色,便于观察布局。
『css/main.css』
/* #################### 全局 #################### */
* {
    margin: 0;
    padding: 0;
    border: 0;
}

html, body {
    height: 100%;
}

aside {
    width: 320px;
    height: 100%;
    position: fixed;
    background: #262a30;
}

nav {
    height: 50px;
    background: #b9e1b1;
}

#content {
    height: 100%;
    padding-left: 320px;
    background: #f9f7ed;
}
/* #################### 全局 #################### */
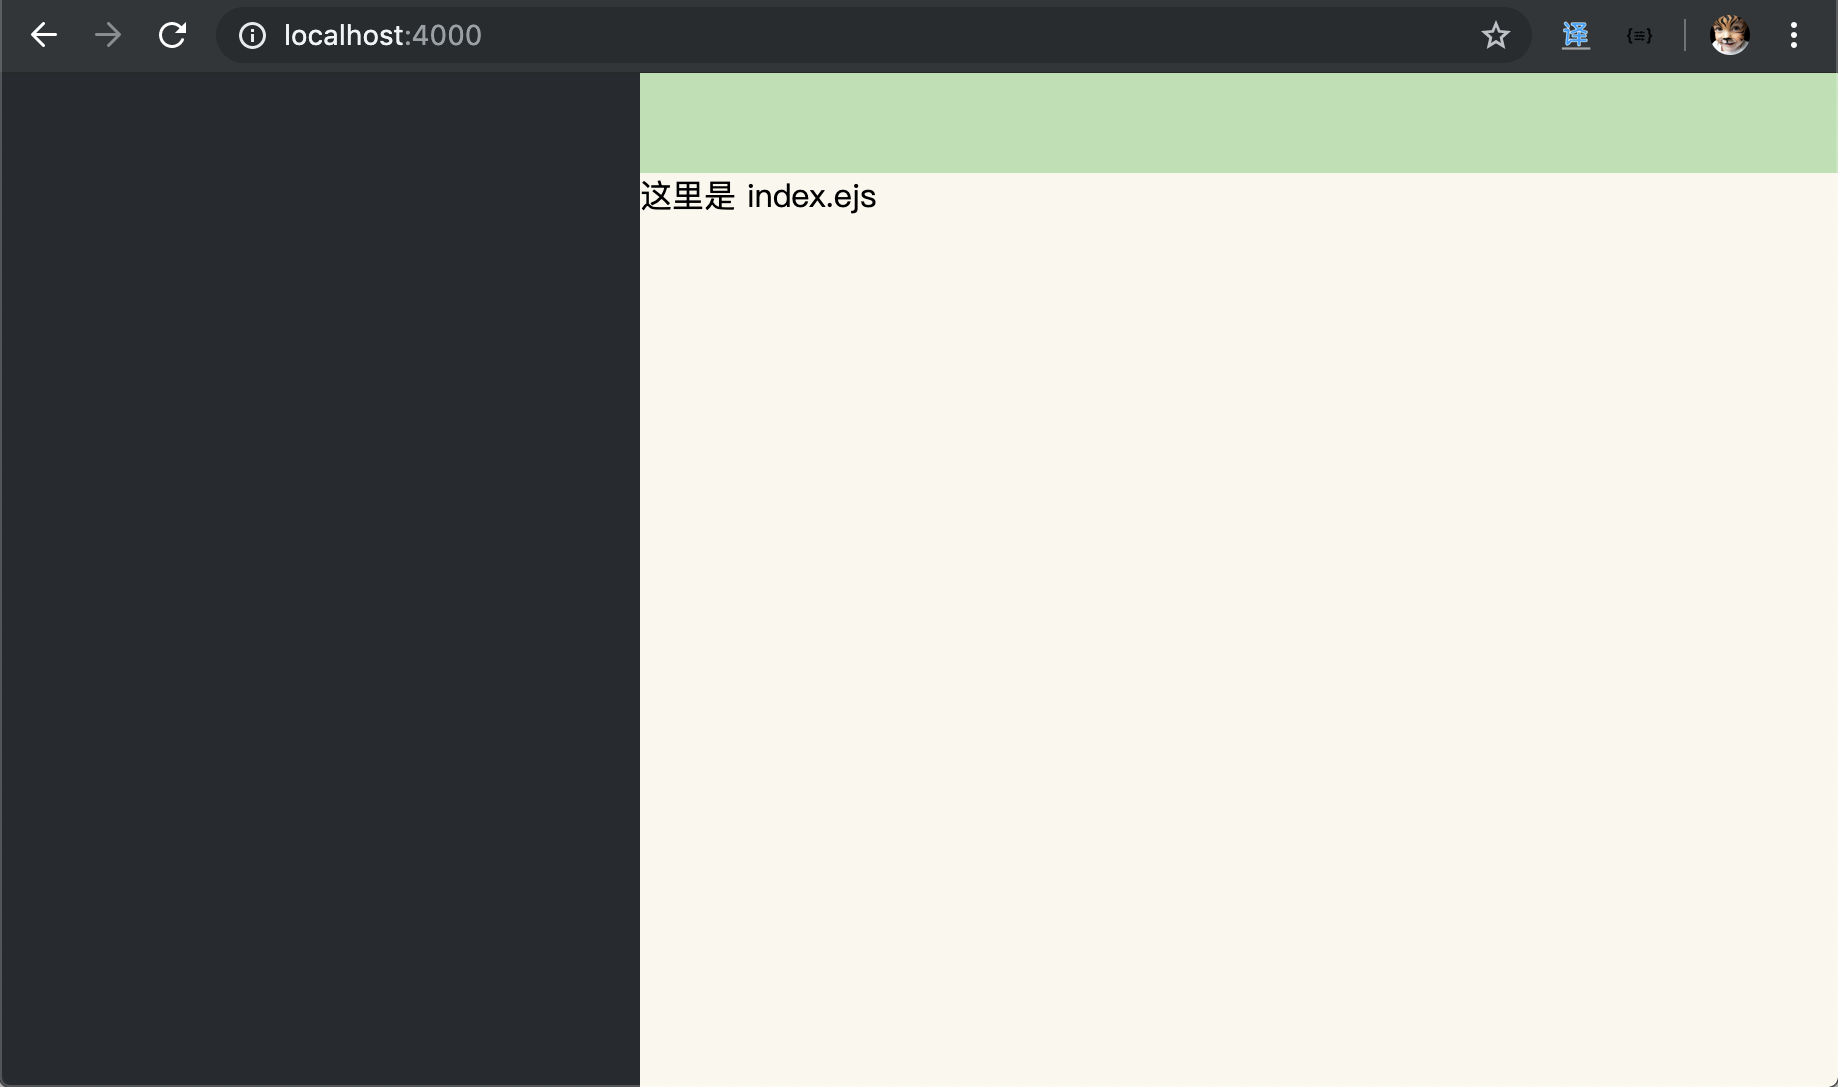
添加导航栏
将刚刚配置文件里面加的导航给列出来
『nav.ejs』
<ul id="menu">
    <!-- 内部链接本页面直接跳转 -->
    <% for ( menu in theme.menus ) { %>
    <li class="menu-item">
        <a href="<%- theme.menus[menu] %>" class="menu-item-link"><%- menu %></a>
    </li>
    <% } %>

    <!-- 外部链接打开新的窗口跳转 -->
    <% for ( link in theme.links ) { %>
    <li class="menu-item">
        <a href="<%- theme.links[link] %>" class="menu-item-link" target="_blank"><%- link %></a>
    </li>
    <% } %>

</ul>
添加 css 美化
『main.css』
/* #################### 导航 #################### */
nav #menu {
    float: right;
    padding-right: 20px;
}
nav ul li {
    float: left;
    padding: 10px;
    list-style: none;
}
nav ul li a{
    color: #555;
    font-size: 12px;
    text-decoration: none;
}
nav ul li a:hover {
    border-bottom: 1px solid;
}
/* #################### 导航 #################### */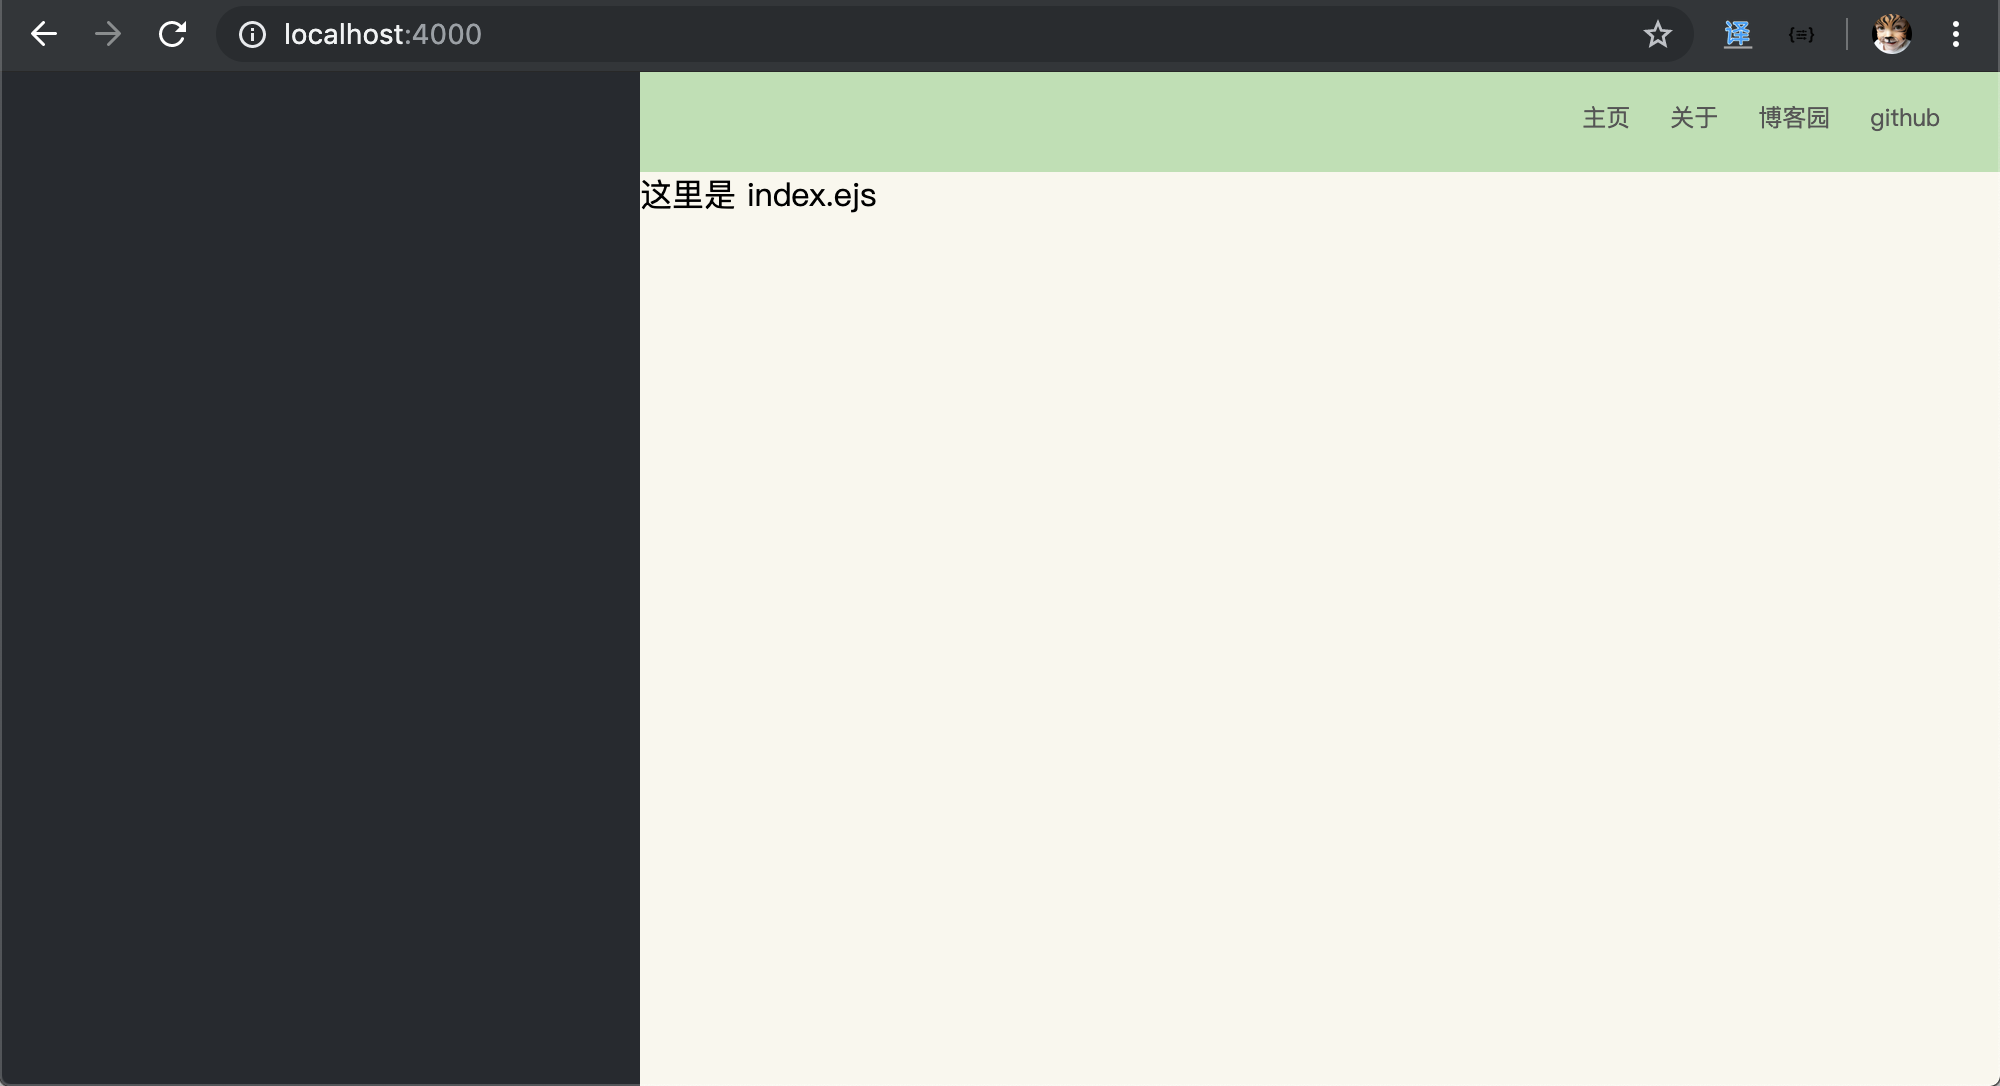
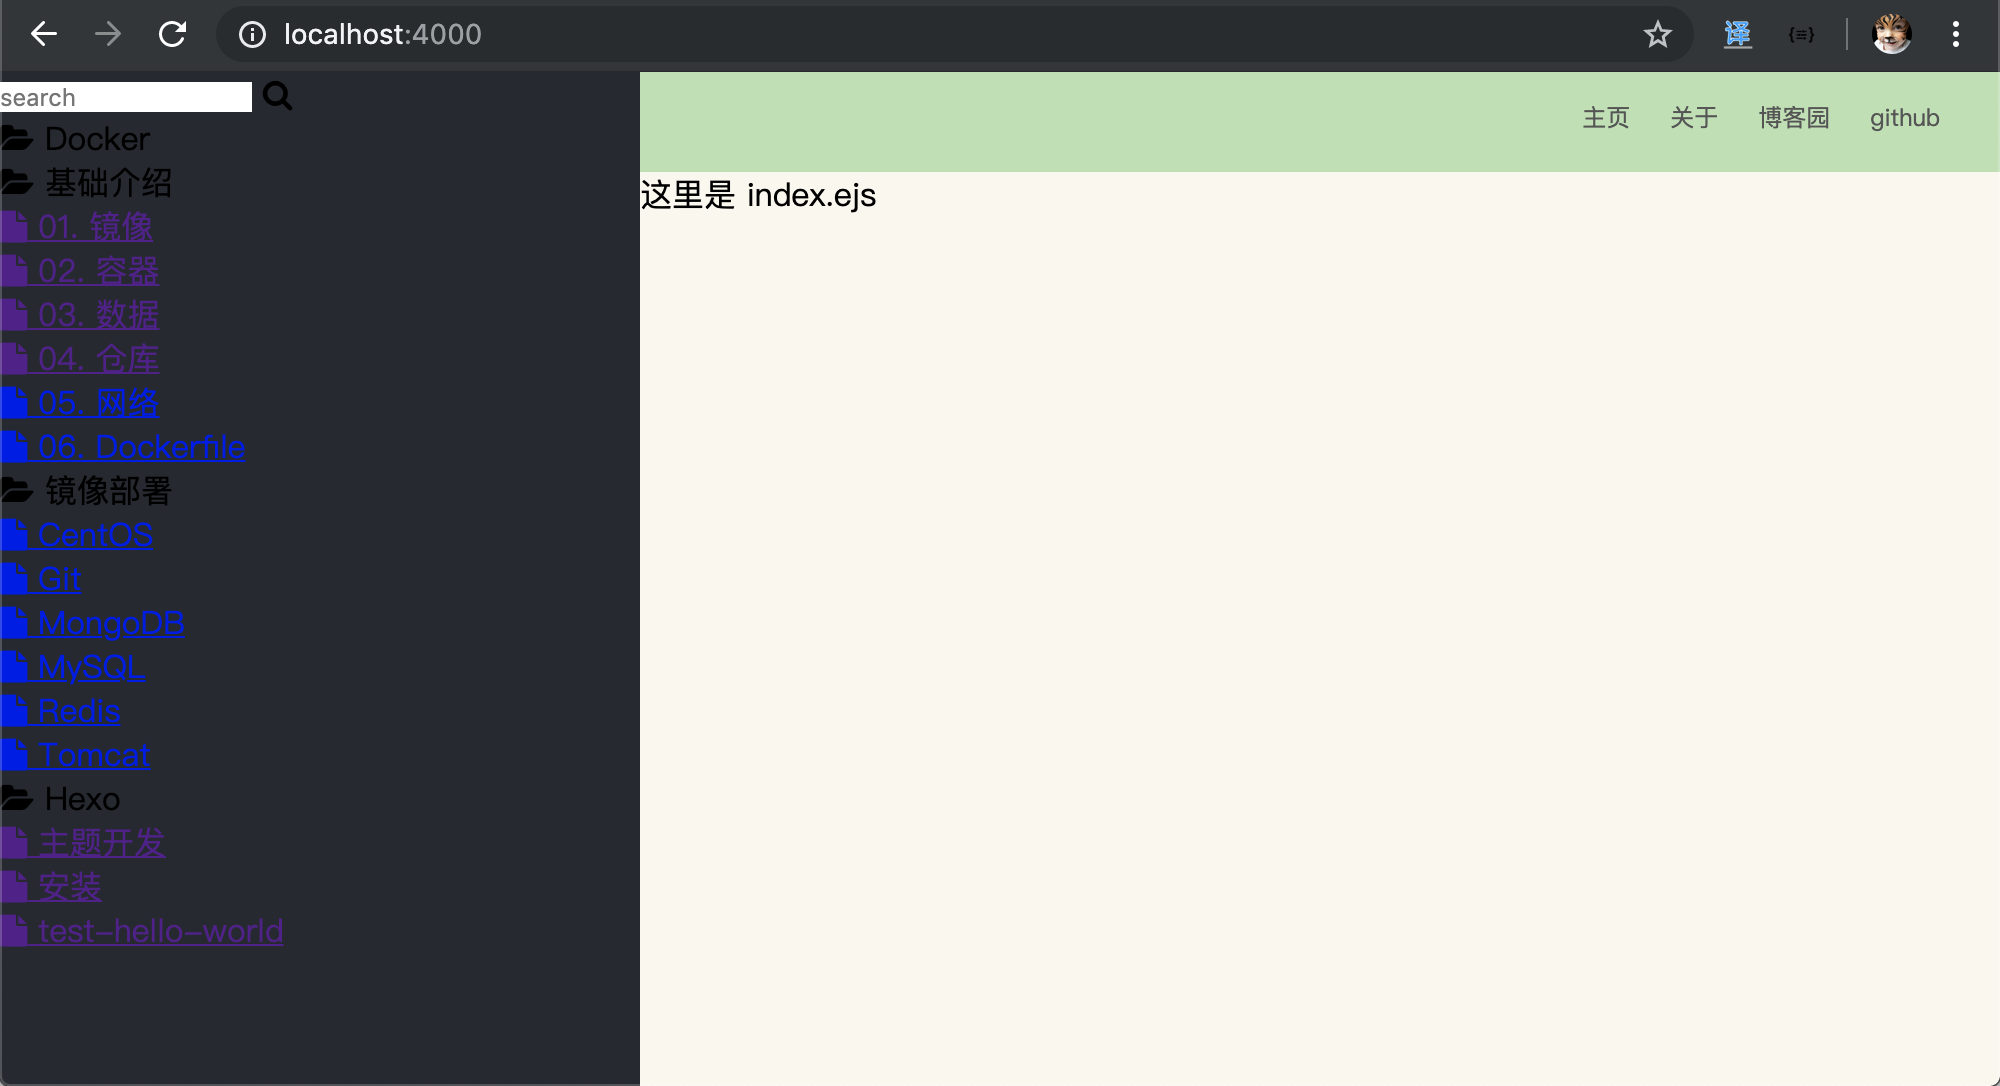
添加侧边栏
想要一个有树状结构的侧边栏,然后给目录、文件、以及搜索框增加图标,需要外部的图片库 。
我的用的图片库是『Font Awesome』。下载好了,放到 source/lib 中。
themes/wiki/
├── _config.yml
├── layout
│   ├── aside.ejs
│   ├── index.ejs
│   ├── layout.ejs
│   ├── nav.ejs
│   └── post.ejs
└── source
    ├── css
    │   └── main.css
    ├── js
    │   └── main.js
    └── lib
        └── font-awesome // 下载好的文字图片库
            ├── css
            ├── fonts
            ├── less
            └── scss
在布局文件中,新增字体图片库的 css 文件引用
『layout.ejs』
<!DOCTYPE html>
<html>
<head>
    <title><%- theme.title %></title>
    <meta charset="utf-8">

    <!-- 引入配置文件 -->
    <%- css('css/main.css') %>

    <!-- 字体图片库 -->
    <%- css('lib/font-awesome/css/font-awesome.min.css') %>

</head>
<body>

    <div id="main">
        <!-- 引入侧边栏 -->
        <aside>
            <%- include('aside.ejs') %>
        </aside>

        <!-- 引入导航 -->
        <nav>
            <%- include('nav.ejs') %>
        </nav>

        <!-- 引入正文 -->
        <div id="content">
            <div id="article">
                <%- body %>
            </div>
        </div>

    </div>

    <!-- 引入 js 文件 -->
    <%- js('js/main.js') %>

</body>
</html>
添加侧边栏代码,主要做了路径转树的算法,然后显示树。新增了一个搜索框。
『aside.ejs』
<!-- 搜索栏 -->
<div id="search">
    <input class="search-input" type="text" placeholder="search">
    <i class="fa fa-search"></i>
</div>

<!-- 侧边目录栏 -->
<div id="tree">
    <%
        <!-- 将路径转换成 tree 目录结构 -->
        const pathToTree = (input) => {
            var output = [];
            input.forEach(function(post){
                <!-- 用来分割去掉时间的路径 -->
                var chain = post.slug.split("/");
                var currentNode = output;
                for (var j = 0; j < chain.length; j++) {
                    if (chain[j] === '') {
                        break;
                    }
                    var wantedNode = chain[j];
                    var lastNode = currentNode;

                    for (var k = 0; k < currentNode.length; k++) {
                        if (currentNode[k].title == wantedNode) {
                            currentNode = currentNode[k].children;
                            break;
                        }
                    }

                    if (lastNode == currentNode) {
                        var newNode = currentNode[k] = { post: post, title: wantedNode, children: [] };
                        currentNode = newNode.children;
                    } else {
                        delete currentNode.children
                    }
                }
            });
            return output;
        }

        <!-- console.log(output) -->
    %>

    <%
        <!-- 递归输出侧边栏目录 tree -->
        const showTree = (input) => {

            <!-- 按 tile ascii 排序 -->
            input.sort(function(a, b){
                var len = a.title.length > b.title.length ? a.title.length : b.title.length;
                for ( var i = 0; i < len; i++ ) {
                    res = a.title[i].charCodeAt() - b.title[i].charCodeAt();
                    if ( res ) { return res }
                }
            });

            <!-- 循环输出 html 结构 -->
            input.forEach(function(node) {
                if ( node.children == 0 ) {

    %>
                    <ul>
                        <li class="file<%- (is_post() && node.post._id == page._id) ? ' active' : '' %>">
                            <a href="<%- config.root %><%- node.post.path %>">
                                <i class="fa fa-file"></i>
                                <%- node.title %>
                            </a>
                        </li>
                    </ul>
    <%
                }
                else {
    %>
                    <ul>
                        <li class="directory">
                            <a href="#" class="directory">
                                <i class="fa fa-folder"></i>
                                <%- node.title %>
                            </a>
                            <%- showTree(node.children) %>
                        </li>

                    </ul>
    <%
                }
            });
        }

        showTree(pathToTree(site.posts))
    %>
</div>
在 main.css 文件中,增加侧边栏美化
『main.css』
/* #################### 侧边栏 #################### */
/* 搜索框 */
aside input {
    width: 290px;
    height: 50px;
    margin: 0;
    border: 0;
    padding: 0;
    left: 0;
    font-size: 14px;
    background: #131417;
    text-indent: 20px;
    outline: none;
    color: #87daff;
    position: absolute;
}

/* 搜索图标 */
aside #search i.fa.fa-search {
    position: absolute;
    top: 0;
    right: 0;
    color: #757575;
    font-size: 20px;
    width: 40px;
    height: 50px;
    background: #131417;
    text-align: center;
    line-height: 2.5;
}

/* 滚动条 */
aside {
    overflow-y: scroll;
}

/* 树目录位置 */
aside #tree {
    padding-top: 55px
}

/* 树目录 */
aside ul {
    padding: 0px 5px 5px 20px;
}
aside ul li {
    list-style: none;
    line-height: 25px;
}
aside ul li a {
    color: #999;
    font-size: 14px;
    text-decoration: none

}
aside ul li a:hover {
    color: #ccc;
    border-bottom: 1px solid #ccc;
    cursor:pointer;
}
aside #tree .active a,
aside #tree .active a:hover {
    color: #87daff;
    border-bottom: 1px solid #87daff;
}

aside #tree i.fa {
    padding-right: 5px;
}

/* #################### 侧边栏 #################### */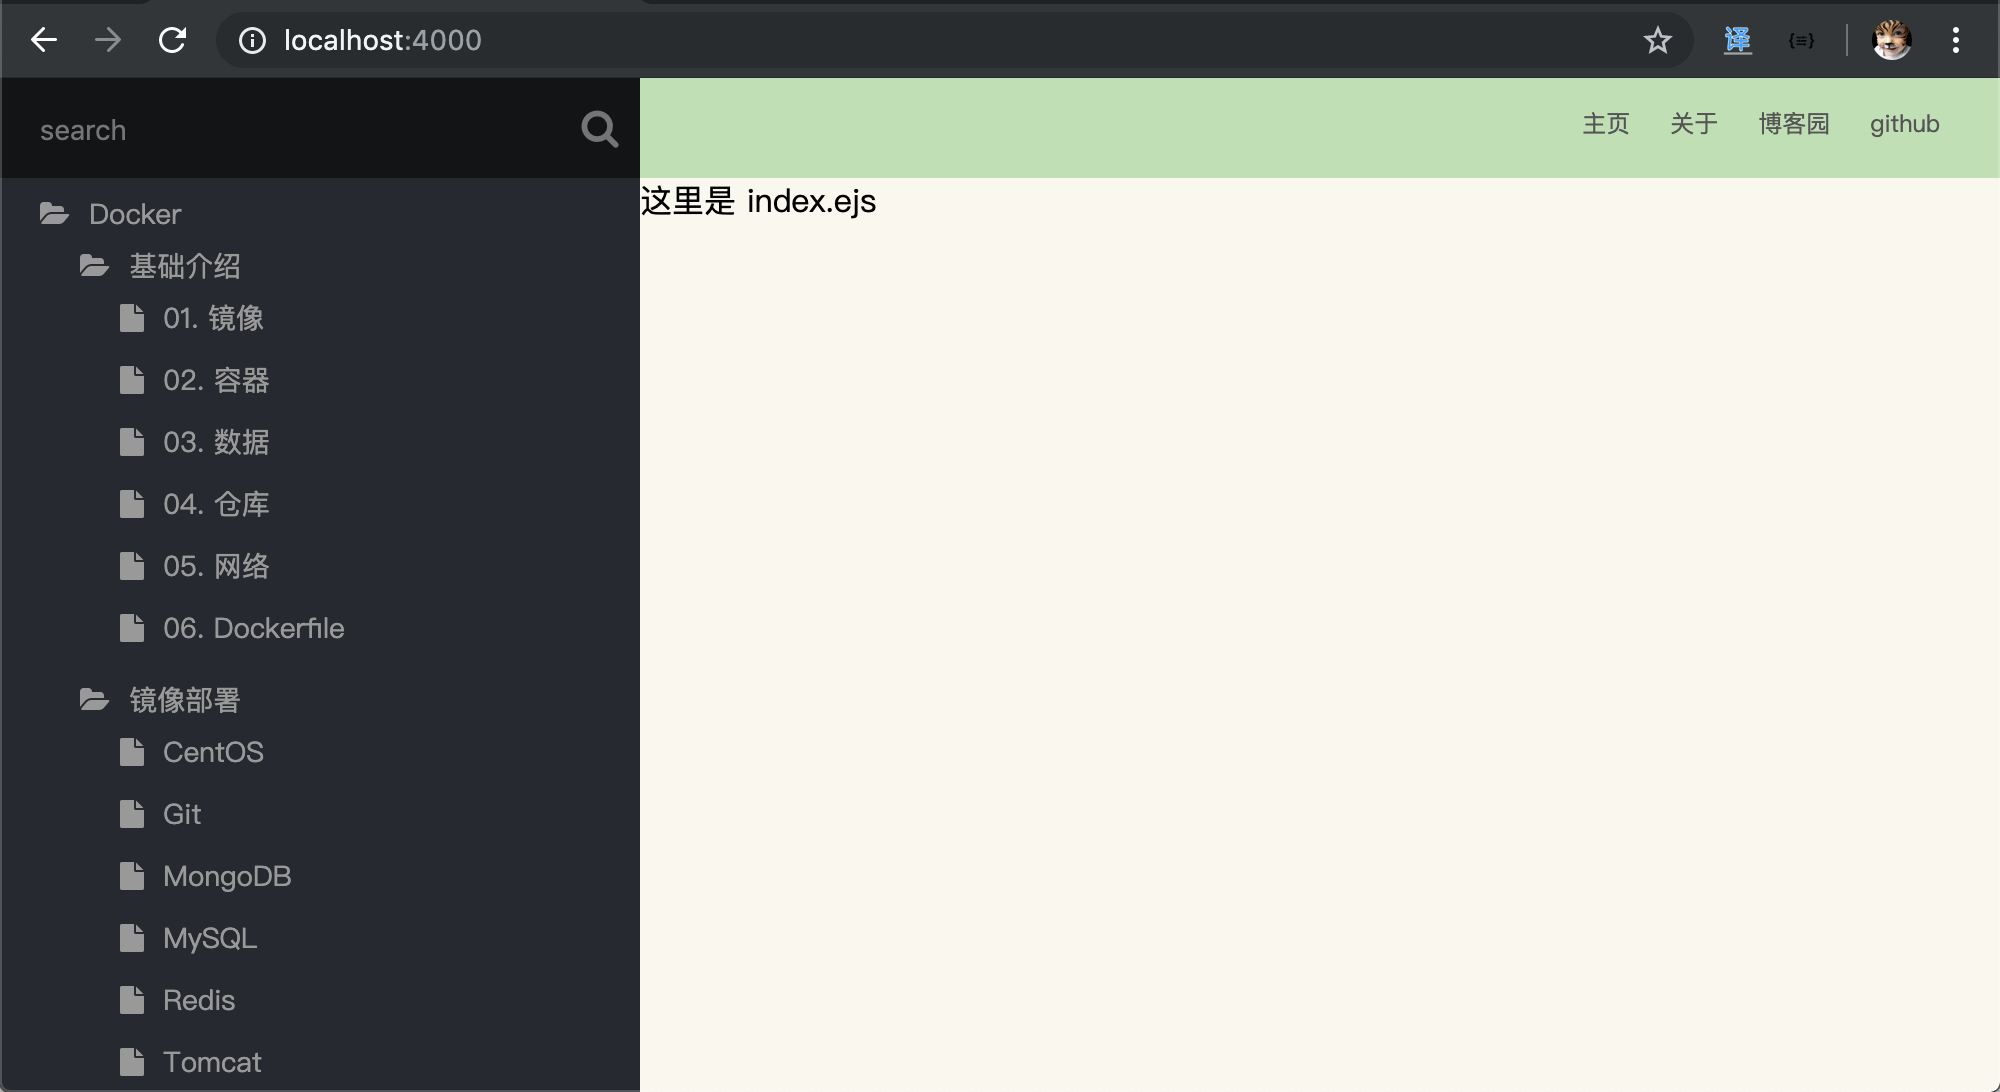
添加文章
侧边栏还有搜索功能,和目录折叠功能没实现,这个后面再实现,先把链接里面的内容给搞定,这个时候需要编辑 post.ejs了
『post.ejs』
<div>
    <span id="post-author">作者: <%- theme.author %></span>
    <span id="post-date"><%- date(page.date, "YYYY-MM-DD HH:mm:ss") %></span>
</div>

<div id="article">
    <%- page.content %>
</div>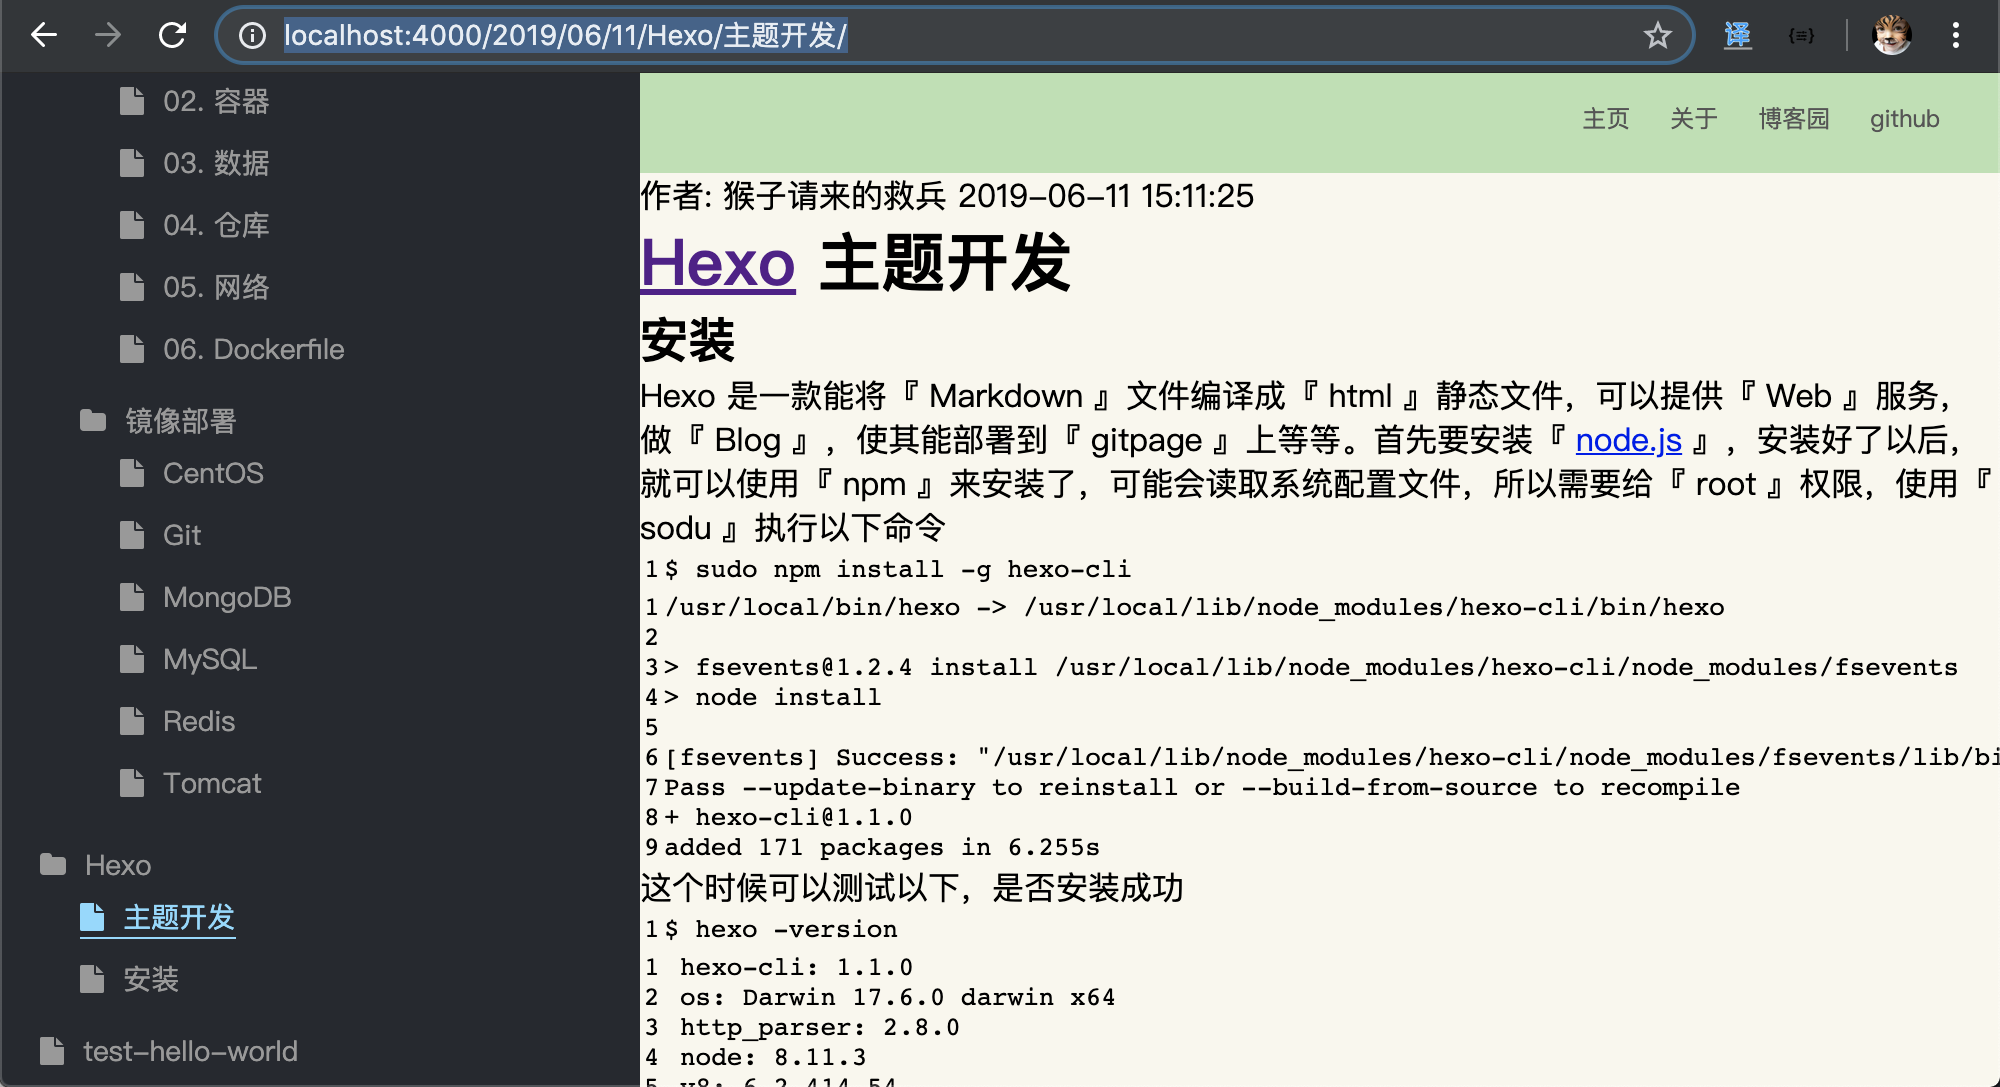
图片插件
可以看到,大致雏形出来了,但是图片都是 404 找不到。
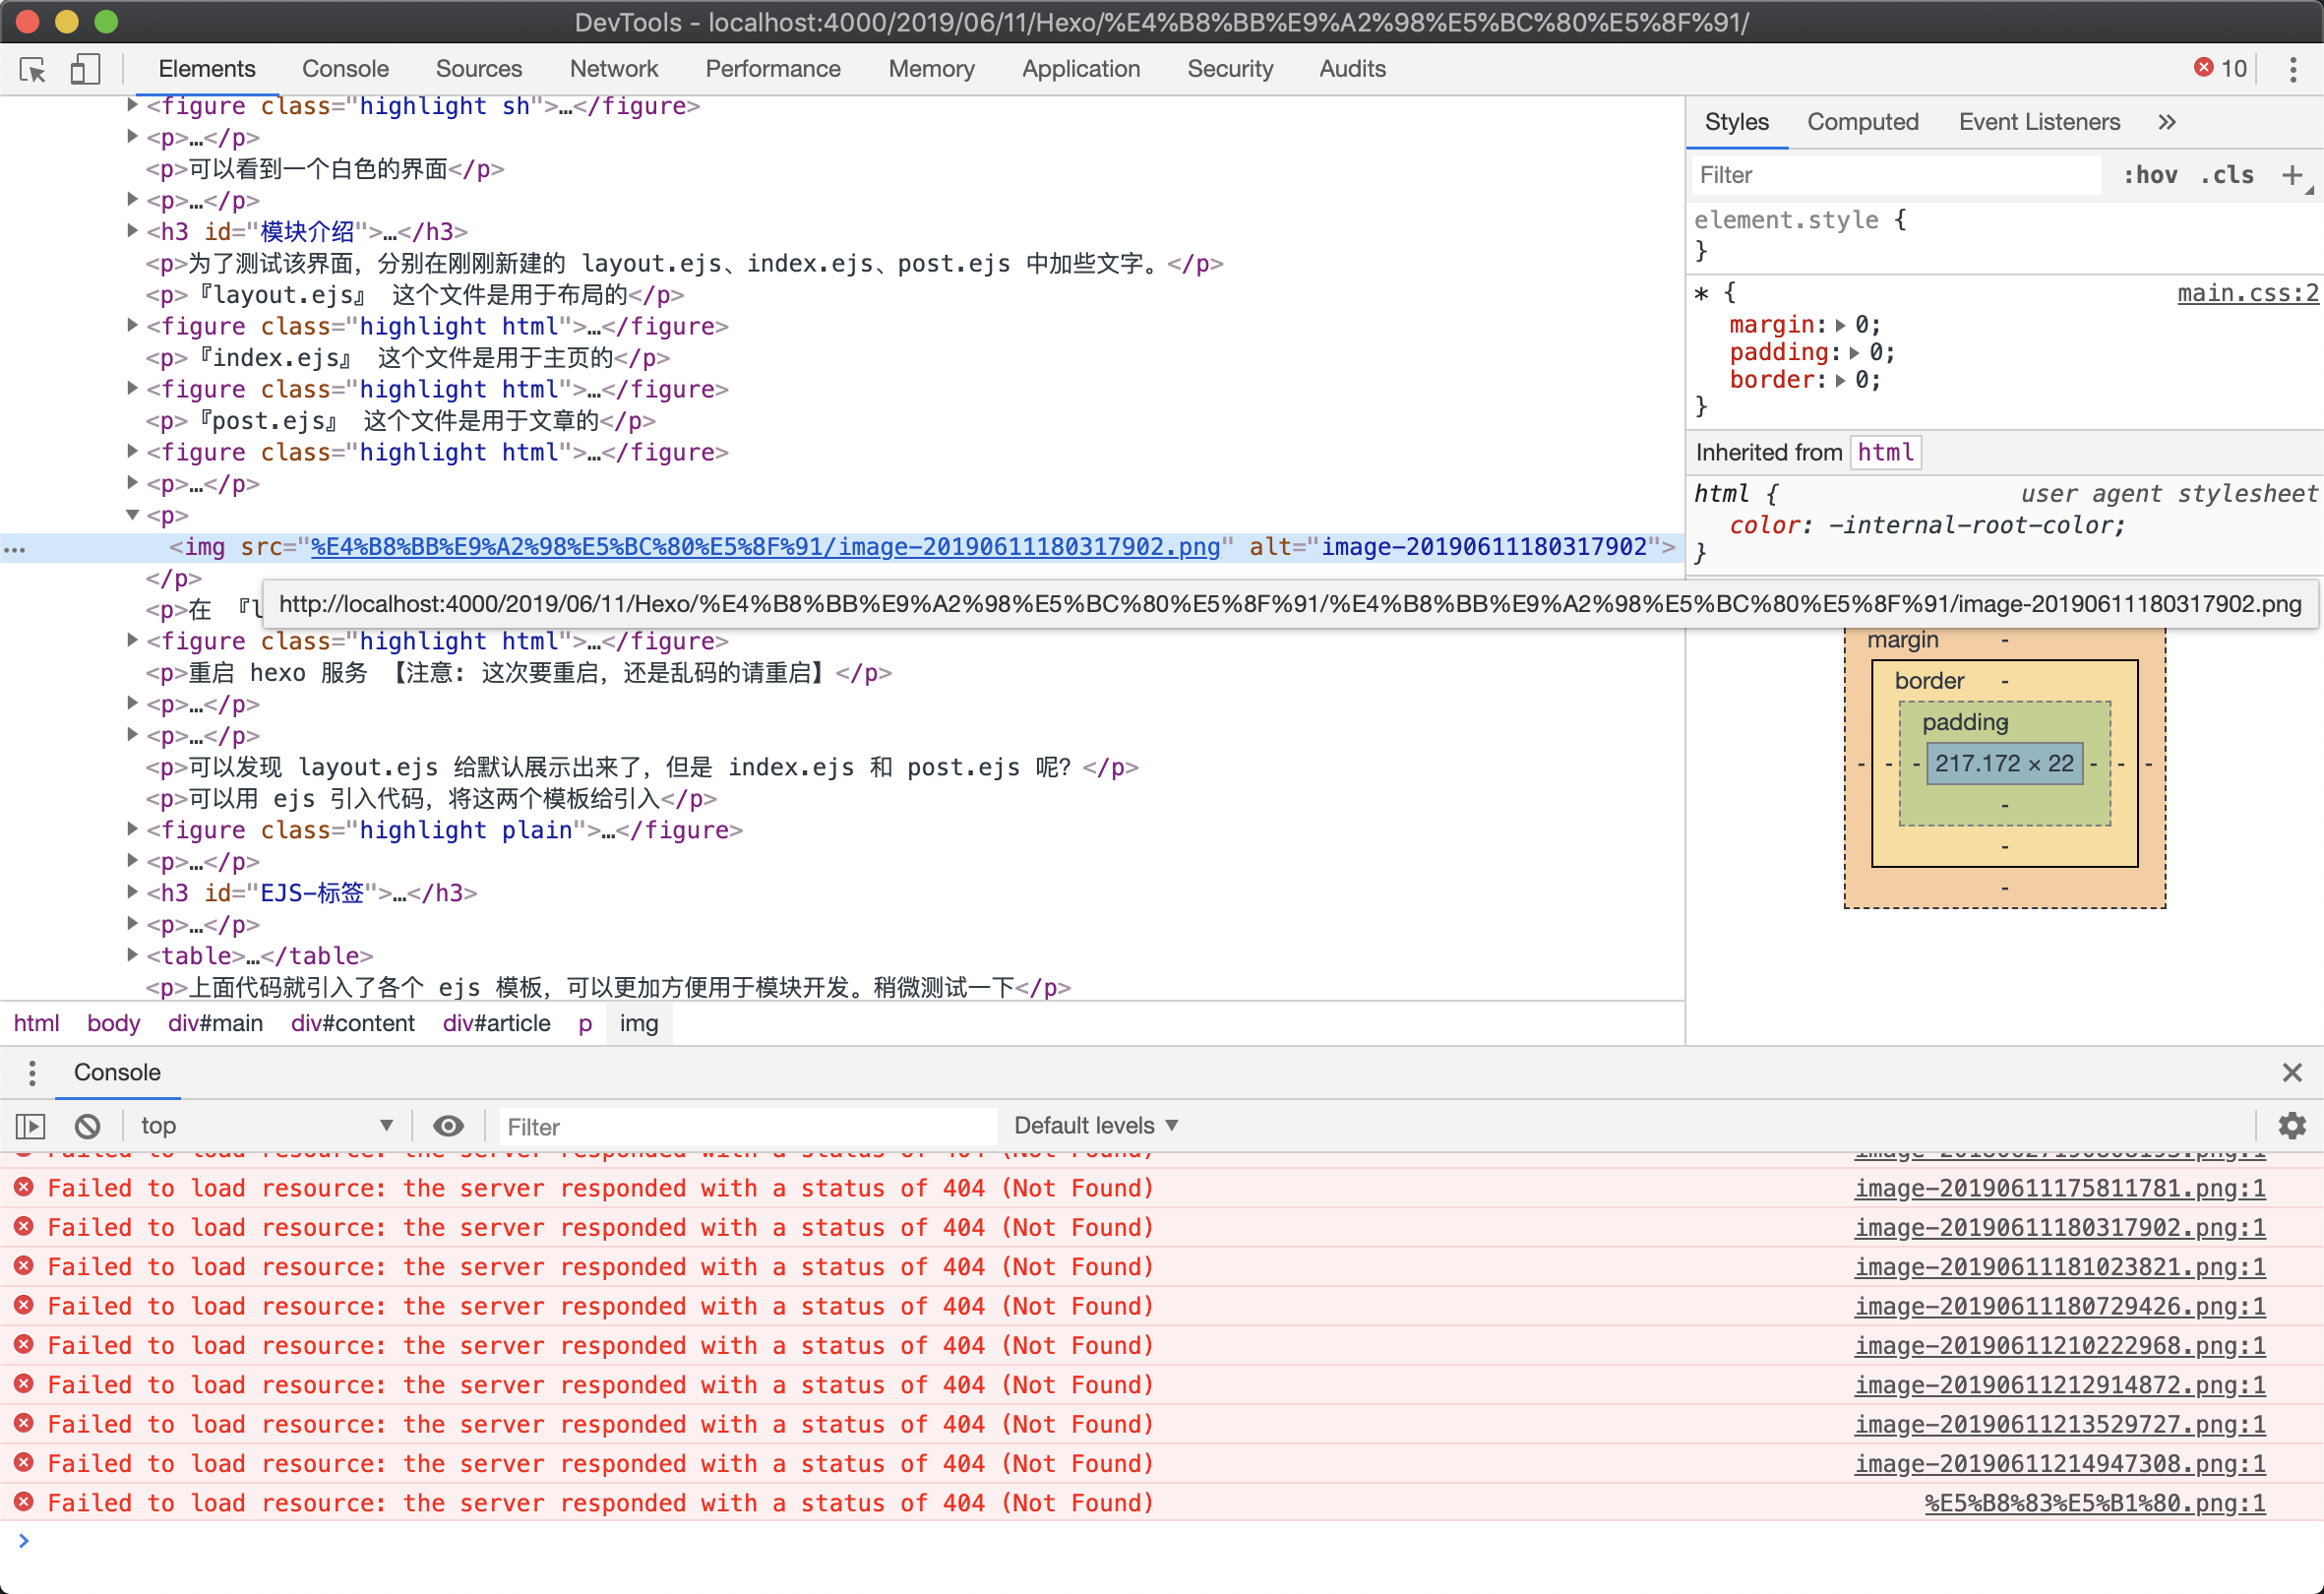
查看后,发现图片的路径不对。因为我用 『Typora』进行 md 的编写。里面有个设置就是将图片保存在当前文件名命名的同级目录下。
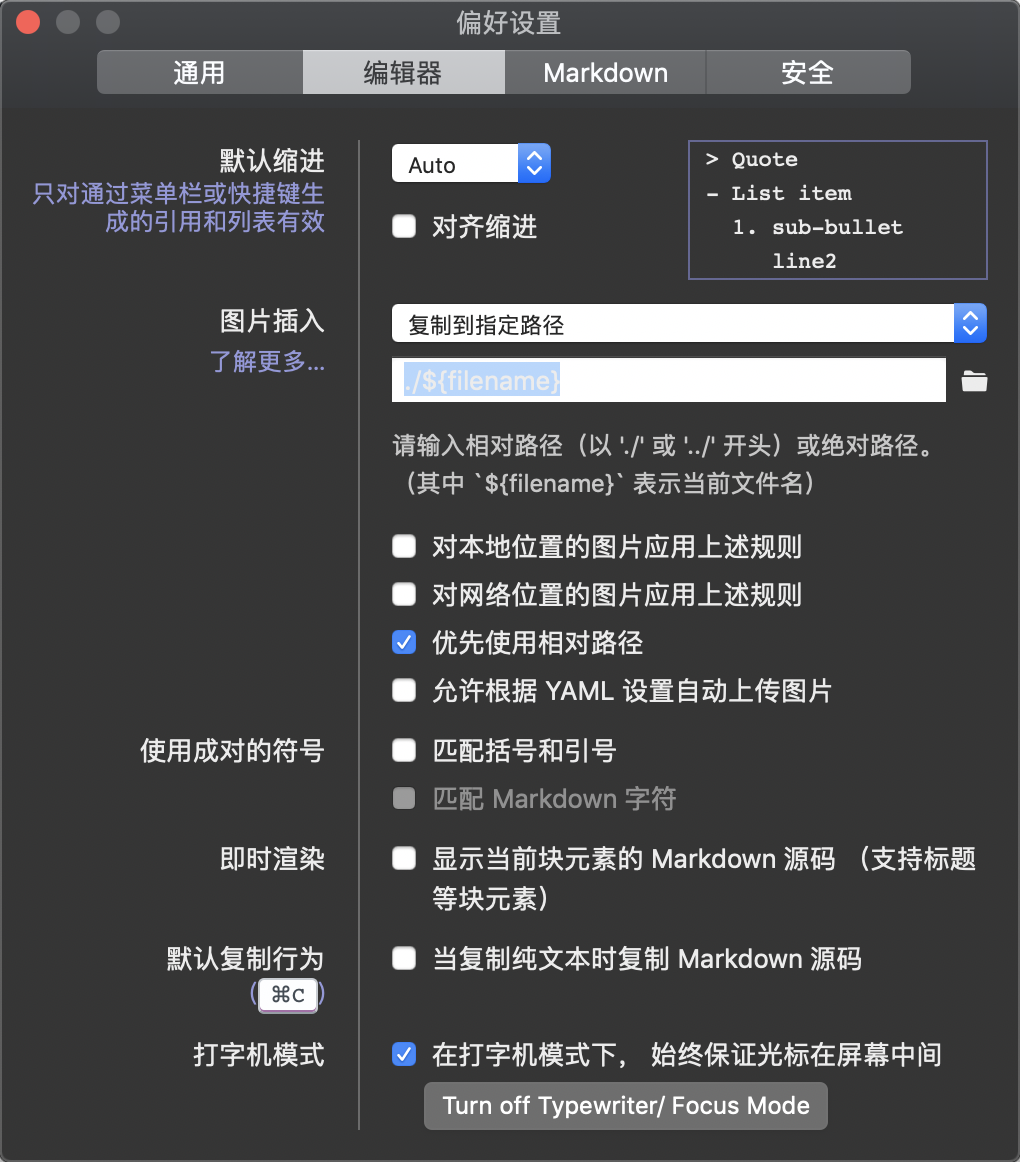
因此为了保证 Hexo 的图片与我设置的一致,需要安装一个 NodeJs 插件 『hexo-asset-image』获取文件相对路径下同名文件夹的图片。
返回到 hexo init 的 wiki 目录下进行安装 【注意: 不是主题的wiki,是根目录wiki】
npm install https://github.com/CodeFalling/hexo-asset-image --save安装好了插件以后,需要在总的配置文件 _config.yml 的第 38 行,将值修改成 true
# 获取文件相对目录的图片
post_asset_folder: true
安装好了,重新启动一下 hexo
wiki ➔ hexo s
INFO Start processing
update link as:-->/2019/06/11/Hexo/主题开发/image-20180627190808193.png
update link as:-->/2019/06/11/Hexo/主题开发/image-20190611175811781.png
update link as:-->/2019/06/11/Hexo/主题开发/image-20190611180317902.png
update link as:-->/2019/06/11/Hexo/主题开发/image-20190611180729426.png
update link as:-->/2019/06/11/Hexo/主题开发/image-20190611181023821.png
update link as:-->/2019/06/11/Hexo/主题开发/image-20190611210222968.png
update link as:-->/2019/06/11/Hexo/主题开发/image-20190611212914872.png
update link as:-->/2019/06/11/Hexo/主题开发/image-20190611213529727.png
update link as:-->/2019/06/11/Hexo/主题开发/image-20190611214947308.png
update link as:-->/2019/06/11/Hexo/主题开发/%E5%B8%83%E5%B1%80.png
update link as:-->/2018/06/27/Hexo/安装/image-20180627190808193.png
update link as:-->/2018/06/27/Hexo/安装/image-20180627190808193.png
update link as:-->/2018/01/17/Docker/镜像部署/CentOS/success.png
update link as:-->/2018/01/17/Docker/镜像部署/CentOS/success.png
INFO Hexo is running at http://localhost:4000 . Press Ctrl+C to stop.看日志,发现他已经在更新我的图片了,看一眼 Blog 图片就已经出来了,不再是 404 了。
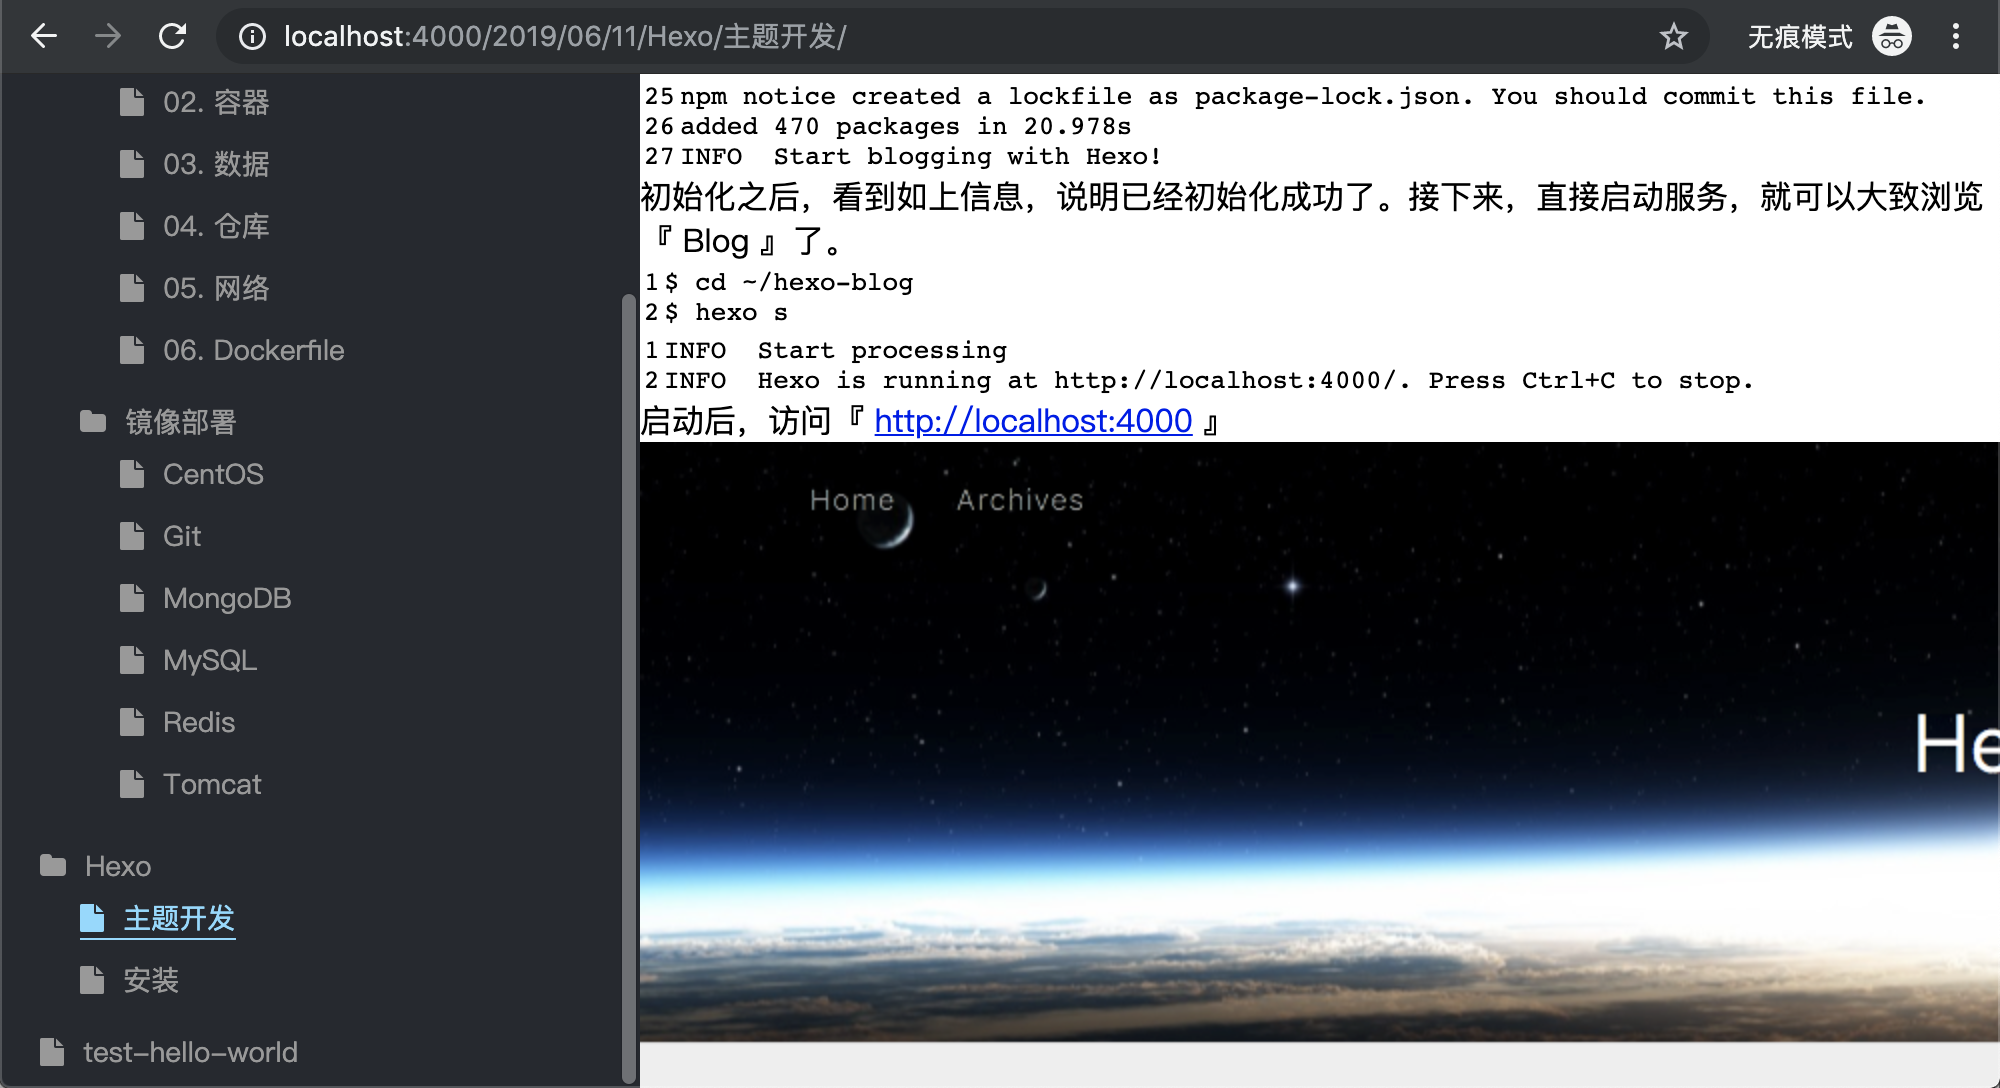
仔细看文件路径,在我 『主题开发.md』文件的同级,有个名字叫『主题开发』的文件夹,里面存着我引用的图片资源,这样的路径,才能被这个插件给加载出来。
├── Hexo
│       │   ├── 安装
│       │   │   ├── image-20180627184245526.png
│       │   │   ├── image-20180627190554905.png
│       │   │   └── image-20180627190808193.png
│       │   ├── 安装.md
│       │   ├── 主题开发
│       │   │   ├── image-20180627190808193.png
│       │   │   ├── image-20190611175811781.png
│       │   │   ├── image-20190611180317902.png
│       │   │   ├── image-20190611180729426.png
│       │   │   ├── image-20190611181023821.png
│       │   │   ├── image-20190611210222968.png
│       │   │   ├── image-20190611212914872.png
│       │   │   ├── image-20190611213529727.png
│       │   │   ├── image-20190611214947308.png
│       │   │   └── 布局.png
│       │   └── 主题开发.md
代码高亮
剩下的就是给文章做 css 美化了,当然,美化一定要代码高亮了。我用的代码高亮是比较流行的 『highlightjs』下载了其中我非常喜欢的 『atom-one-dark』的主题。如果有自己更喜欢的主题,可以根据自己的喜好进行下载。
跟图片库『font-awesome』一样,也把它放进 source/lib 中
themes/wiki/source/
├── css
│   └── main.css
├── js
│   └── main.js
└── lib
    ├── font-awesome
    └── highlight
在 『laout.ejs』中,引入它的 css 与 js,引入后,记得让高亮加载
<!DOCTYPE html>
<html>
<head>
    <title><%- theme.title %></title>
    <meta charset="utf-8">

    <!-- 引入配置文件 -->
    <%- css('css/main.css') %>

    <!-- 字体图片库 -->
    <%- css('lib/font-awesome/css/font-awesome.min.css') %>

    <!-- 代码高亮库 -->
    <%- css('/lib/highlight/styles/atom-one-dark') %>

</head>
<body>

    <div id="main">
        <!-- 引入侧边栏 -->
        <aside>
            <%- include('aside.ejs') %>
        </aside>

        <!-- 引入导航 -->
        <nav>
            <%- include('nav.ejs') %>
        </nav>

        <!-- 引入正文 -->
        <div id="content">
            <%- body %>
        </div>

    </div>

    <!-- 引入 js 文件 -->
    <%- js('js/main.js') %>

    <!-- 引入代码高亮的 js -->
    <%- js('/lib/highlight/highlight.pack.js') %>
    <script>hljs.initHighlightingOnLoad();</script>

</body>
</html>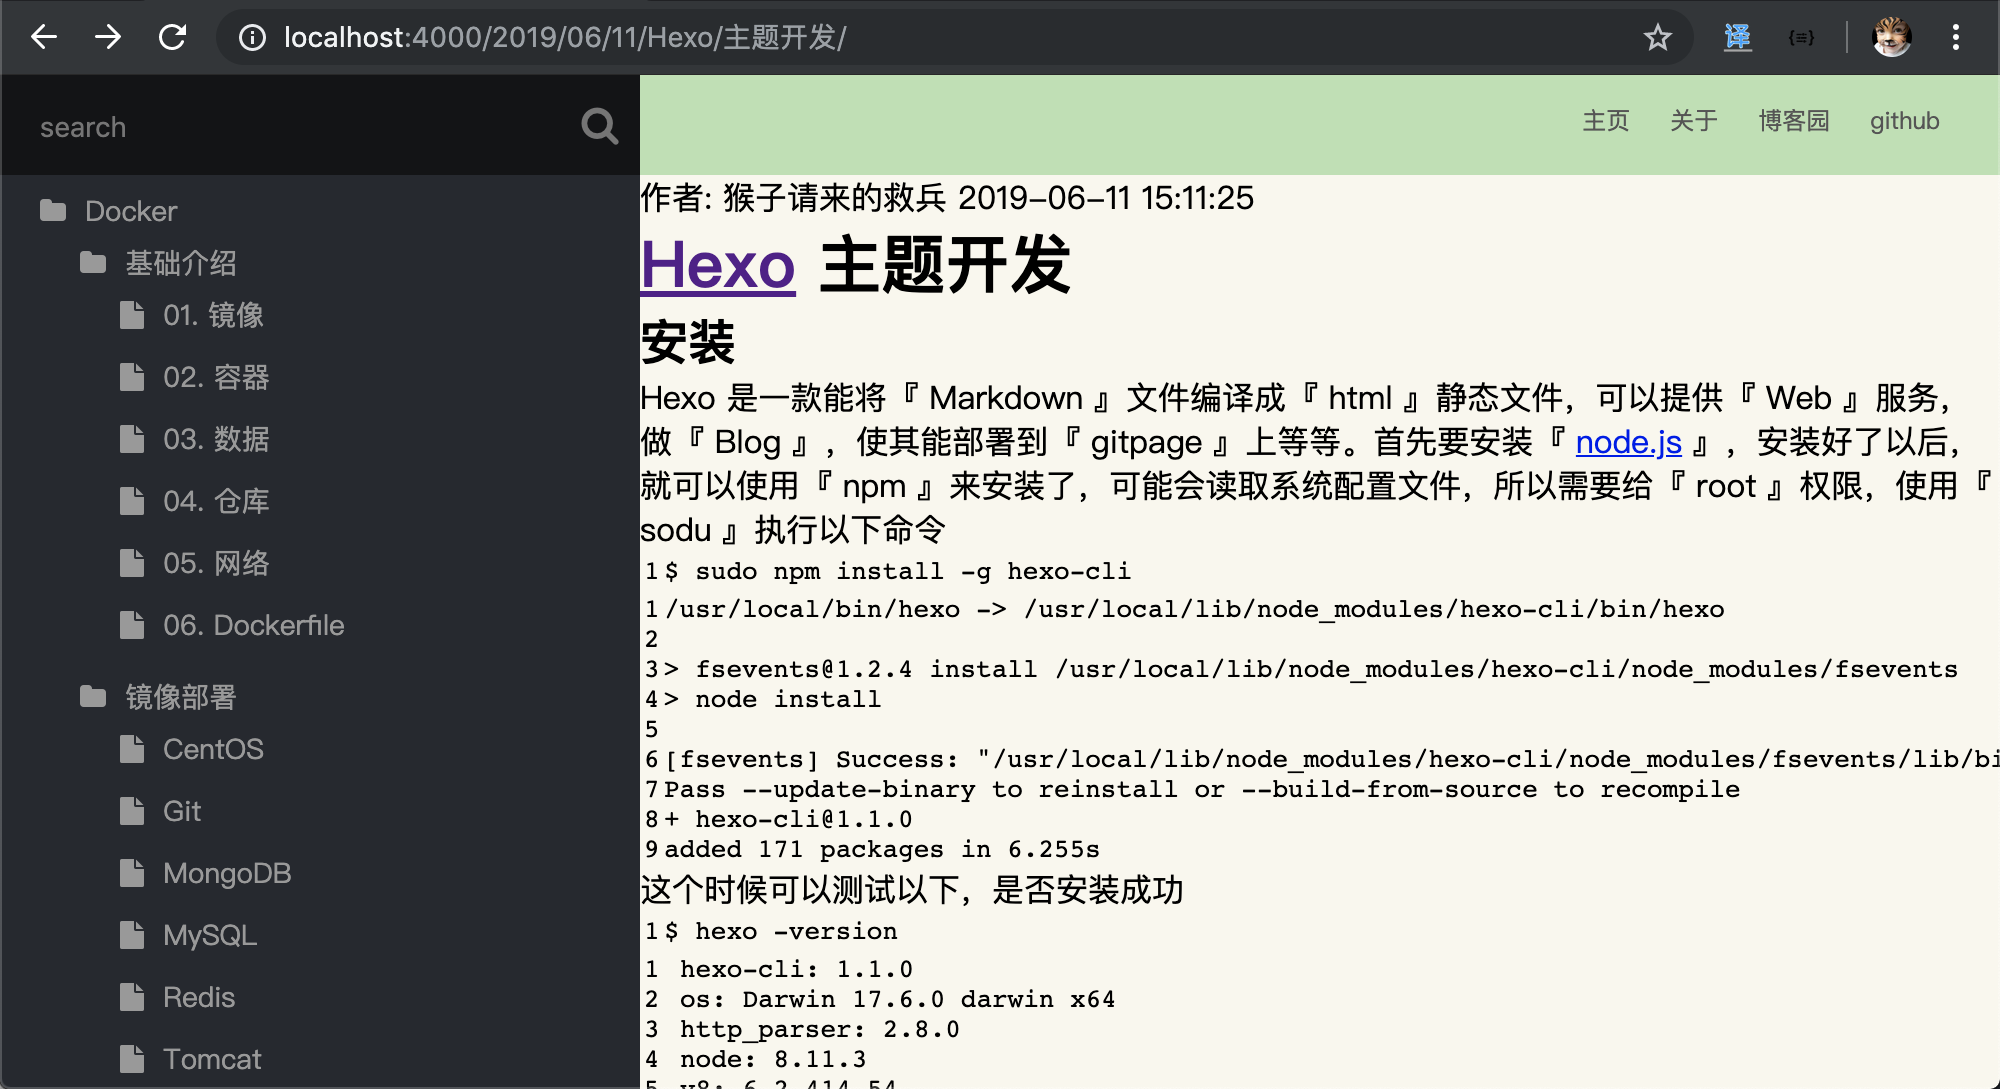
发现代码并没有高亮,找了下原因,原来是默认主题已经是 『highlight』代码高亮了,但是它的这些并不够炫酷,还是选择坚持用我自己下载的,所以我必须得去总配置文件 _config.yml 里面,把它给关闭,大概在 42 行的位置,将这 3 个选项关闭。
『_config.yml』
highlight:
  enable: false
  line_number: false
  auto_detect: false
  tab_replace:
修改配置文件以后,得重启 hexo 在重启前,先 hexo clean 以免还有缓存在。
hexo clean
hexo s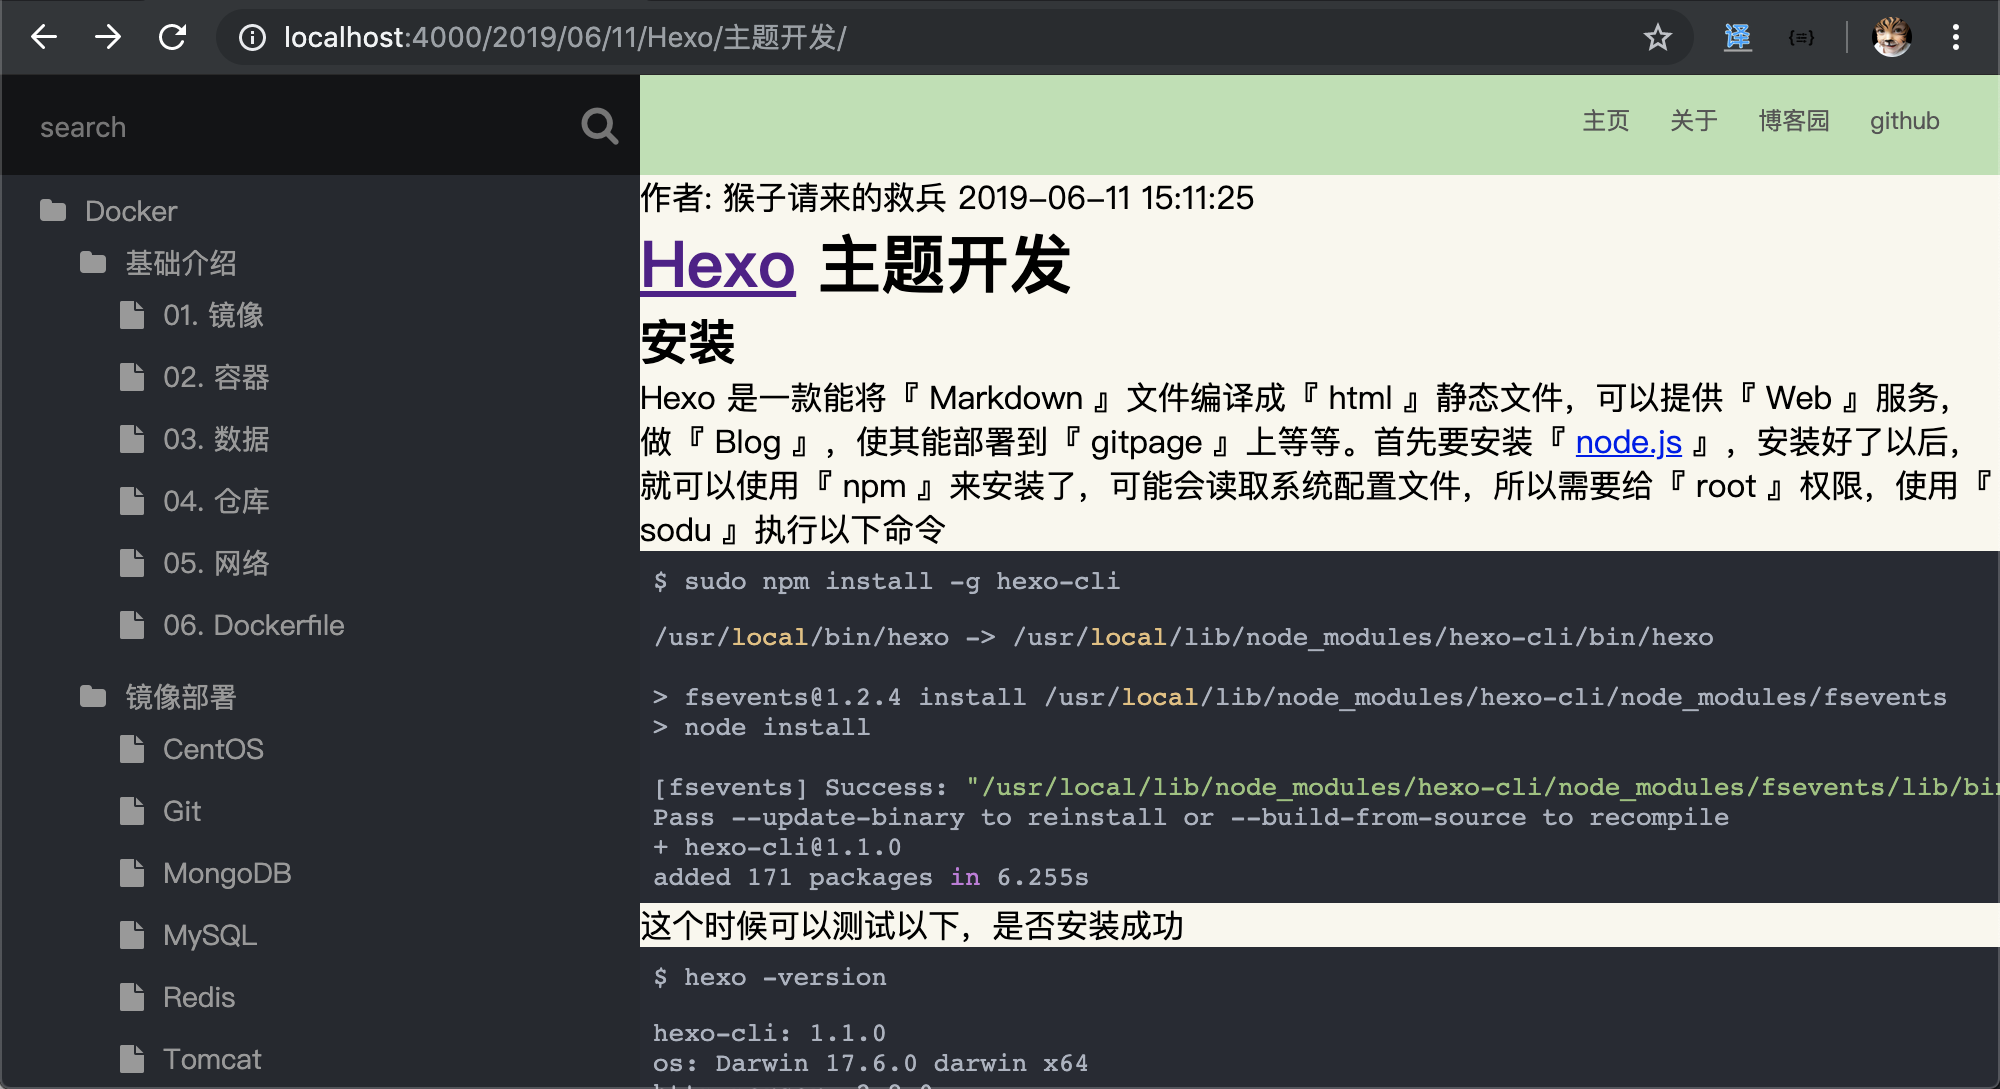
代码出现高亮了,现在美化文章,增加 css
『main.css』
/* #################### 文章 #################### */
/* 作者 时间 相关 */
#post-author {
    font-size: 9px;
    position: absolute;
    top: 60px;
    right: 30px;
    color: #999;
}

#post-date {
    font-size: 9px;
    position: absolute;
    top: 80px;
    right: 30px;
    color: #999;
}

/* 文章各个元素间隔 */
#article {
    padding: 30px;
}
#article * {
    margin: 30px 0;
}


#article h1,
#article h2,
#article h3,
#article h4,
#article h5,
#article h6 {
    line-height: 40px;
    margin: 20px 0 15px;
}


#article h1 {
    font-size: 32px;
    font-weight: 900;
    padding-bottom: 10px;
    border-bottom: 2px solid #e06c75;
}

#article h2 {
    font-size: 25px;
    border-left: 3px solid #73b1e0;
    padding-left: 10px;
}

#article h3 {
    font-size: 22px
}

#article a {
    color: #e06c75;
    text-decoration: none;
}

#article a:hover {
    border-bottom: 1px solid;
}

#article h1 a:hover{
    border-bottom: none;
}

#article code {
    border-radius: 3px;
    box-shadow: 0px 0px 5px #999;
}

#article img {
    max-width: 100%;
    height: auto;
    border-radius: 5px;
    box-shadow: 0px 0px 8px #999;
}

#article pre {
    font-size: 14px;
    margin: 20px 0 15px;
}

#article p {
    margin: 0 0 10px;
    line-height: 30px
}

/* 表格处理 */
#article table {
  width: 100%;
  border: 0;
  margin: 20px 0 50px 0;
  border-collapse: collapse;
  border-spacing: 0;
  line-height: 35px;
  border-radius: 8px;
  box-shadow: 0px 0px 5px #999;
}

#article table th {
  background: #73b1e0;
  font-weight: 800;
  font-size: 18px;
  text-align: left;
  line-height: 35px;
  color: #FFF;
}

#article table tr:nth-child(odd) {
  background: #F4F4F4;
}

#article table tr:hover,
#article table td:hover {
  background: #badbf5;
  color: #FFF;
}

#article table td, table th {
  padding: 5px 20px 5px 20px
}

#article table tr:first-child th:first-child {
  border-top-left-radius: 3px;
}

#article table tr:first-child th:last-child {
  border-top-right-radius: 3px;
}

#article table tr:last-child td:first-child {
  border-bottom-left-radius: 3px;
}

#article table tr:last-child td:last-child {
  border-bottom-right-radius: 3px;
}

/* #################### 文章 #################### */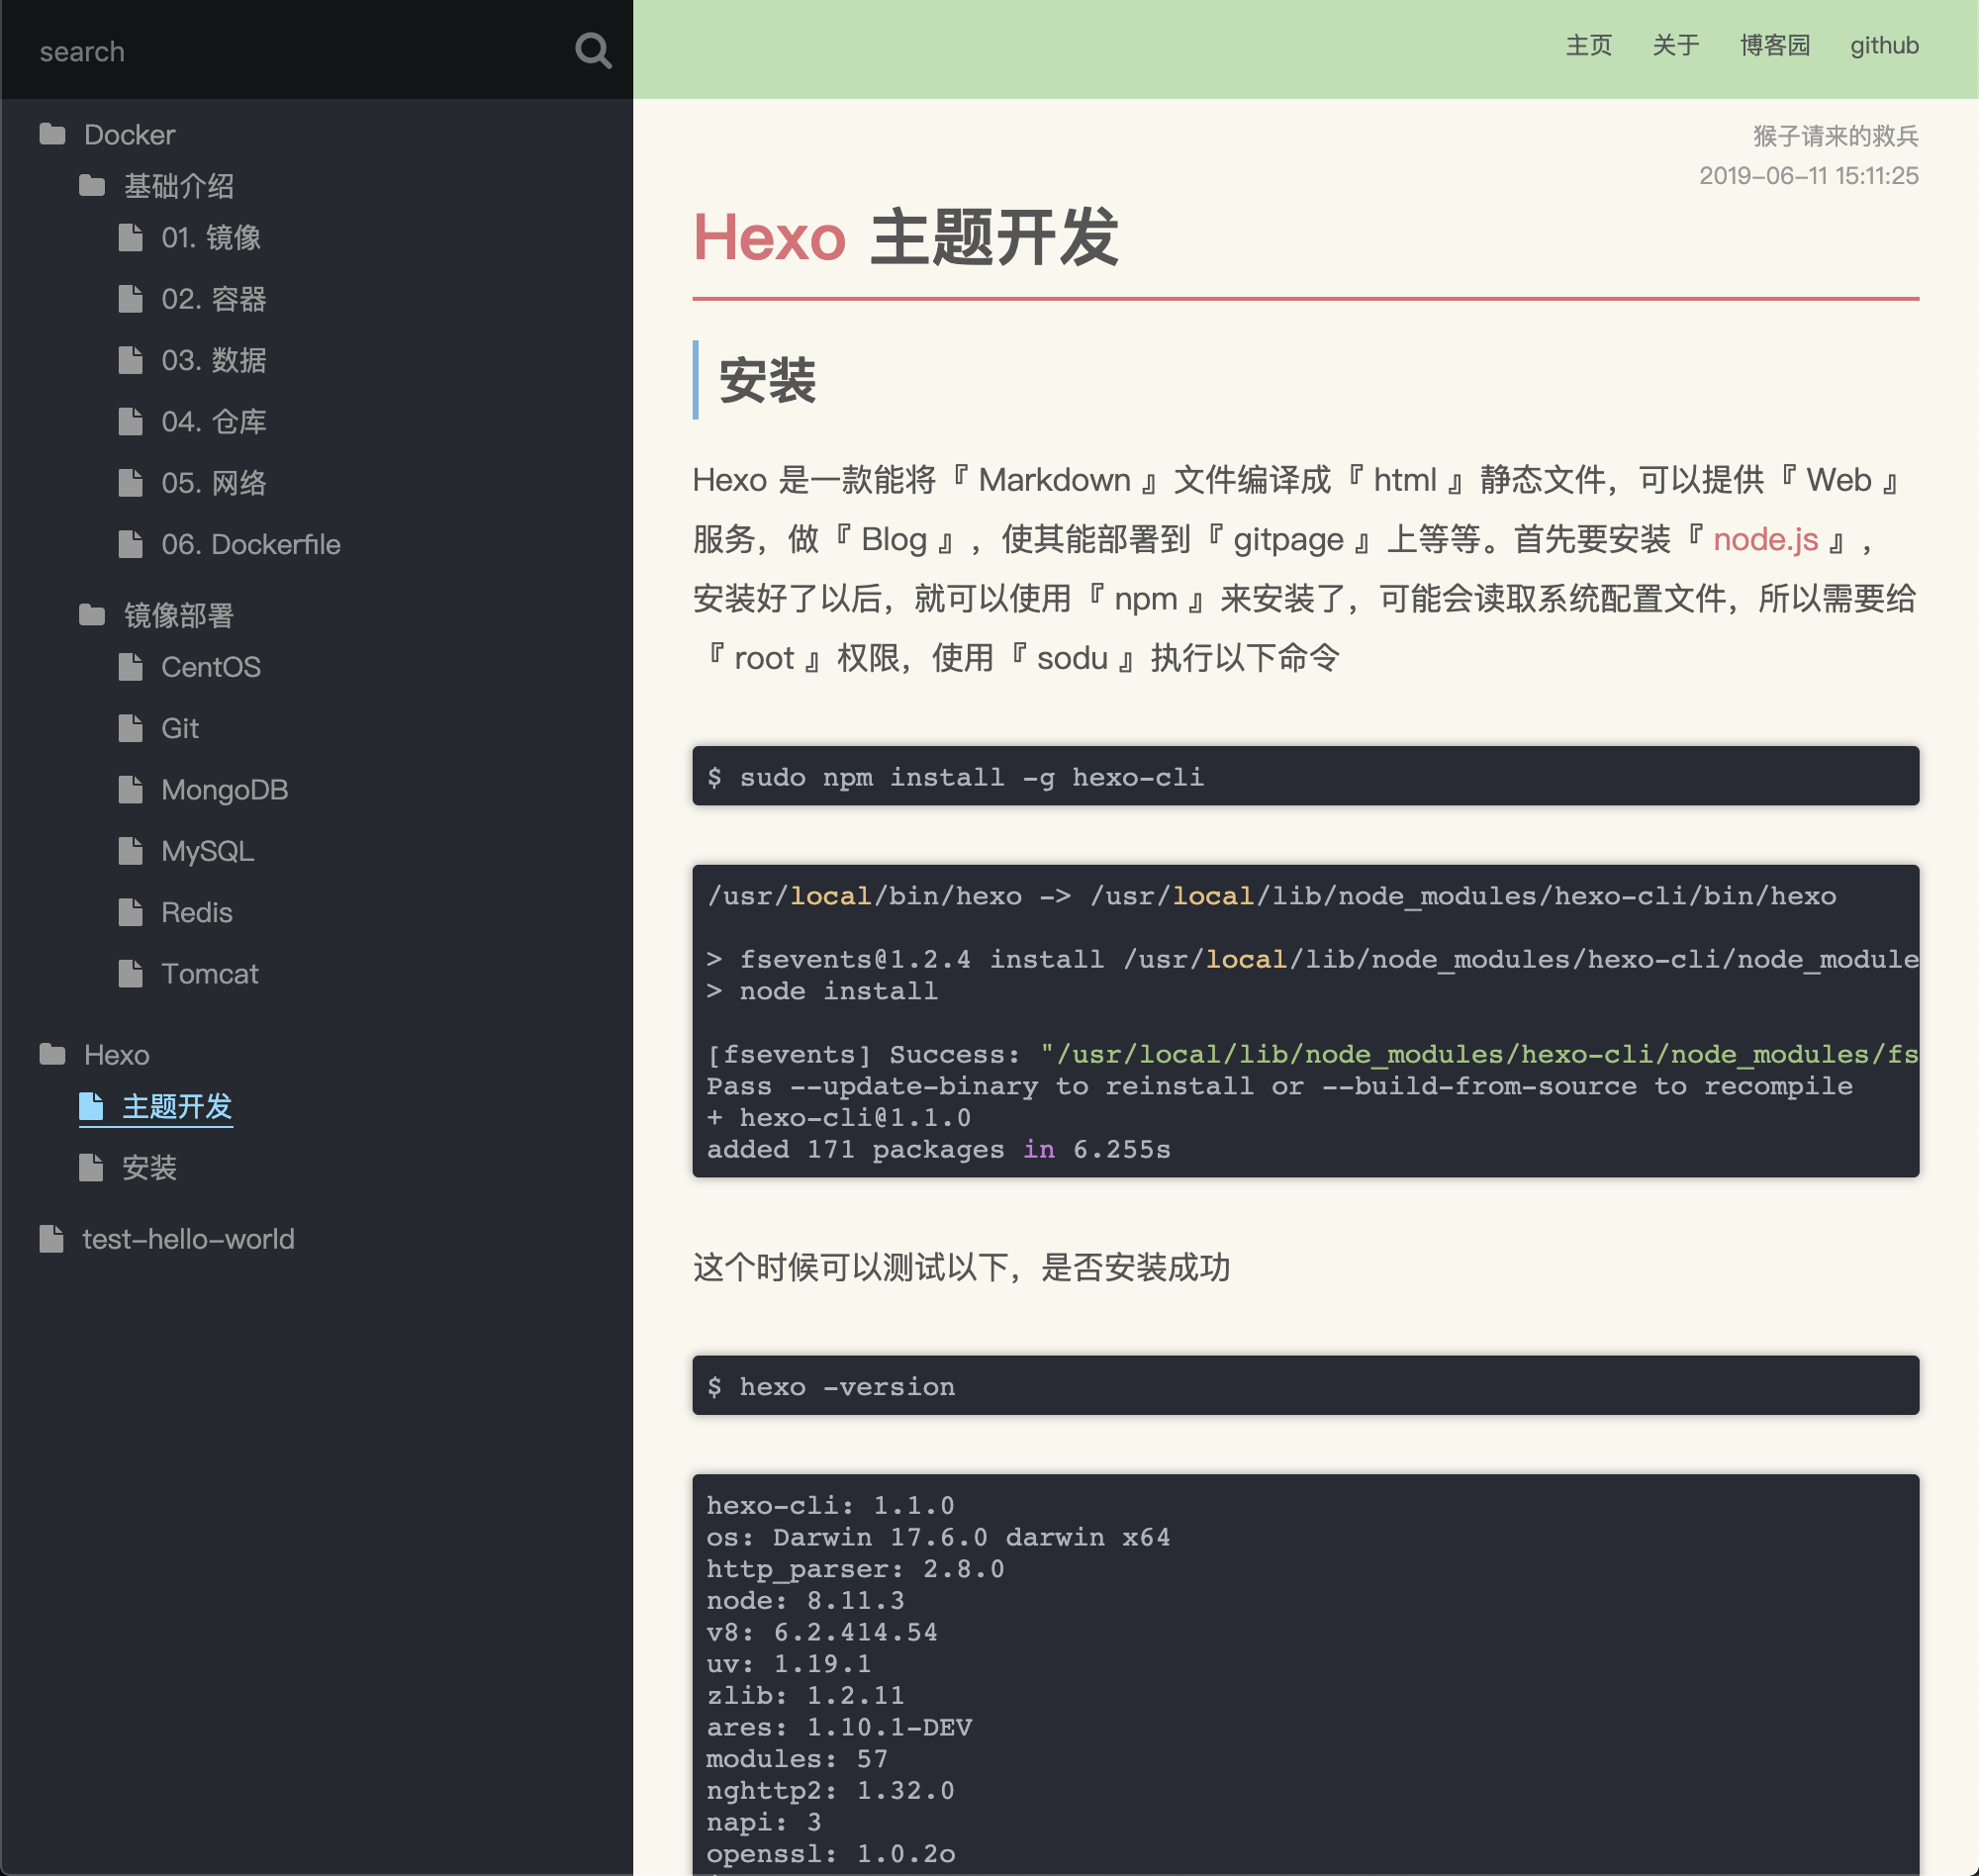
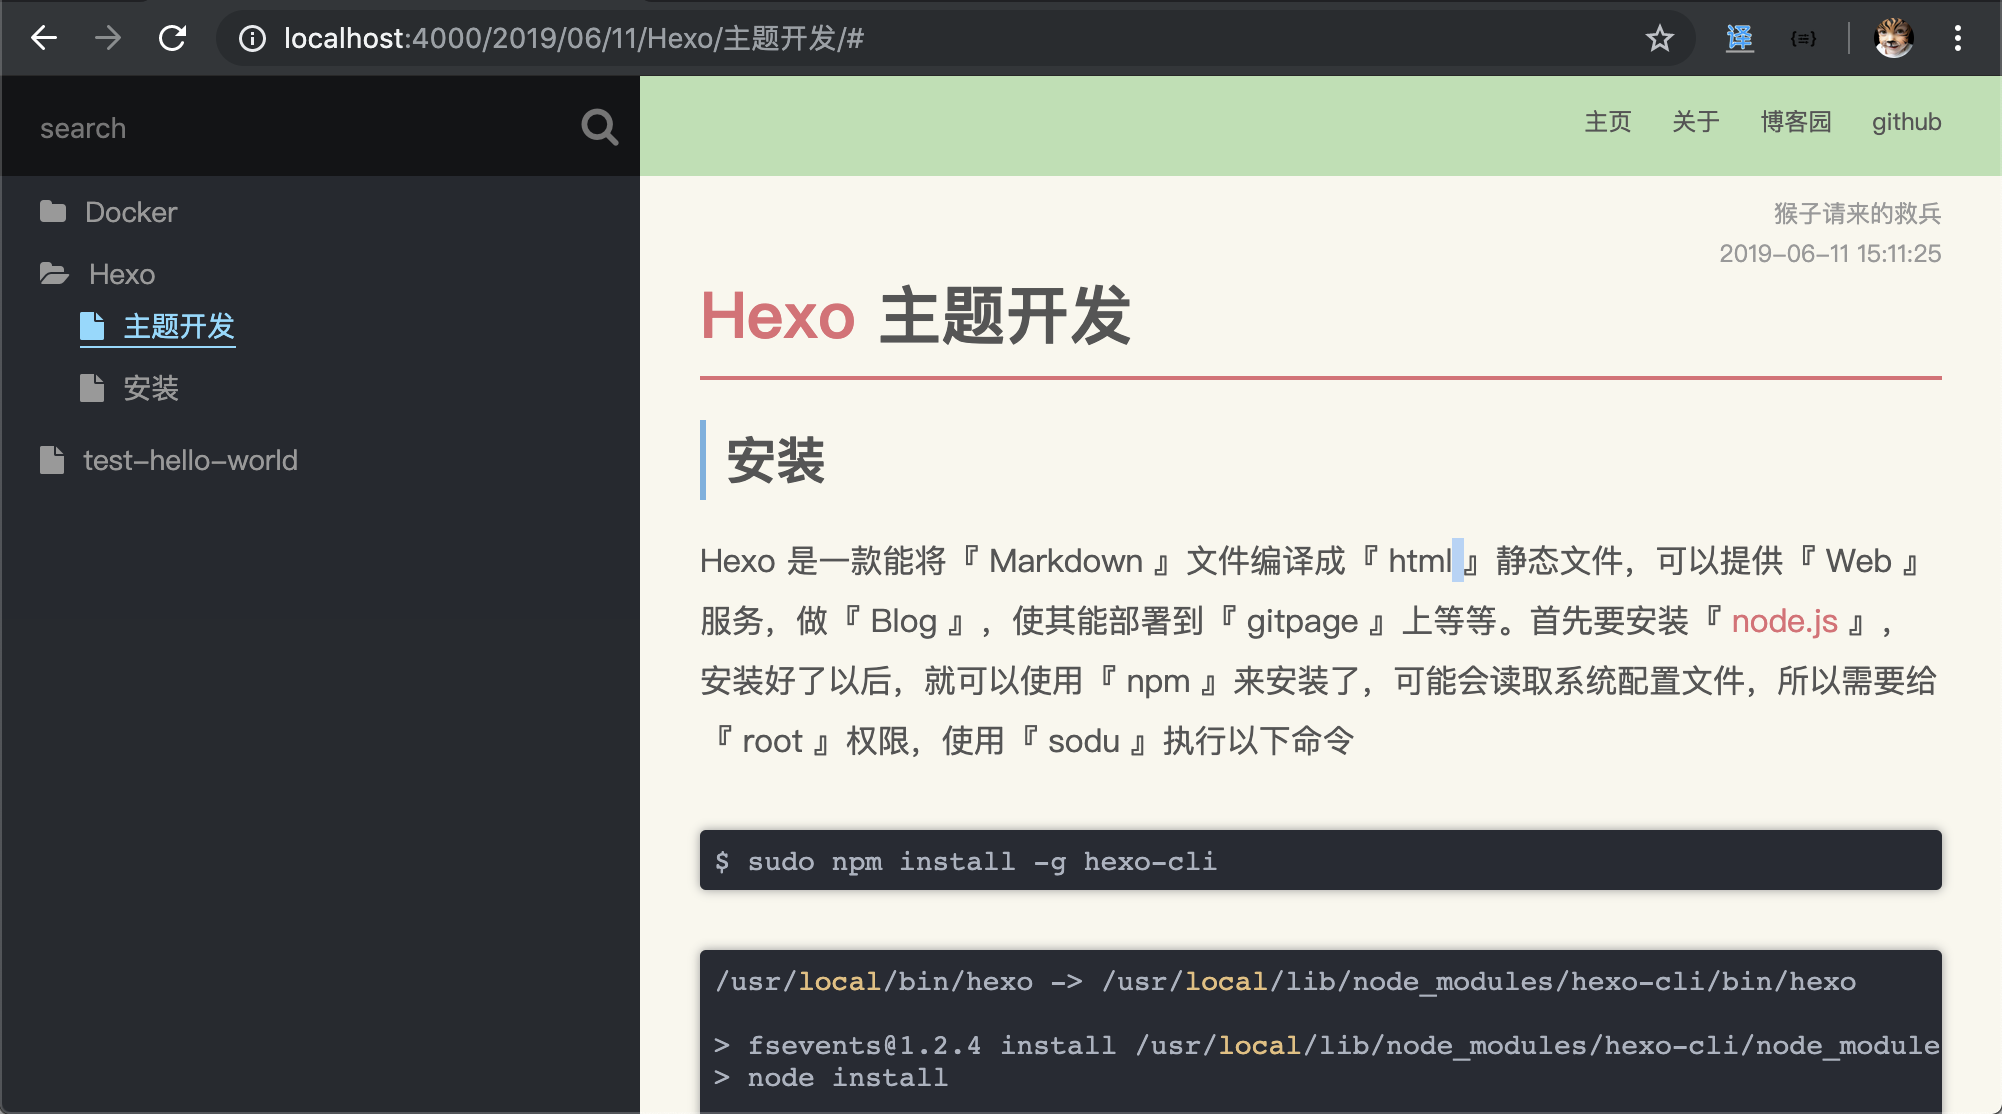
目录点击事件
到这个时候,就需要编写 js 了。我使用了 jQuery 库,本来不准备用第三方插件了,后面发现,早晚都要用,干脆一开始就使用好了。
下载 jQuery 库,放到 sorce/lib 中
themes/wiki/source/
├── css
│   └── main.css
├── js
│   └── main.js
└── lib
    ├── font-awesome
    ├── highlight
    └── jquery-3.4.1.min.js
在 layout.ejs 中引入 jquery 库,这里得注意,要先引用 jquery 再引入自己的 js 代码,否则在编写的时候,找不到 jqeury 库。因为 html 在编译的时候,是从上往下顺序执行的,如果不先引入库文件,在自己的代码中就找不到库文件了。
<!DOCTYPE html>
<html>
<head>
    <title><%- theme.title %></title>
    <meta charset="utf-8">

    <!-- 引入配置文件 -->
    <%- css('css/main.css') %>

    <!-- 字体图片库 -->
    <%- css('lib/font-awesome/css/font-awesome.min.css') %>

    <!-- 代码高亮库 -->
    <%- css('/lib/highlight/styles/atom-one-dark') %>

</head>
<body>

    <div id="main">
        <!-- 引入侧边栏 -->
        <aside>
            <%- include('aside.ejs') %>
        </aside>

        <!-- 引入导航 -->
        <nav>
            <%- include('nav.ejs') %>
        </nav>

        <!-- 引入正文 -->
        <div id="content">
            <%- body %>
        </div>

    </div>

    <!-- 引入代码高亮的 js -->
    <%- js('/lib/highlight/highlight.pack.js') %>

    <!-- 引入 jquery -->
    <%- js('/lib/jquery-3.4.1.min.js') %>
    <script>hljs.initHighlightingOnLoad();</script>

    <!-- 引入 js 文件 -->
    <%- js('js/main.js') %>

</body>
</html>
接着就是编写自己的 js 了。代码大致意识,都写在注释里了。
『main.js』
$(document).ready(function () {
    clickTreeDirectory();
});

// 点击目录事件
function clickTreeDirectory() {
    // 判断有 active 的话,就递归循环把它的父目录打开
    var treeActive = $("#tree .active");
    if ( treeActive.length ) {
        showActiveTree(treeActive, true);
    }

    // 点击目录,就触发折叠动画效果
    $(document).on("click", "#tree a[class='directory']", function (e) {
        // 用来清空所有绑定的其他事件
        event.preventDefault();

        var icon = $(this).children(".fa");
        var iconIsOpen = icon.hasClass("fa-folder-open");
        var subTree = $(this).siblings("ul");

        icon.removeClass("fa-folder-open").removeClass("fa-folder");

        if (iconIsOpen) {
            if (typeof subTree != "undefined") {
                subTree.slideUp({ duration: 100 });
            }
            icon.addClass("fa-folder");
        } else {
            if (typeof subTree != "undefined") {
                subTree.slideDown({ duration: 100 });
            }
            icon.addClass("fa-folder-open");
        }
    });
}

// 循环递归展开父节点
function showActiveTree(jqNode, isSiblings) {
    if ( jqNode.attr("id") === "tree"  ) { return; }
    if ( jqNode.is("ul") ) {
        jqNode.css("display", "block");

        // 这个 isSiblings 是给搜索用的
        // true 就显示开同级兄弟节点
        // false 就是给搜索用的,值需要展示它自己就好了,不展示兄弟节点
        if ( isSiblings ) {
            jqNode.siblings().css("display", "block");
            jqNode.siblings("a").css("display", "inline");
            jqNode.siblings("a").find(".fa-folder").removeClass("fa-folder").addClass("fa-folder-open");
        }
    }
    jqNode.each(function(){ showActiveTree($(this).parent(), isSiblings); });
}
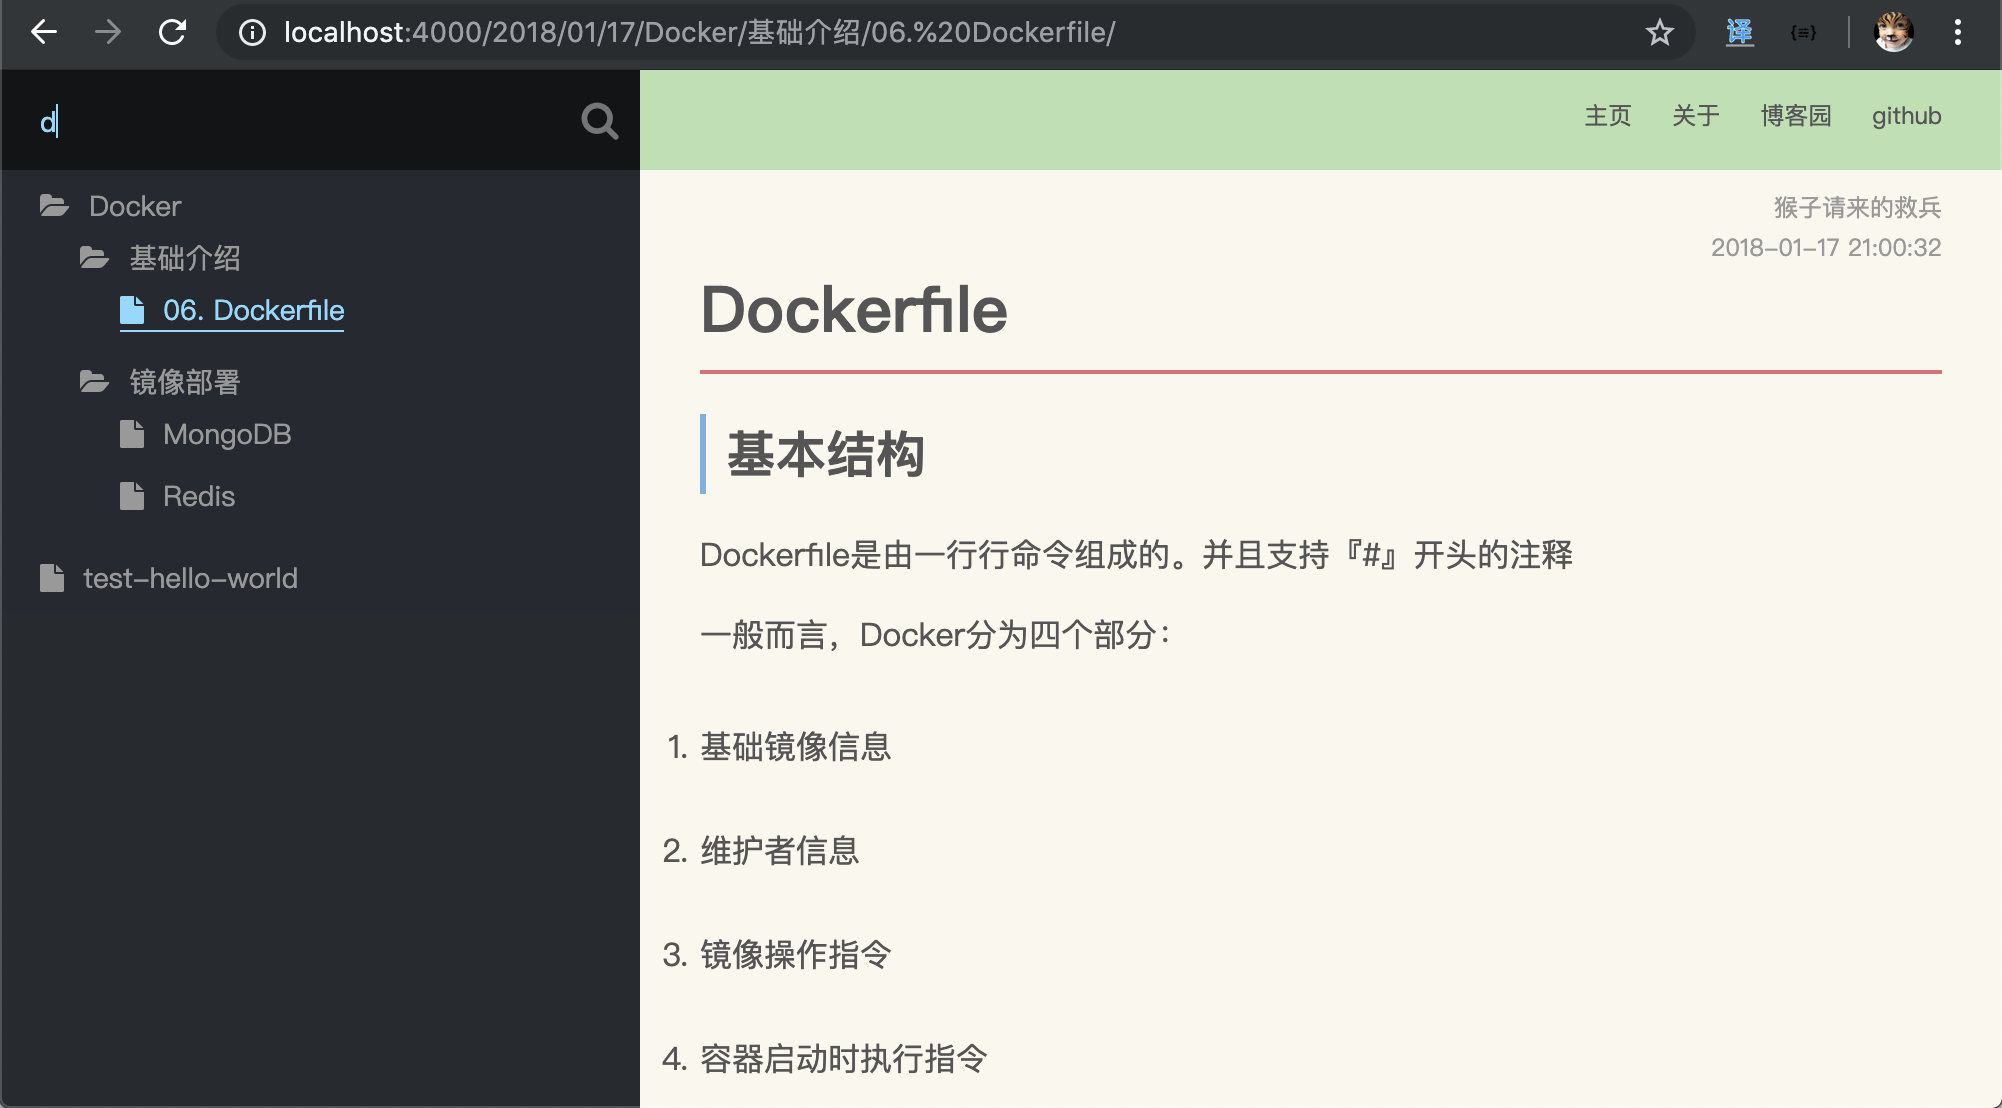
搜索
这个搜索框一开始就设计好了,但是没有什么功能。要是做全文本搜索的话,就需要安装插件了。这里只是简单的在侧边栏的文章目录上进行搜索。在 js 代码中增加以下。
『main.js』
// 搜索框输入事件
function serachTree() {
    // 解决搜索大小写问题
    jQuery.expr[':'].contains = function (a, i, m) {
        return jQuery(a).text().toUpperCase().indexOf(m[3].toUpperCase()) >= 0;
    };

    $("#search input").on("input", function(e){
        e.preventDefault();

        // 获取 inpiut 输入框的内容
        var inputContent = e.currentTarget.value;

        // 没值就收起父目录,但是得把 active 的父目录都展开
        if ( inputContent.length === 0 ) {
            $(".fa-folder-open").removeClass("fa-folder-open").addClass("fa-folder");
            $("#tree ul").css("display", "none");
            if ( $("#tree .active").length ) {
                showActiveTree($("#tree .active"), true);
            }
            else {
                $("#tree").children().css("display", "block");
            }
        }
        // 有值就搜索,并且展开父目录
        else {
            $(".fa-folder").removeClass("fa-folder").addClass("fa-folder-open");
            $("#tree ul").css("display", "none");
            var searchResult = $("#tree li").find("a:contains('" + inputContent + "')");
            if ( searchResult.length ) {
                showActiveTree(searchResult.parent(), false)
            }
        }
    });
}
局部刷新
发现搜索出来东西以后,点击搜索的连接,页面会闪一下,然后我的树状结构目录就变了,作为测试的我,这种 bug 不能忍呀。琢磨了很久,想到可以使用 ajax 做局部刷新。就是刷新下图中的局部区域。
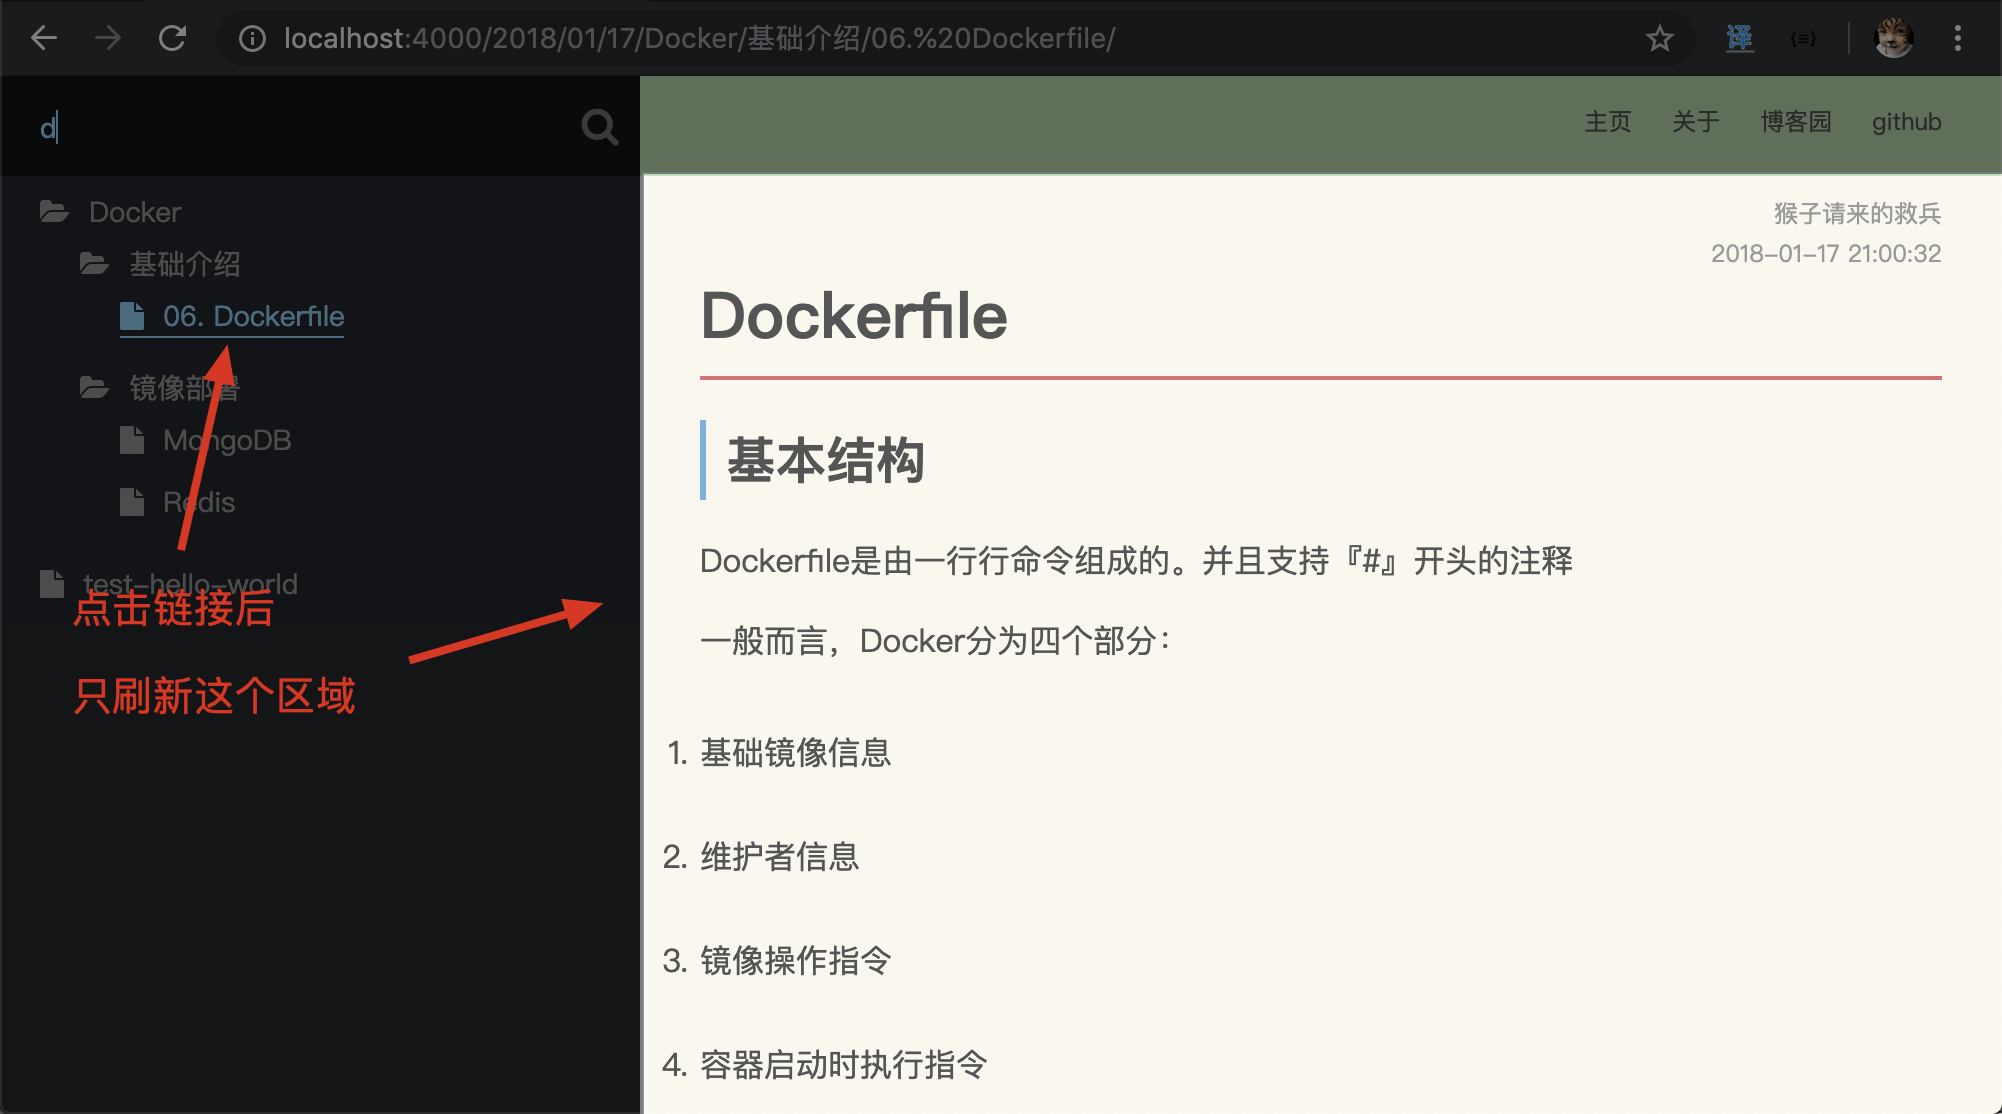
网上搜索以后,发现已经有现成的东西了它叫做 『 pjax 』,下载后放进 source/lib 中,在布局中引用,在 js 里新增逻辑。
themes/wiki/source/
├── css
│   └── main.css
├── js
│   └── main.js
└── lib
    ├── font-awesome
    ├── highlight
    ├── jquery-3.4.1.min.js
    └── jquery.pjax.js
『layout.ejs』
<!DOCTYPE html>
<html>
<head>
    <title><%- theme.title %></title>
    <meta charset="utf-8">

    <!-- 引入配置文件 -->
    <%- css('css/main.css') %>

    <!-- 字体图片库 -->
    <%- css('lib/font-awesome/css/font-awesome.min.css') %>

    <!-- 代码高亮库 -->
    <%- css('/lib/highlight/styles/atom-one-dark') %>

</head>
<body>

    <div id="main">
        <!-- 引入侧边栏 -->
        <aside>
            <%- include('aside.ejs') %>
        </aside>

        <!-- 引入导航 -->
        <nav>
            <%- include('nav.ejs') %>
        </nav>

        <!-- 引入正文 -->
        <div id="content">
            <%- body %>
        </div>

    </div>

    <!-- 引入代码高亮的 js -->
    <%- js('/lib/highlight/highlight.pack.js') %>

    <!-- 引入 jquery -->
    <%- js('/lib/jquery-3.4.1.min.js') %>

    <!-- 引入 pjax -->
    <%- js('/lib/jquery.pjax.js') %>

    <!-- 引入 js 文件 -->
    <%- js('js/main.js') %>

</body>
</html>
『main.js』
$(document).ready(function () {
    clickTreeDirectory();
    serachTree();
    pjaxLoad();
});

function pjaxLoad(){
    $(document).pjax('#tree a', '#content', {fragment:'#content', timeout:8000});
    $(document).pjax('#menu a', '#content', {fragment:'#content', timeout:8000});
    $(document).on({
        "pjax:complete": function(e) {
            $("pre code").each(function (i, block){
                hljs.highlightBlock(block);
            });

            // 添加 active
            $("#tree .active").removeClass("active");
            e.relatedTarget.parentNode.classList.add("active");
        }
    });
}
文章索引目录
文章的索引目录,可以根据文章的 h1 h2 h3 标签,把他们给弄出来,然后分级自动生成目录。
首先在 aside.ejs 做一个存放目录的 div,先试试目录好不好用。
『aside.ejs』
...
<!-- 最尾部添加,这里就不列以前的代码了 -->
<div id="toc"></div>
我想在我点击目录链接的时候,文章滑动至我想看的位置,并且在文章滑动过的位置,导航都标记已读的状态。加入 js 代码。先丢进 aside 的 toc 中测试一下。
『main.js』
$(document).ready(function () {
    hljs.initHighlightingOnLoad();
    clickTreeDirectory();
    serachTree();
    pjaxLoad();
    showArticleIndex();
});

function showArticleIndex() {
    // 先刷一遍文章有哪些节点,把 h1 h2 h3 加入列表,等下循环进行处理。
    // 如果不够,可以加上 h4 ,只是我个人觉得,前 3 个就够了,出现第 4 层就目录就太长了,太细节了。
    var h1List = h2List = h3List = [];
    var labelList = $("#article").children();
    for ( var i=0; i<labelList.length; i++ ) {
        if ( $(labelList[i]).is("h1") ) {
            h2List = new Array();
            h1List.push({node: $(labelList[i]), id: i, children: h2List});
        }

        if ( $(labelList[i]).is("h2") ) {
            h3List = new Array();
            h2List.push({node: $(labelList[i]), id: i, children: h3List});
        }

        if ( $(labelList[i]).is("h3") ) {
            h3List.push({node: $(labelList[i]), id: i, children: []});
        }
    }

    // 闭包递归,返回树状 html 格式的文章目录索引
    function show(tocList) {
        var content = "<ul>";
        tocList.forEach(function (toc) {
            toc.node.before('<span class="anchor" id="_label'+toc.id+'"></span>');
            if ( toc.children == 0 ) {
                content += '<li><a href="#_label'+toc.id+'">'+toc.node.text()+'</a></li>';
            }
            else {
                content += '<li><a href="#_label'+toc.id+'">'+toc.node.text()+'</a>'+show(toc.children)+'</li>';
            }
        });
        content += "</ul>"
        return content;
    }

  // 最后组合成 div 方便 css 设计样式,添加到指定位置
    $("aside #toc").empty();
    $("aside #toc").append(show(h1List));

    // 点击目录索引链接,动画跳转过去,不是默认闪现过去
    $("#toc a").on("click", function(e){
        e.preventDefault();
        // 获取当前点击的 a 标签,并前触发滚动动画往对应的位置
        var target = $(this.hash);
        $("body, html").animate(
            {'scrollTop': target.offset().top},
            500
        );
    });

    // 监听浏览器滚动条,当浏览过的标签,给他上色。
    $(window).on("scroll", function(e){
        var anchorList = $(".anchor");
        anchorList.each(function(){
            var tocLink = $('#toc a[href="#'+$(this).attr("id")+'"]');
            var anchorTop = $(this).offset().top;
            var windowTop = $(window).scrollTop();
            if ( anchorTop <= windowTop+50 ) {
                tocLink.addClass("read");
            }
            else {
                tocLink.removeClass("read");
            }
        });
    });
}
新增 css 样式,用来支撑滚动已读状态的。
『main.css』
/* #################### 文章索引 #################### */

aside #toc a.read{
    /*color: #e06c75;*/
    color: #87daff;
    border-bottom: 0;
    -webkit-transition: 0.5s;
    -moz-transition: 0.5s;
    -ms-transition: 0.5s;
    -o-transition: 0.5s;
}

aside #toc a{
    color: #999;
    border-bottom: 0;
    -webkit-transition: 0.2s;
    -moz-transition: 0.2s;
    -ms-transition: 0.2s;
    -o-transition: 0.2s;
}

aside #toc a:hover{
    /*color: #87daff;*/
    color: #e5c07b;
    padding-left: 20px;
    -webkit-transition: 0.1s;
    -moz-transition: 0.1s;
    -ms-transition: 0.1s;
    -o-transition: 0.1s;
}

/* #################### 文章索引 #################### */
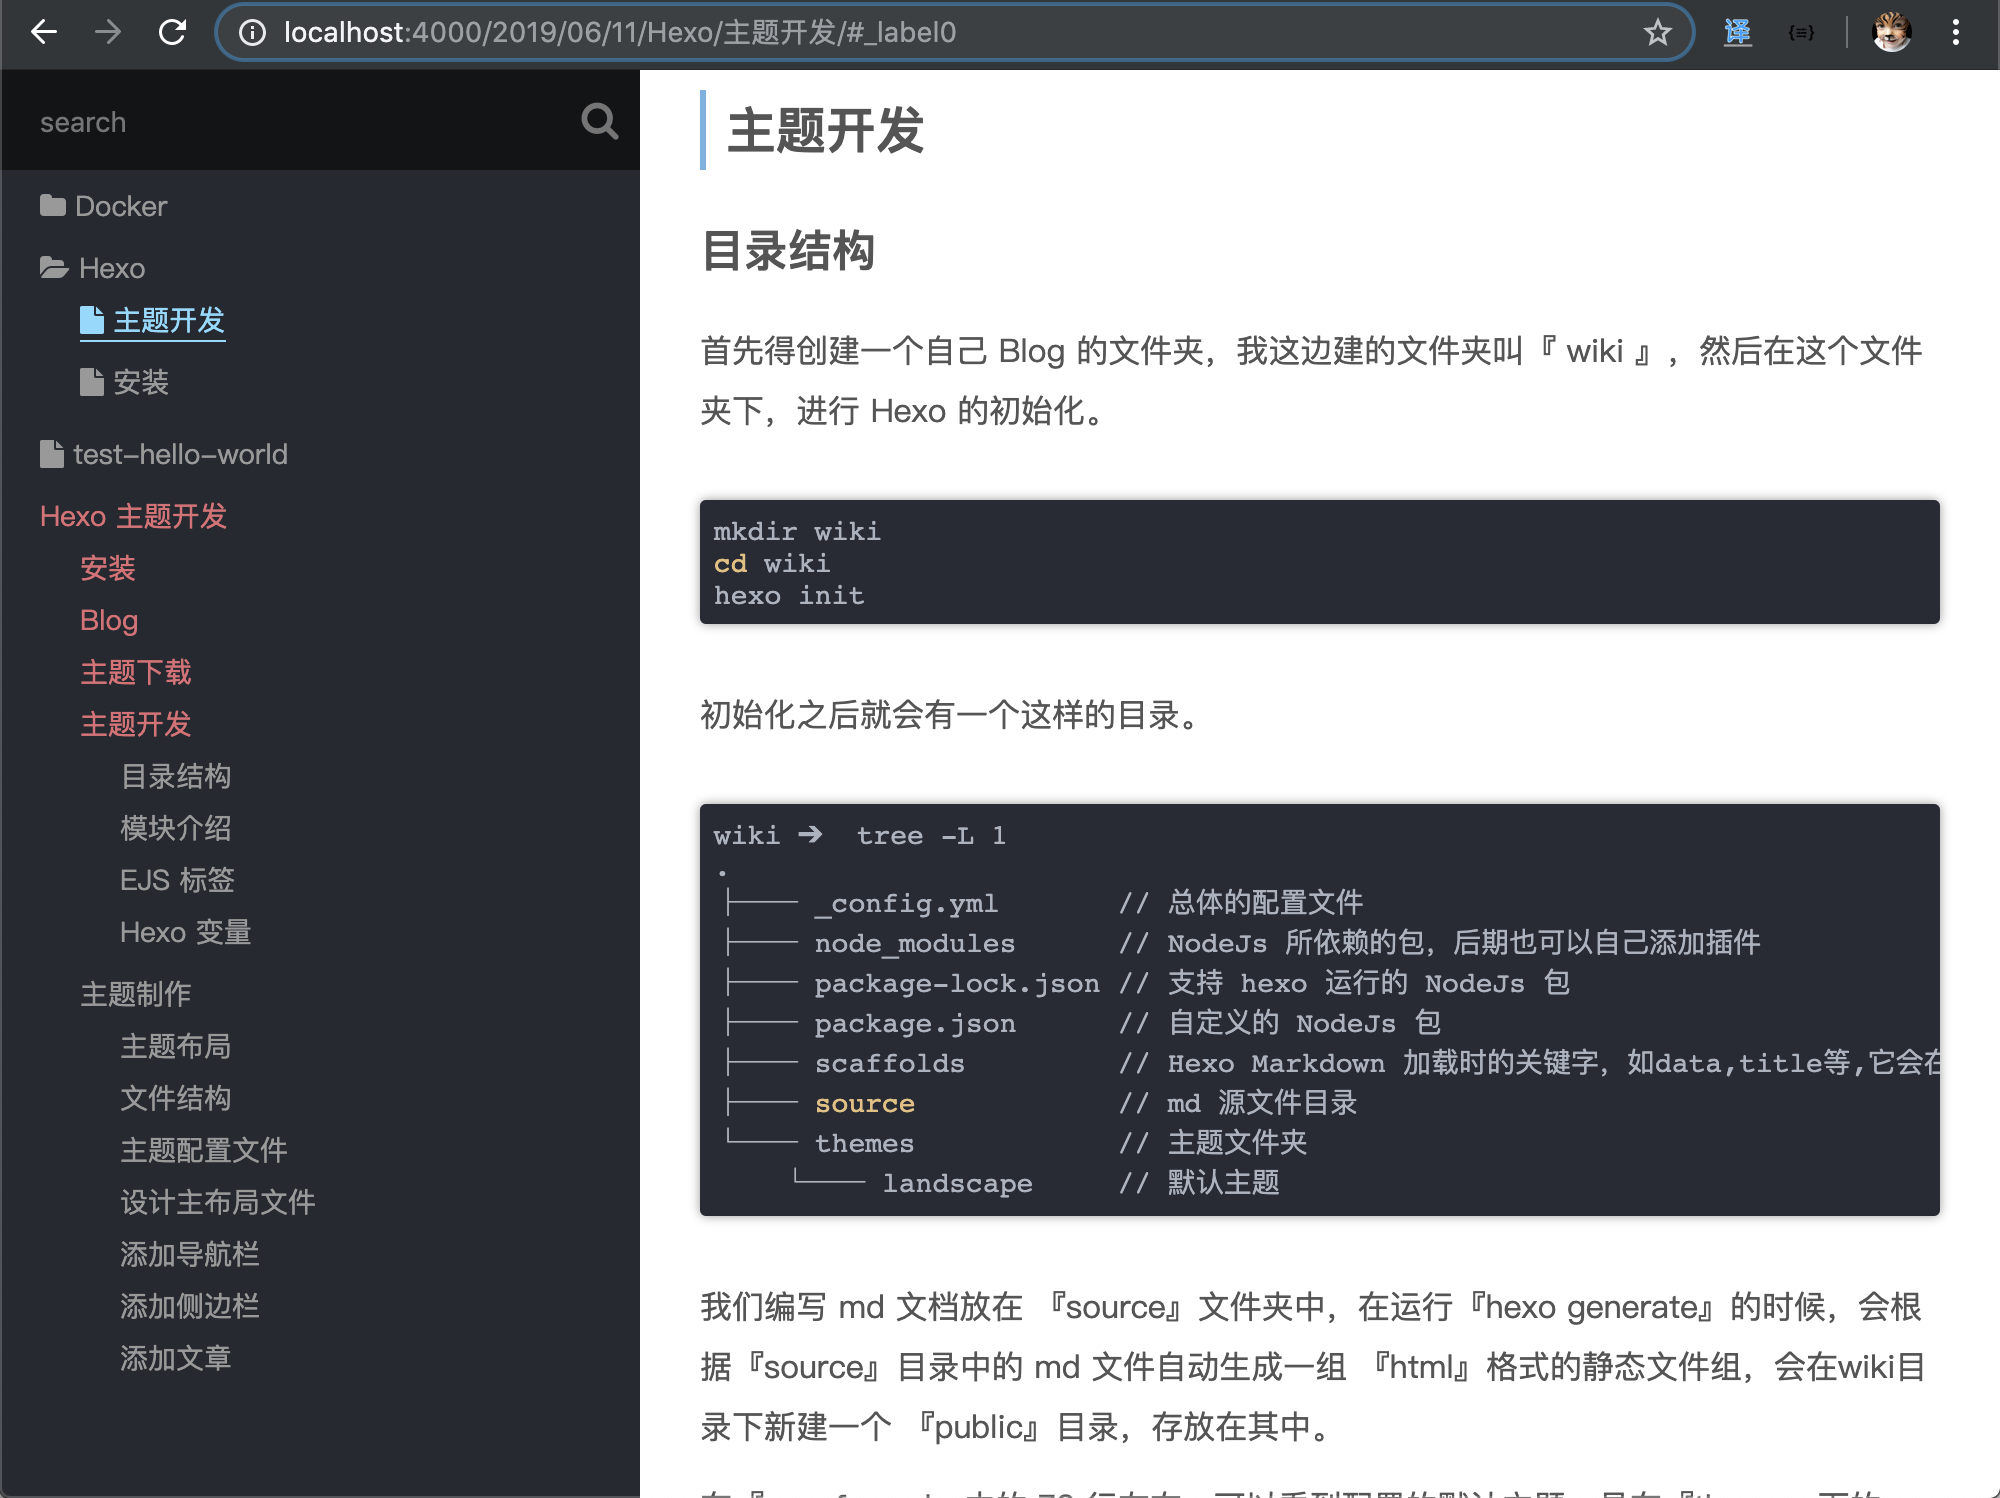
本来想着 wiki 这种不需要文章目录索引的。但是万一文章真的很长呢?好歹得有个目录吧,还是有个目录方便点。初期布局的时候,就没有想过目录要放哪,这下尴尬了。放在这个位置吧,还是有点丑,想点办法把这个目录优化一下,想着左上方的搜索图标没啥用,换成按钮好了,当点击时,分别切换文章索引目录,与树目录。
修改 aside.ejs ,把这个搜索图标,加个 id
『aside.ejs』
<!-- 搜索栏 -->
<div id="search">
    <input class="search-input" type="text" placeholder="search">
    <i class="fa fa-search"></i>
</div>
修改如下
『aside.ejs』
<!-- 搜索栏 -->
<div id="search">
    <input class="search-input" type="text" placeholder="search">
    <i id="search-icon" class="fa fa-bars" title="切换目录与索引">
</div>
然后给它实现 js 事件。
『main.js』
$(document).ready(function () {
    hljs.initHighlightingOnLoad();
    clickTreeDirectory();
    serachTree();
    pjaxLoad();
    showArticleIndex();
    switchTreeOrIndex();
});

// 点击搜索旁的按钮,切换目录与索引
function switchTreeOrIndex(){
    $("#search-icon").on("click", function(e){
        $("#tree").animate({height:'toggle'},0);
        $("#toc").animate({height:'toggle'},0);
    });
}
修改 css 给图标加上一个选中状态,大概 70 行的位置,以前是对 i 标签进行设置的,现在换成 id ,并且对它的 hover 选中状态进行变色。
『main.css』
/* 搜索图标 */
aside #search #search-icon {
    position: absolute;
    top: 0;
    right: 0;
    color: #999;
    font-size: 20px;
    width: 40px;
    height: 50px;
    background: #131417;
    text-align: center;
    line-height: 2.5;
    text-decoration: none
}
aside #search #search-icon:hover {
    cursor: pointer;
    color: #87daff;
    -webkit-user-select: none;
  -moz-user-select: none;
  -ms-user-select: none;
  -o-user-select: none;
}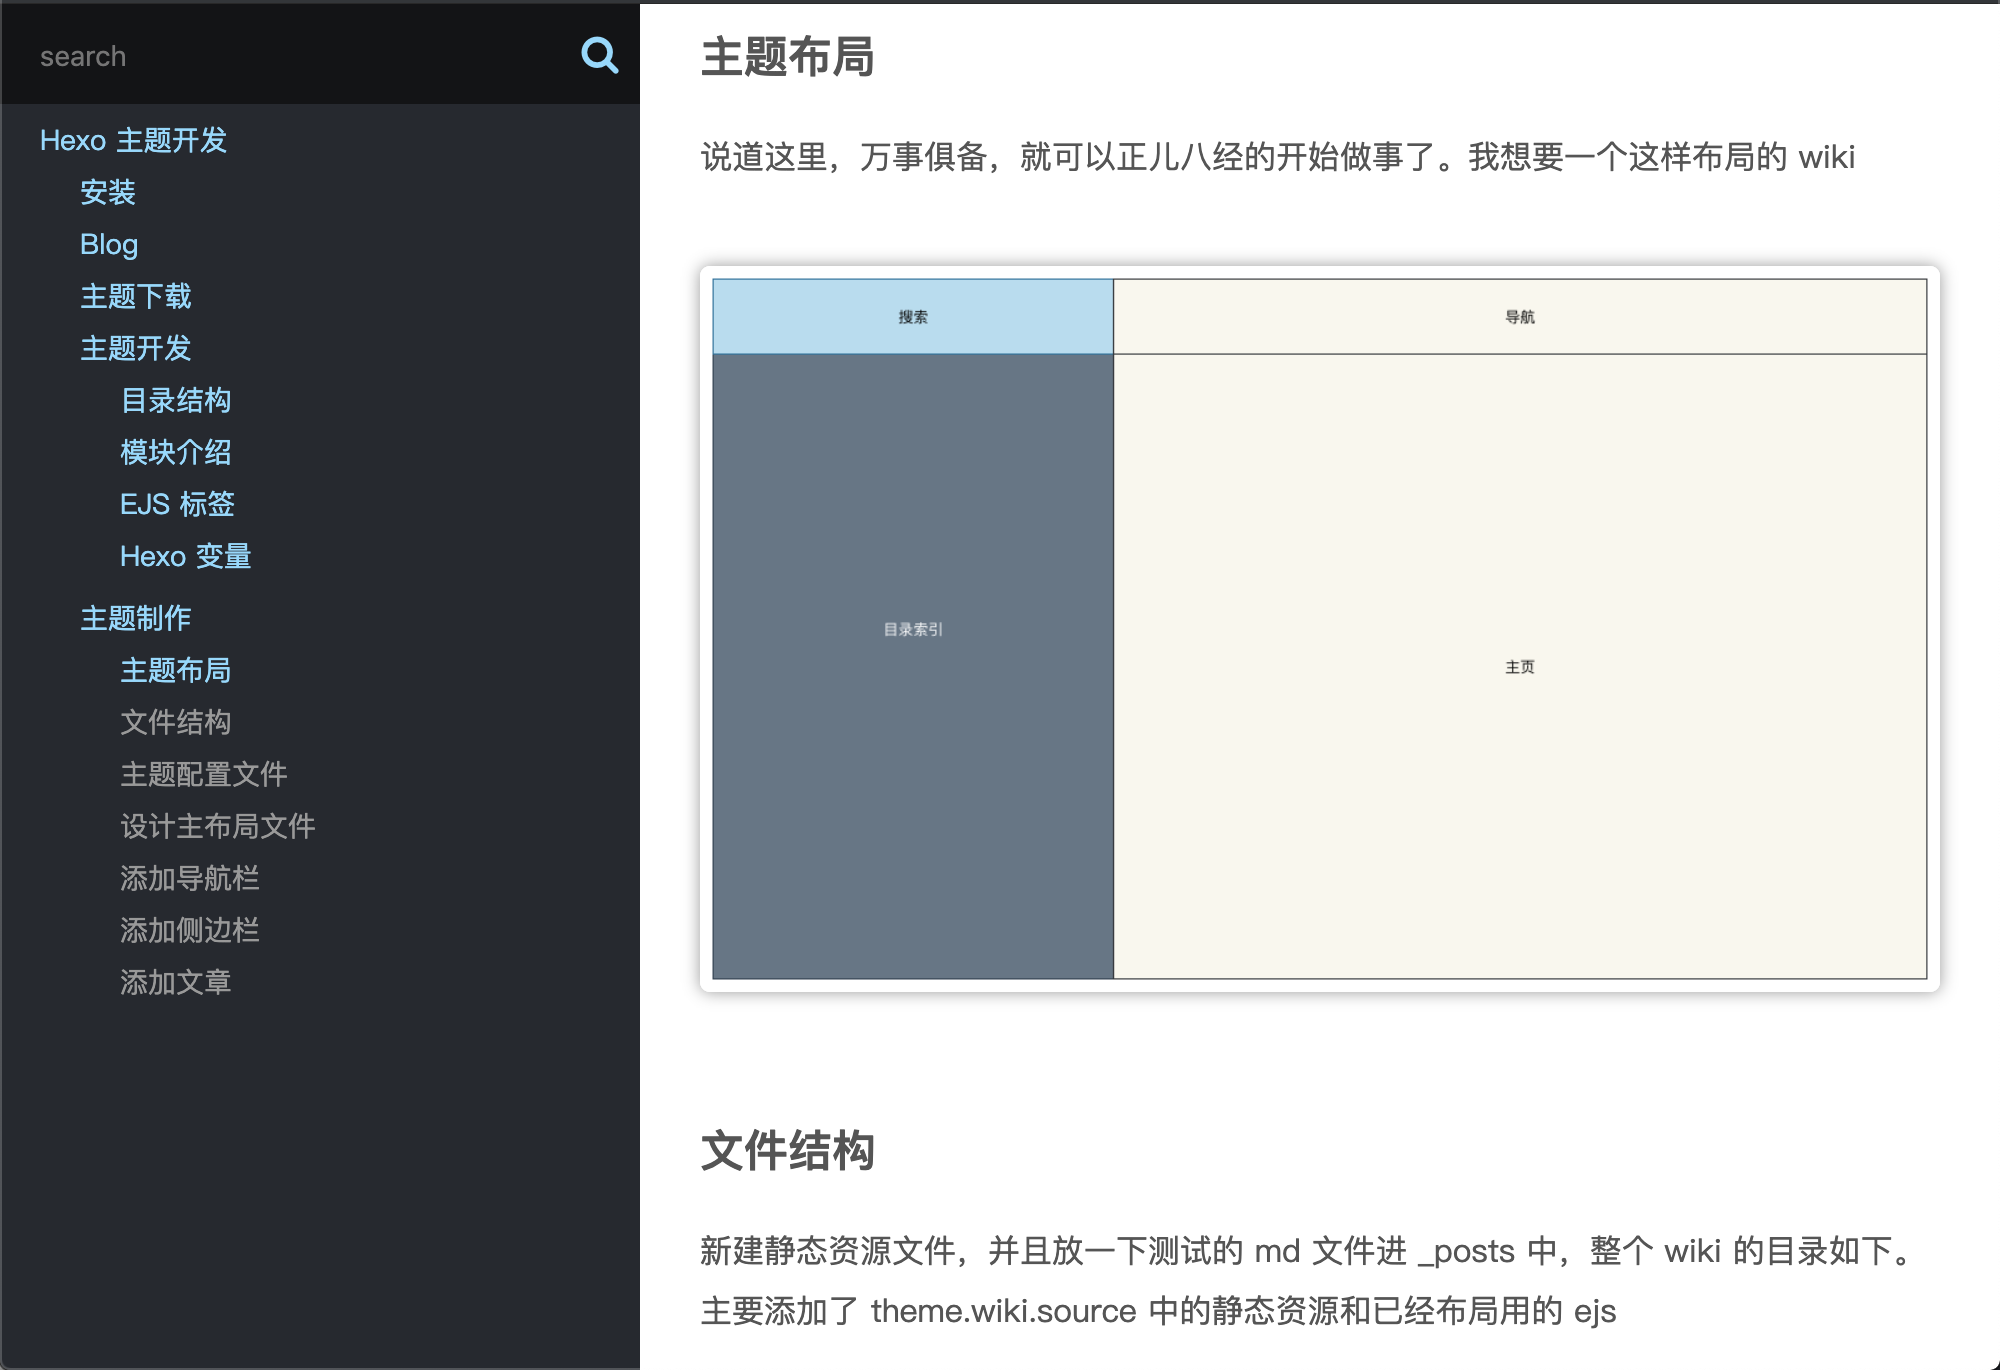
好了,现在点击这个图标,就会切换目录或者索引了。就是图标选的不太好,可以选中把图标换掉。如果想要更多的图标,可以去『Font Awesome』找喜欢的。
『aside.ejs』
<!-- 搜索栏 -->
<div id="search">
    <input class="search-input" type="text" placeholder="search">
    <i id="search-icon" class="fa fa-bars" title="切换目录与索引">
</div>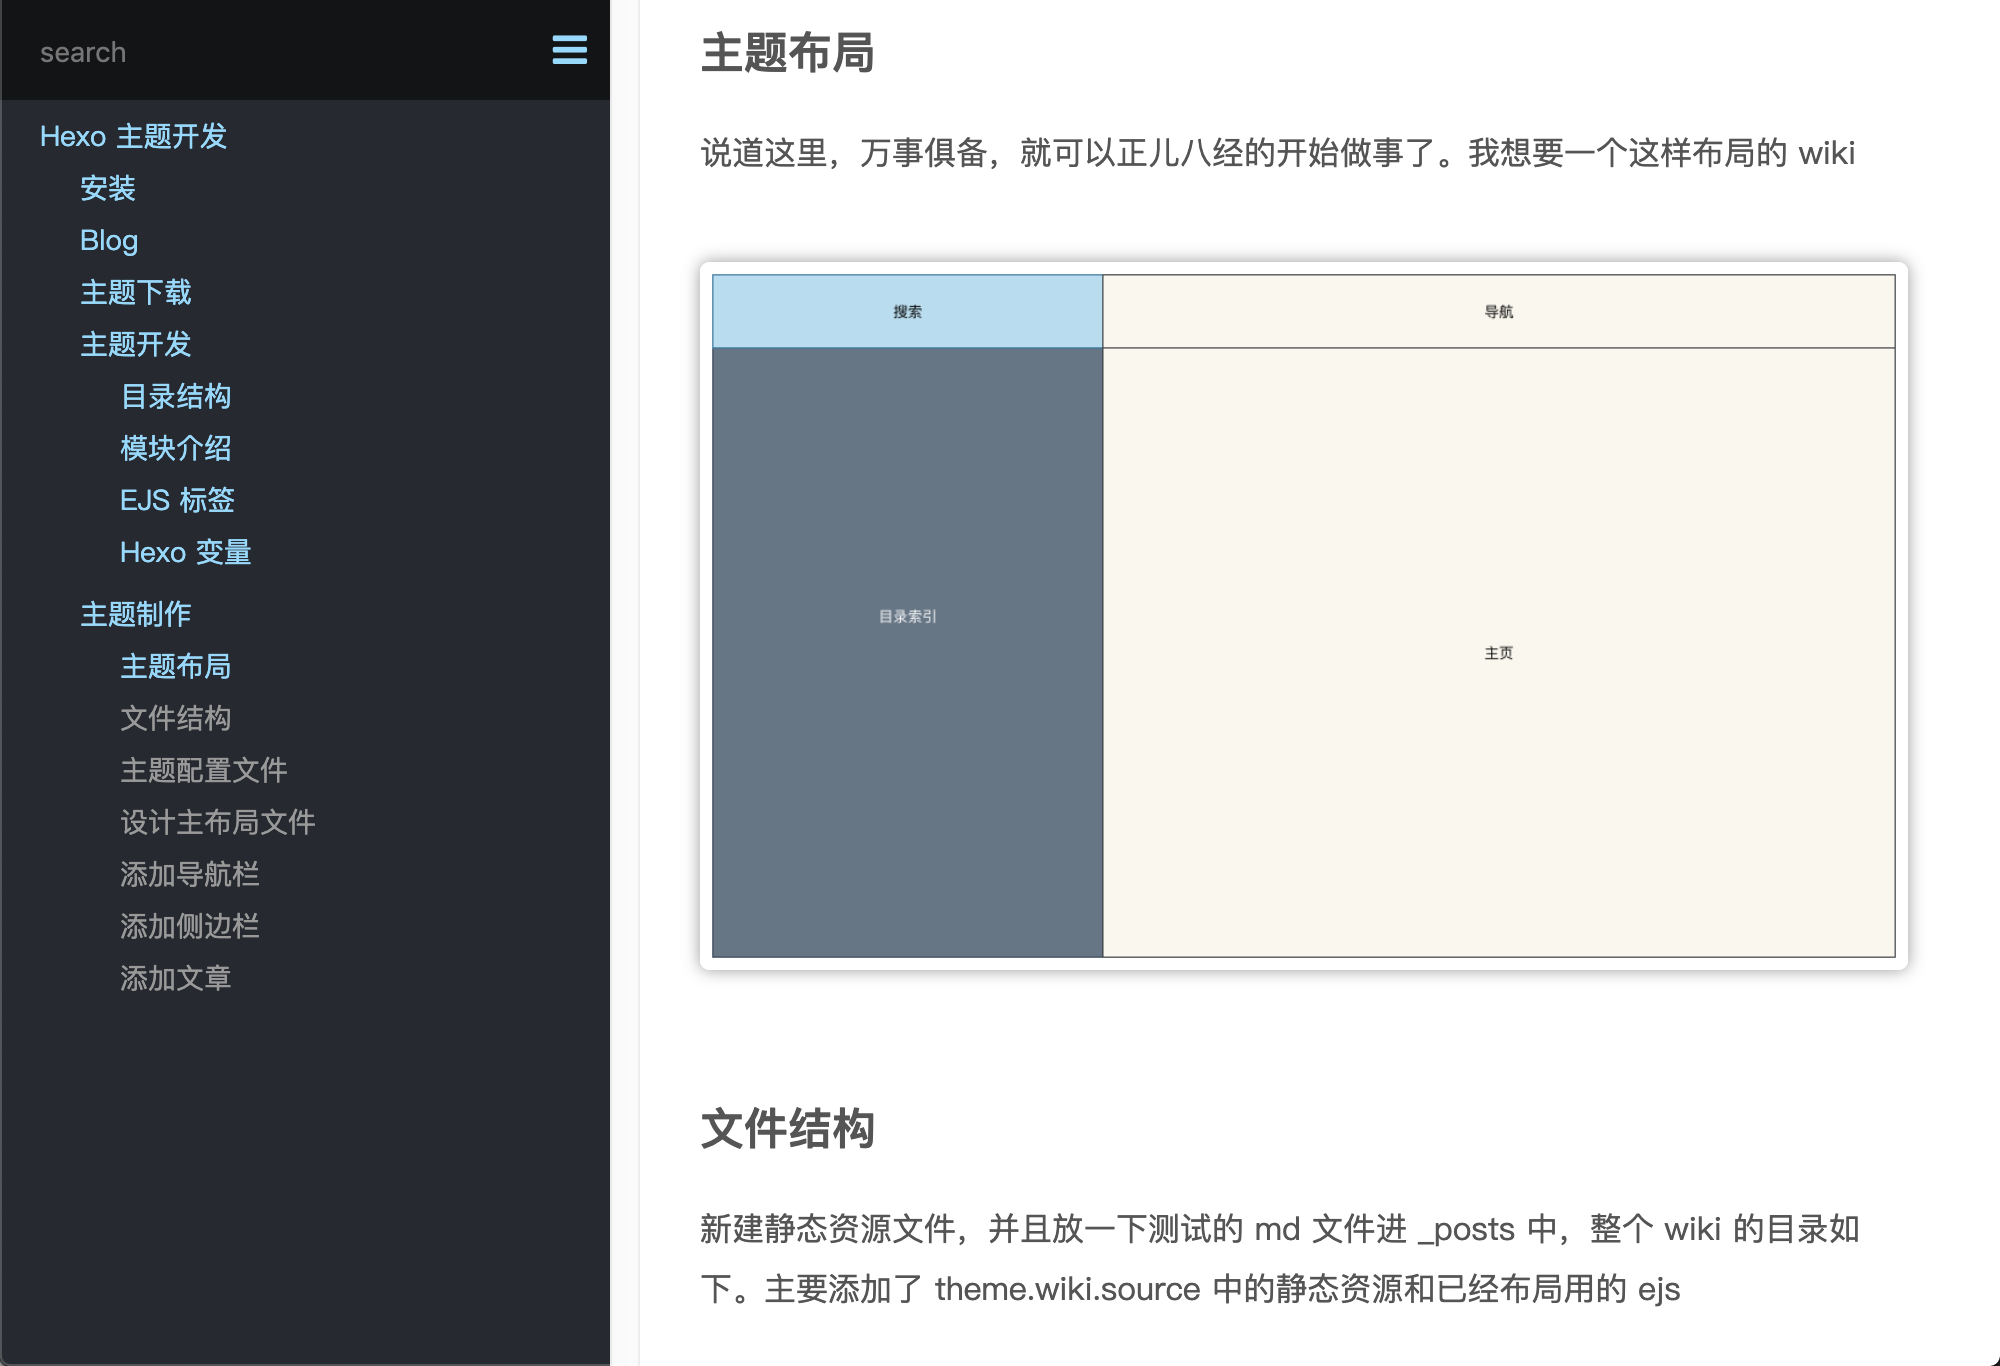
主页
其实主页可以直接引用最喜欢的 md 文件,就是主页了。后面的关于是直接引用的,为了本文每块都不一样,我这里把 wiki 文章列一下,形成一个全局文章浏览好了。如果你的文章特别的多,这种方式很影响网络带宽的,如果网络不是足够的大,很容易造成卡顿。
『index.ejs』
<div id="articleList">
    <ul>
        <% site.posts.forEach(function(post){ %>

            <li class="article-li">
                <span class="article-date"><%- date(post.date, "YYYY-MM-DD") %></span>
                <a class="article-read" href="<%- config.root %><%- post.path %>"> 阅读全文 </span>
                <a class="article-title" href="<%- config.root %><%- post.path %>"><%- post.slug.split("/")[post.slug.split("/").length-1] %></a>
                <div class="article-digest">
                    <%- post.more.replace(/<\/?.+?\/?>/g, "").substring(0, 100) %>
                    ...
                </div>
            </li>

        <% }); %>
    </ul>
</div>
美化样式
『css.main』
/* #################### 主页 #################### */

#articleList {
    position: absolute;
}

#articleList .article-li {
    margin: 20px;
    height: 200px;
    border-radius: 5px;
    box-shadow: 1px 1px 8px #999;
    list-style: none;
    border: 1px solid #999;
}

#articleList .article-digest * {
    word-wrap: break-word;
    display: inline;
    font-size: 12px;
    color: #555;
    text-decoration: none;
    cursor:auto;
    border-radius: none;
    box-shadow: none;
}

#articleList .article-digest{
    padding: 30px;
    position: relative;
    top: 35px;
    width: 85%;
}

#articleList .article-date{
    position: relative;
    background: #e06c75;
    color: #f9f7ed;
    padding: 10px;
    top: -5px;
    border-radius: 2px;
    margin-left: 30px;
}

#articleList .article-read {
    position: absolute;
    background: #e06c75;
    color: #f9f7ed;
    padding: 10px;
    border-radius: 2px;
    right: 15px;
    margin-top: 140px;
    text-decoration: none;
}

#articleList .article-title {
    position: relative;
    color: #555;
    text-decoration: none;
    font-size: 24px;
    font-weight: bold;
    top: 50px;
    right: 110px;
}

/* #################### 主页 #################### */
添加 pjax,在 pjaxLoad 中,增加一个主页的。
『main.js』
function pjaxLoad(){
    $(document).pjax('#tree a', '#content', {fragment:'#content', timeout:8000});
    $(document).pjax('#menu a', '#content', {fragment:'#content', timeout:8000});
    $(document).pjax('#articleList a', '#content', {fragment:'#content', timeout:8000});
    $(document).on({
        "pjax:complete": function(e) {
            $("pre code").each(function (i, block){
                hljs.highlightBlock(block);
            });

            // 添加 active
            $("#tree .active").removeClass("active");
            e.relatedTarget.parentNode.classList.add("active");

            showArticleIndex();
        }
    });
}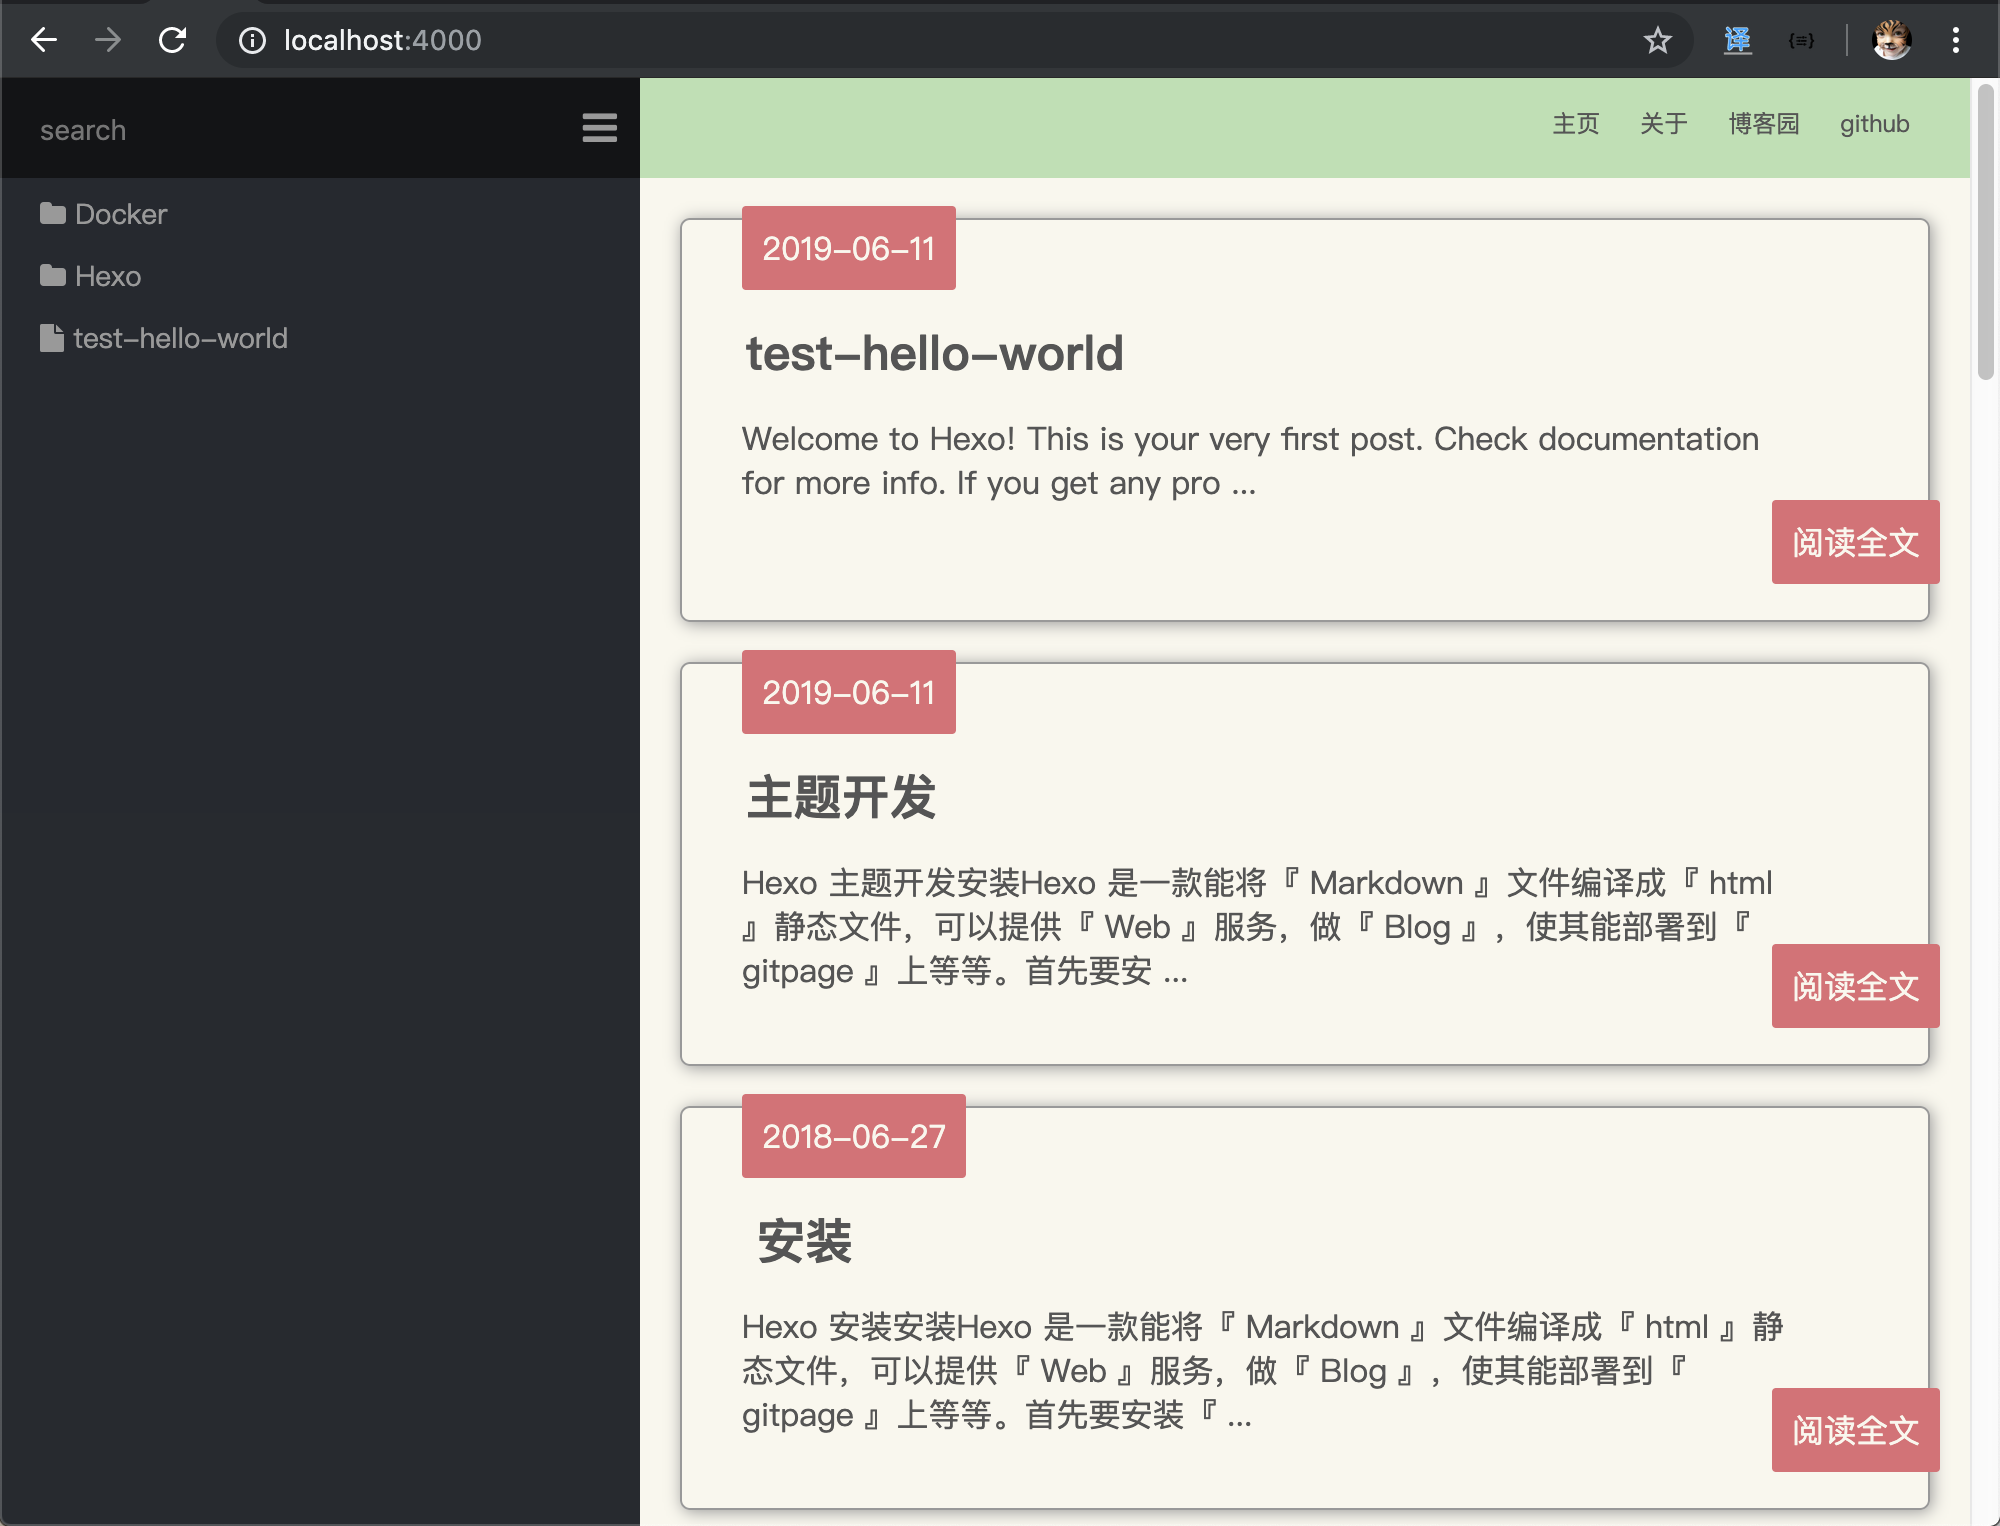
主机设计就这样了,其实主页可以很花哨、炫酷的。可以把自己最自豪的作品展示在这里。ejs 是支持 html 编码的,所以完全可以在 ejs 中写入自己的项目。
关于
关于就是个人相关的信息,直接引入 md 就好了。在 Hexo 存放 md 的 _post 同级目录,新建 about 目录,同时在这个目录下,新建一个 index.md,在里面随便写几句话测试好了。
wiki ➔  tree -L 3
├── _config.yml
├── db.json
├── package-lock.json
├── package.json
├── scaffolds
├── source
│   ├── _posts
│   │   ├── Docker
│   │   ├── Hexo
│   │   └── test-hello-world.md
│   ├── about
│   │   └── index.md
└── themes
部署
Nginx
写好的文章是可以部署自己的云服务器上的,如果没有自己的也可以部署到 github 的 gitpage 上的。这边先介绍怎么部署到 Nginx 上。
我这有一台 Linux 服务器
| 服务器 | ip |
|---|---|
| CentOS | 192.168.0.100 |
先安装好 Nginx
- Nginx安装环境
yum install -y openssl openssl-devel
yum install -y pcre pcre-devel
yum install -y zlib zlib-devel- 下载
wget http://nginx.org/download/nginx-1.12.0.tar.gz
tar zxvf nginx-1.12.0.tar.gz- 编译
./configure \
--prefix=/usr/local/nginx \
--pid-path=/var/run/nginx/nginx.pid \
--lock-path=/var/lock/nginx.lock \
--error-log-path=/var/log/nginx/error.log \
--http-log-path=/var/log/nginx/access.log \
--with-http_gzip_static_module \
--http-client-body-temp-path=/var/temp/nginx/client \
--http-proxy-temp-path=/var/temp/nginx/proxy \
--http-fastcgi-temp-path=/var/temp/nginx/fastcgi \
--http-uwsgi-temp-path=/var/temp/nginx/uwsgi \
--http-scgi-temp-path=/var/tmp/nginx/scgi- 安装
make && make install新建默认目录
mkdir -p /var/temp/nginx/client
mkdir -p /var/tmp/nginx/scgi
启动 nginx
cd /usr/local/nginx/sbin/
./nginx
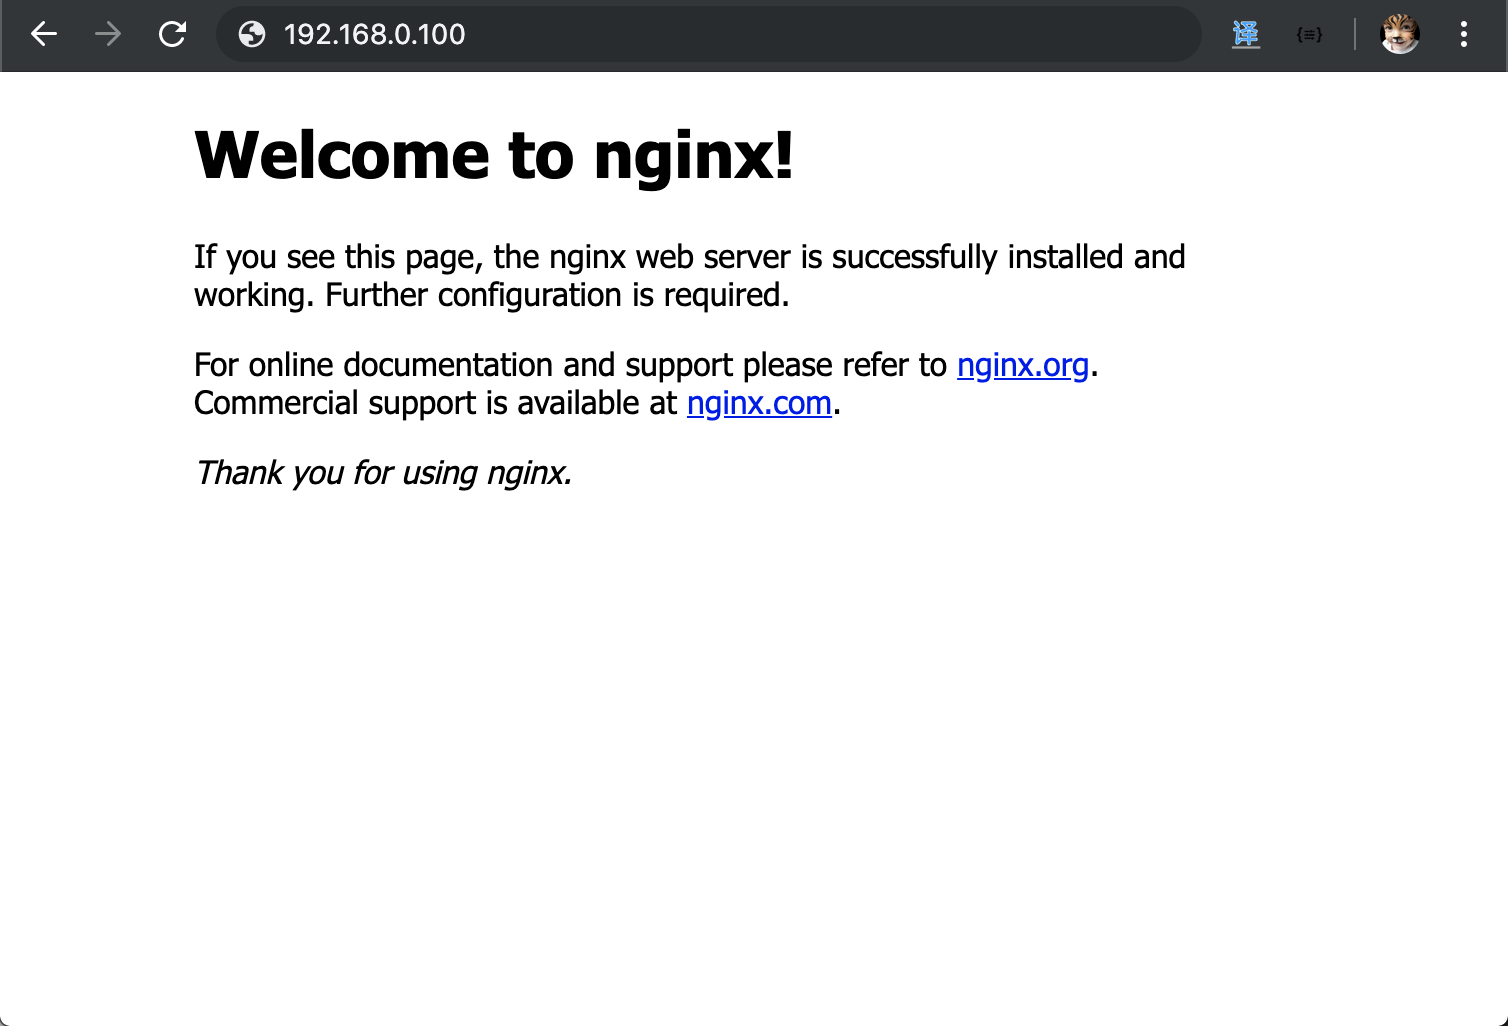
访问 nginx 看是否已经可以正常浏览
关于这方面的部署,可以参照官方文档 SFTP 部署
首先得在 hexo 目录下安装 sftp 插件
npm install hexo-deployer-sftp --save然后在 _config.yml 中配置 deploy
『_config.yml』
deploy:
  type: "sftp"
  host: "192.168.0.100"
  user: "root"
  pass: "123456"
  remotePath: "/usr/local/nginx/html"
  port: 22
先生成文件
hexo g

INFO  Start processing
INFO  Files loaded in 459 ms
INFO  Generated: index.html
INFO  Generated: archives/index.html
INFO  Generated: about/index.html
INFO  Generated: archives/2018/01/index.html
INFO  Generated: archives/2019/06/index.html
...
再进行部署
hexo d

INFO  Deploying: sftp
* Deploying to host localhost
* local dir  = /Users/Yuki/Documents/wiki/public
* remote dir = /usr/local/nginx/html
...
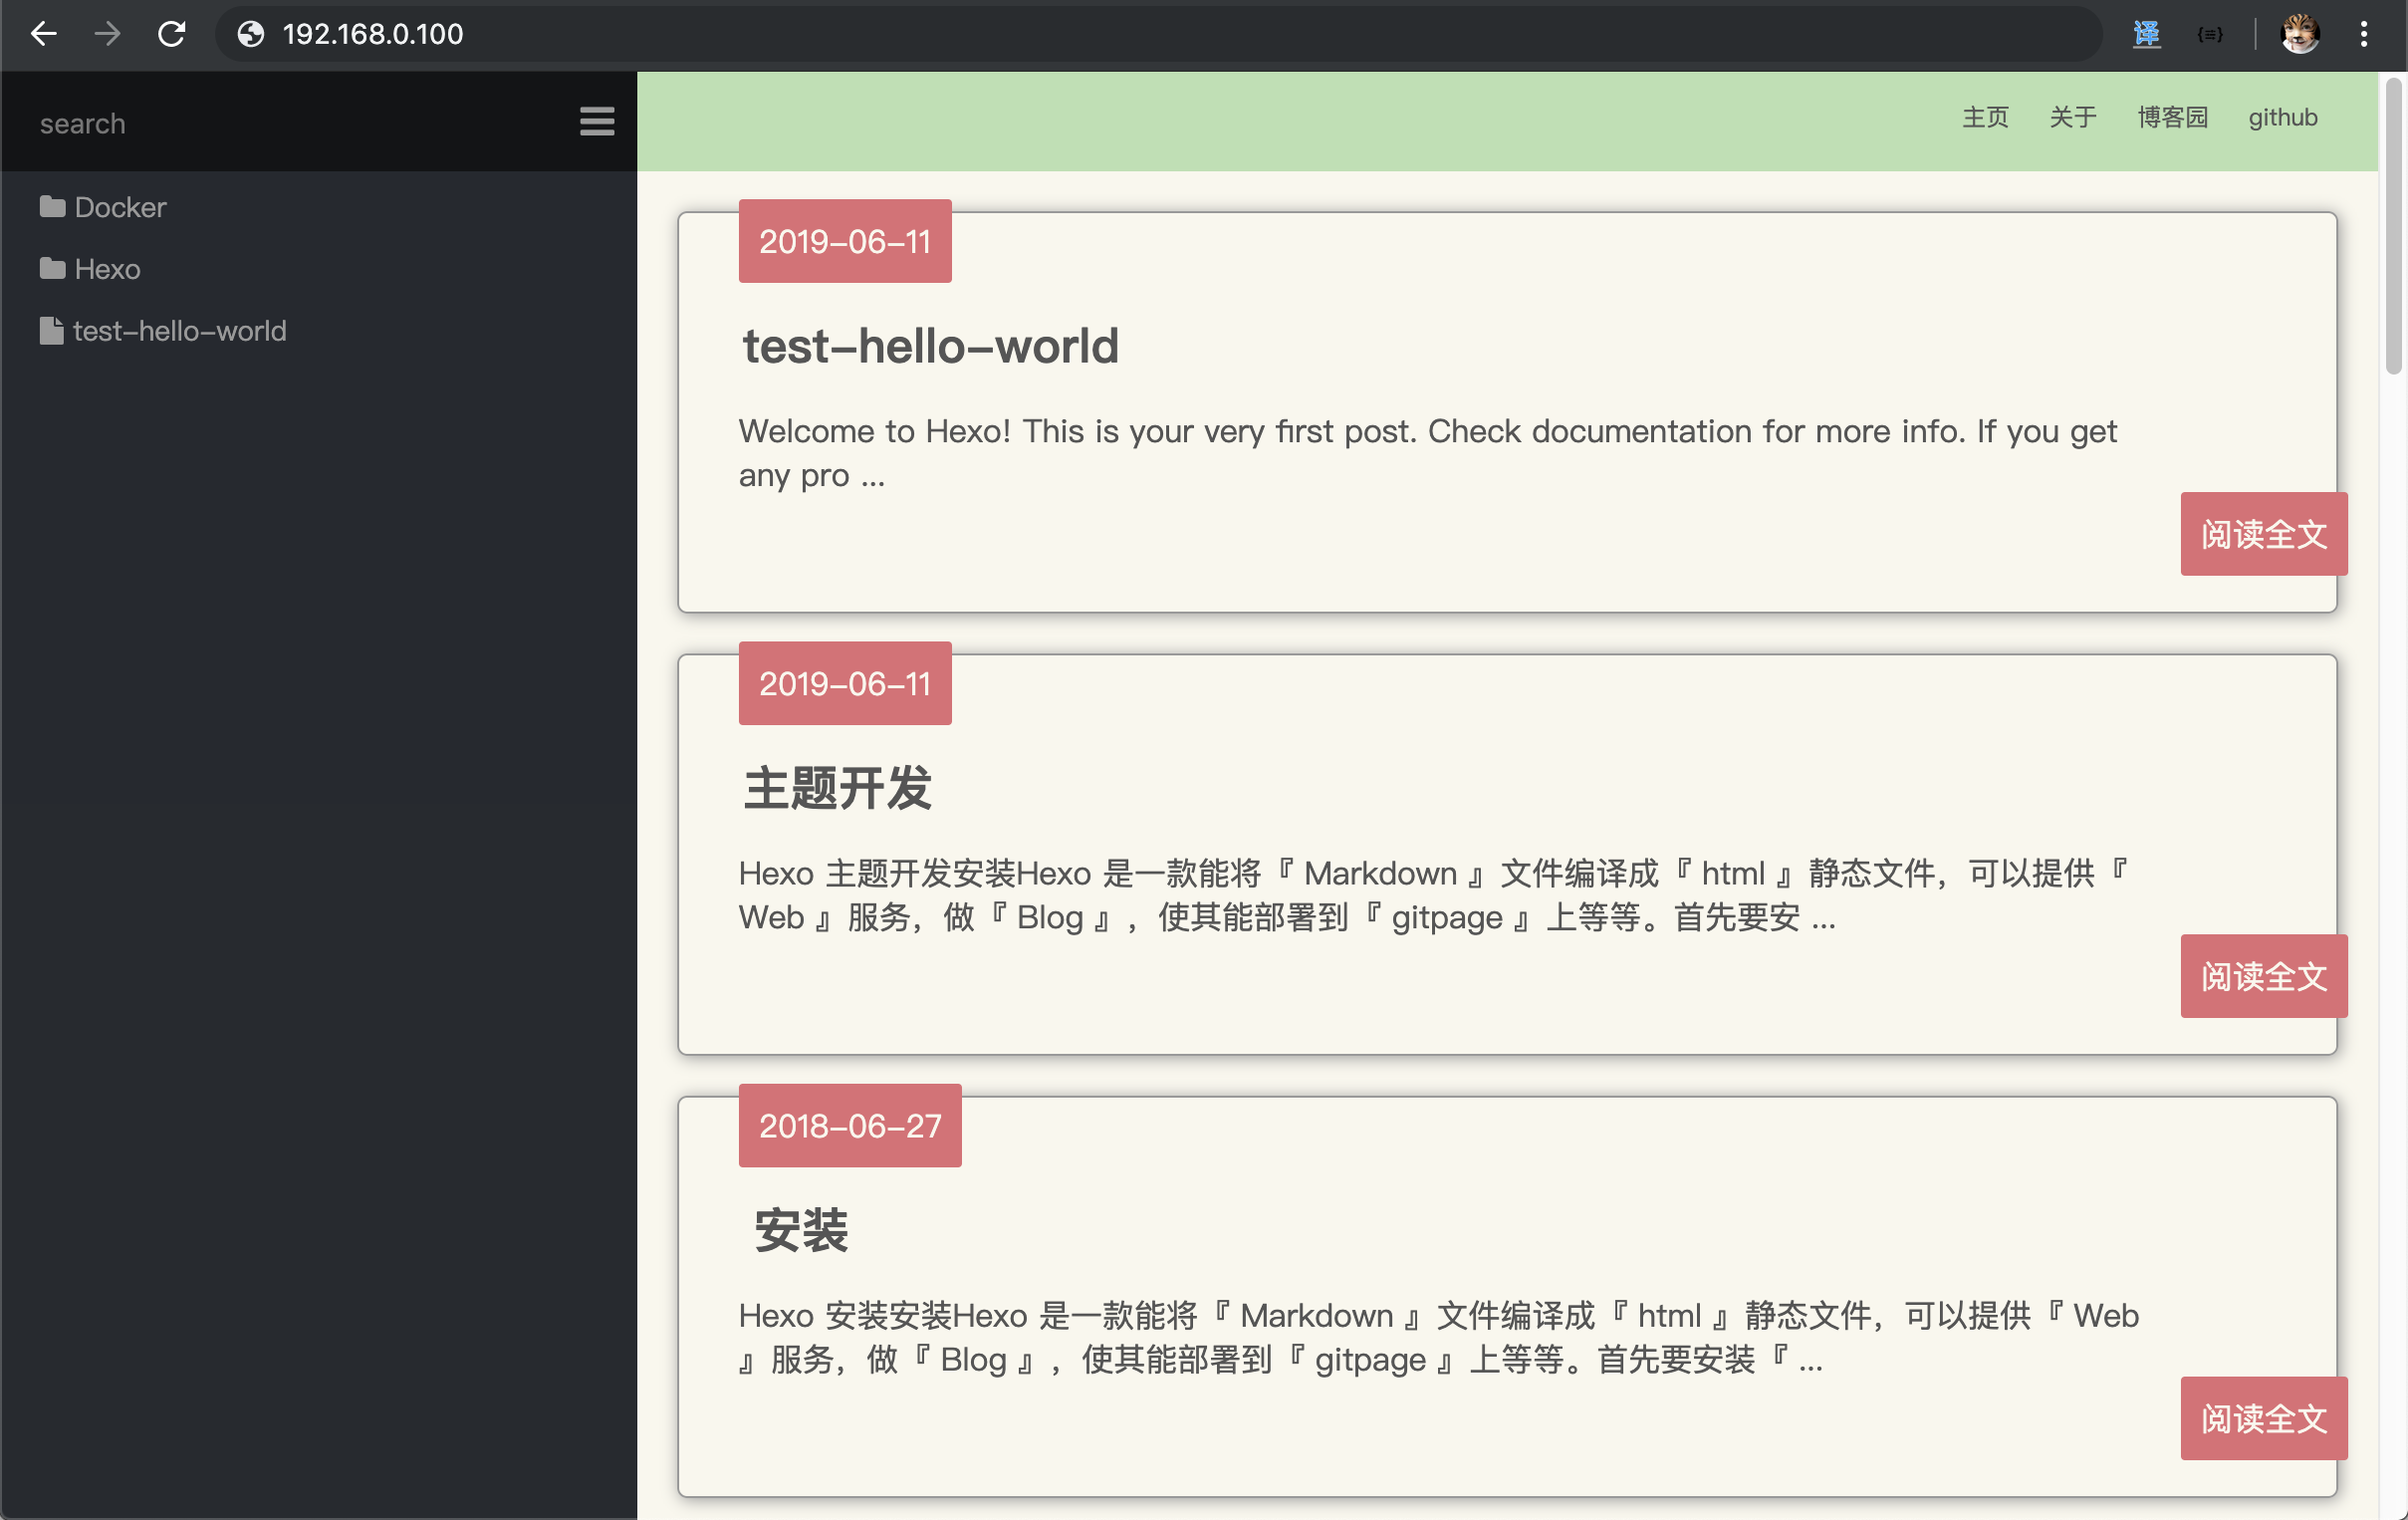
好了,访问看看。
gitpage
部署到 github 下的 gitpage 里,这个是免费的,不需要有自己的云服务,唯一的缺点,就是国外的网速有点慢,还好 github 没有被墙。
- 首先新建一个仓库
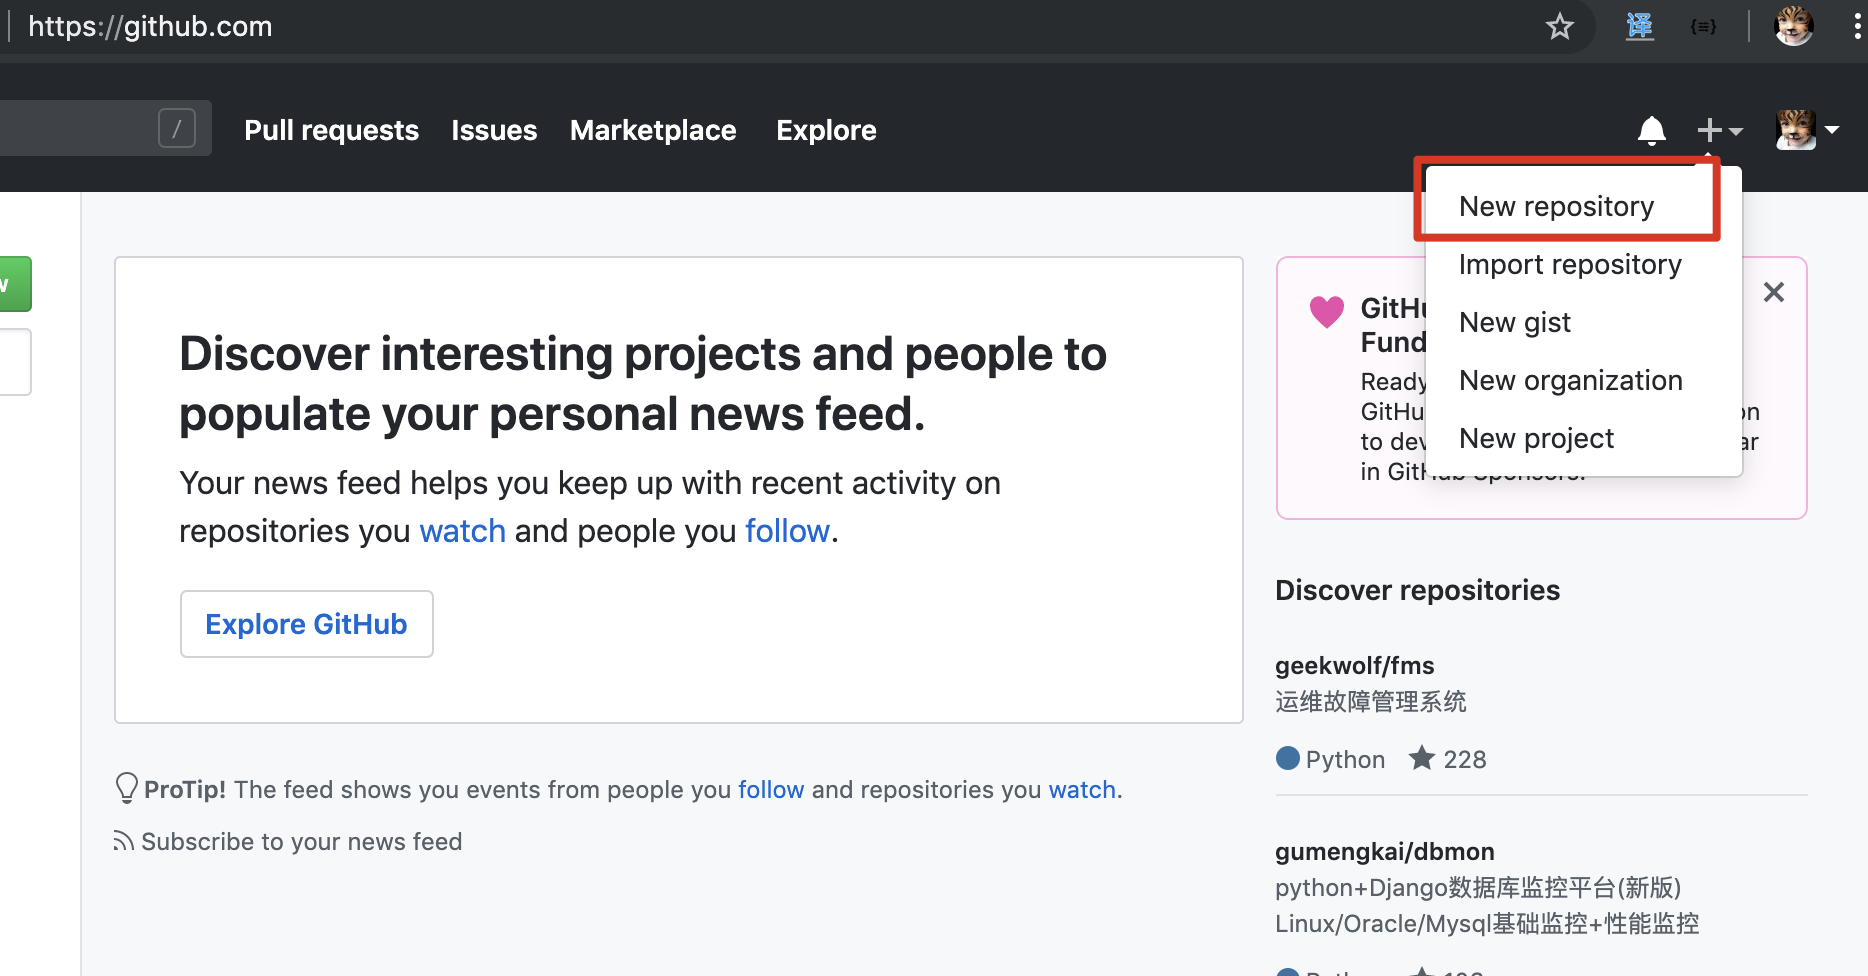
- 新建一个开头以你的账户命名的 yourname.github.io 的仓库
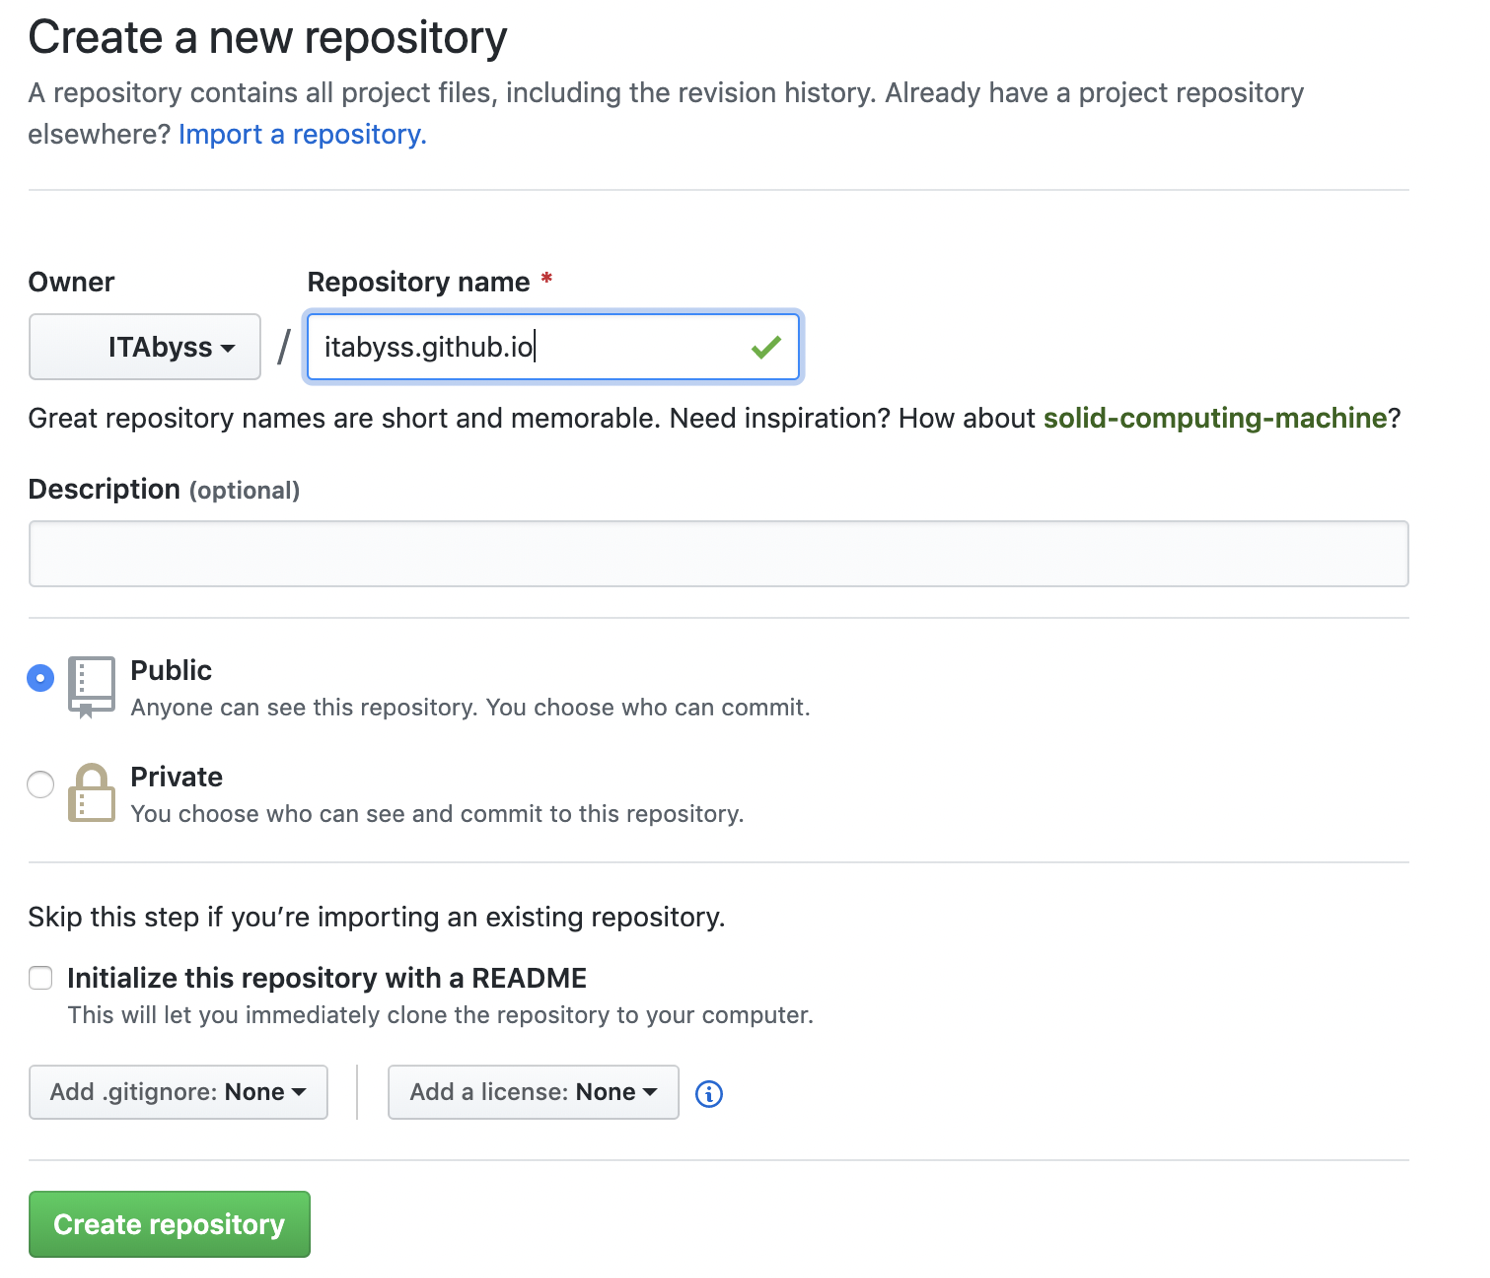
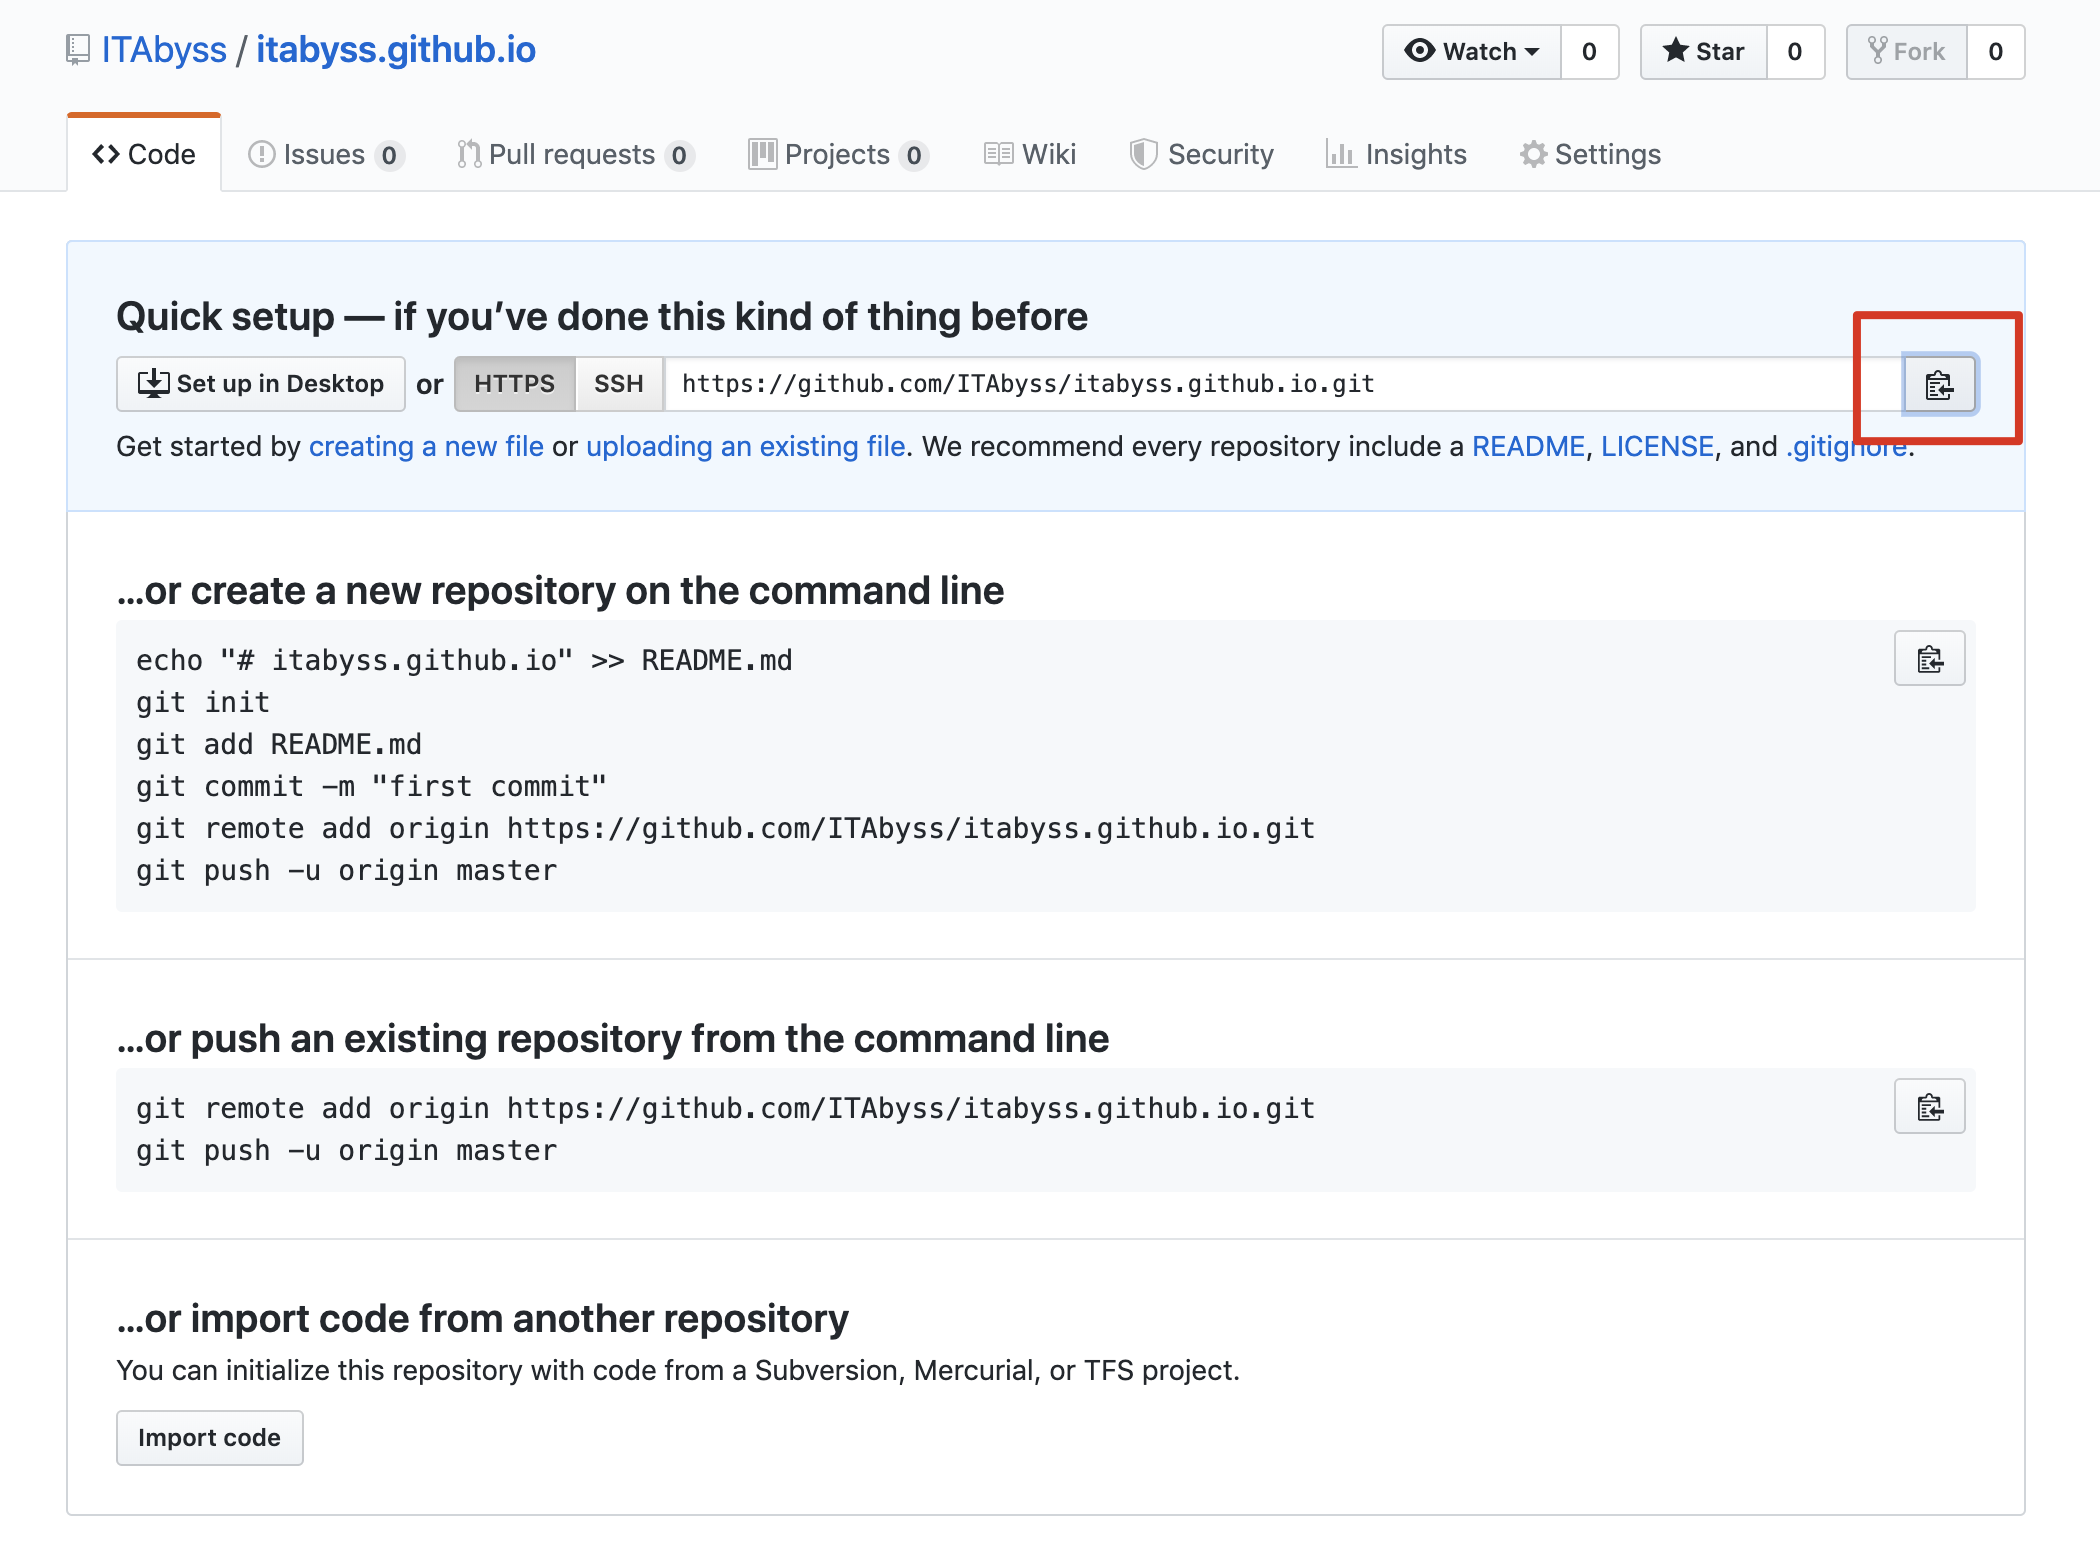
- 复制你的 git 地址。
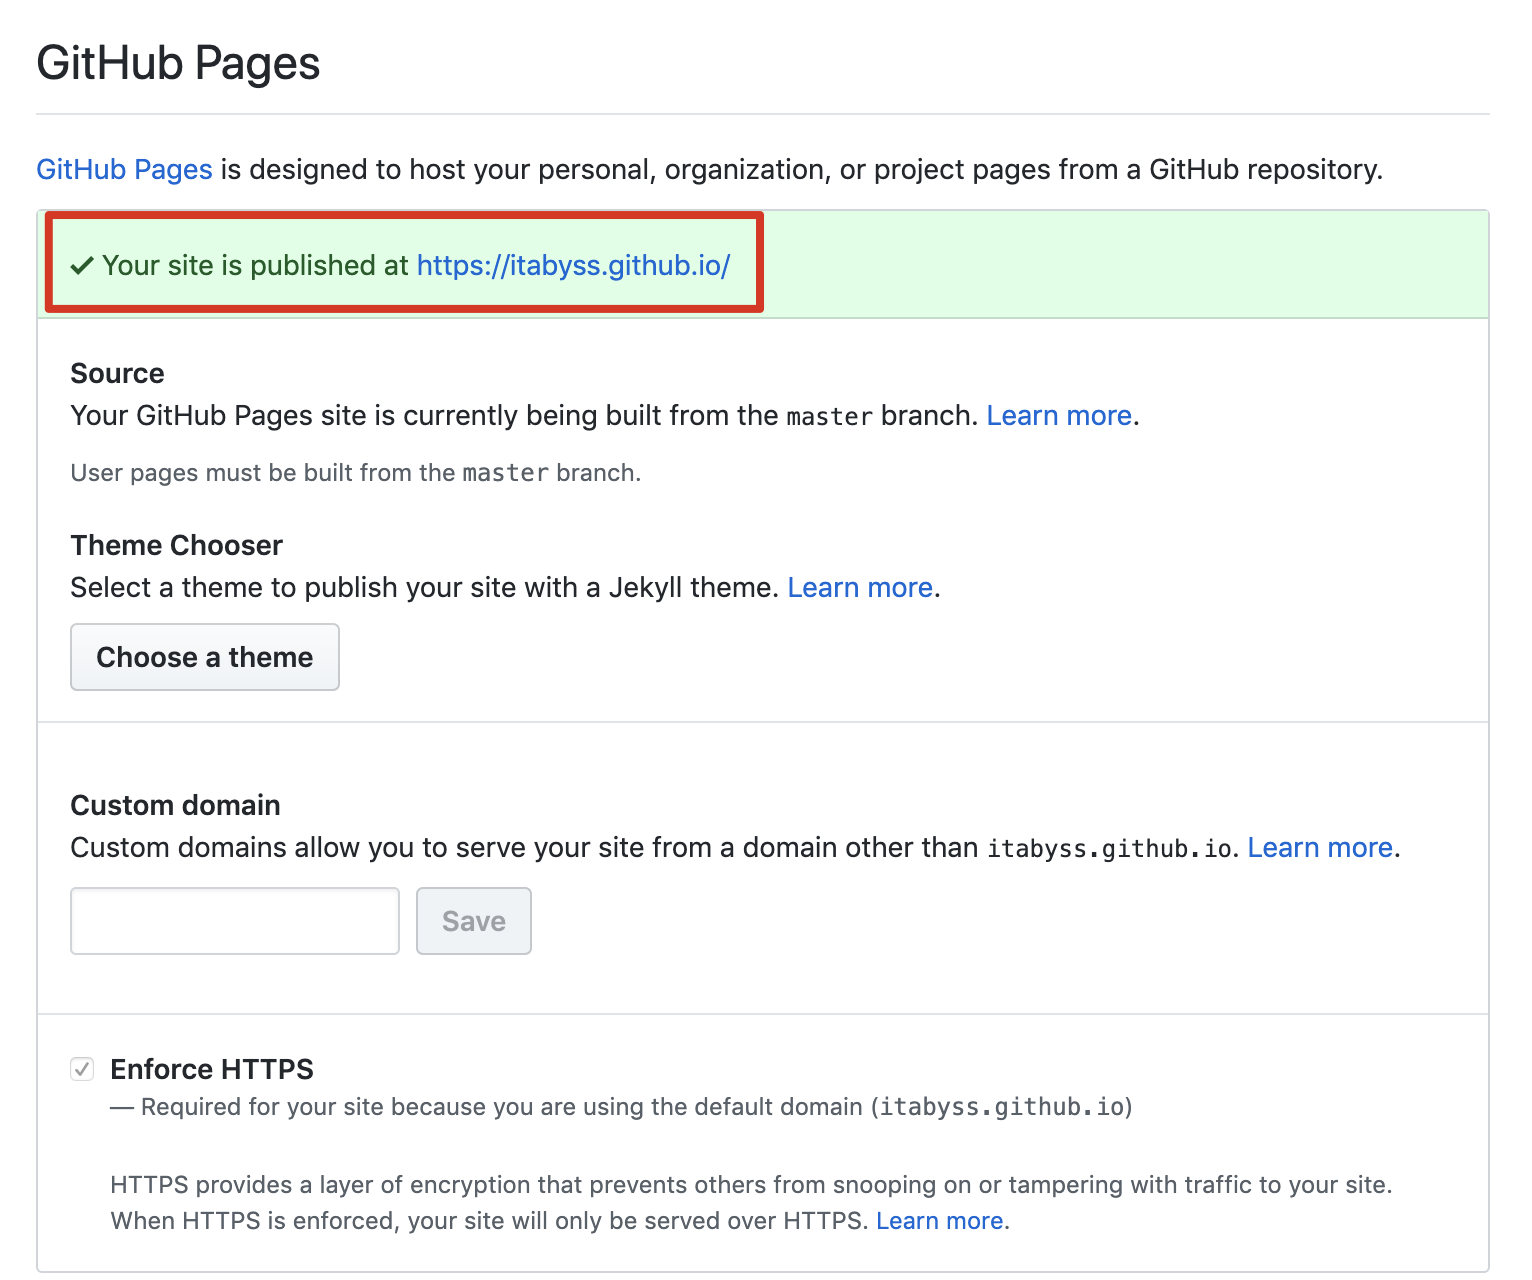
- 往下翻,修改它的 gitpage 位置,可以看到它的提示已经变了,并且给你了 gitpage 的地址。
- 同样跟刚才部署 nginx 一样,可以参照官文档 Git 部署
先添加 git 插件
npm install hexo-deployer-git --save然后在 _config.yml 中配置 deploy,这个就是你刚才复制的仓库地址。
『_config.yml』
deploy:
  type: "git"
  repo: "https://github.com/ITAbyss/itabyss.github.io.git"
  branch: "master"
先生成文件
hexo g

INFO  Start processing
INFO  Files loaded in 459 ms
INFO  Generated: index.html
INFO  Generated: archives/index.html
INFO  Generated: about/index.html
INFO  Generated: archives/2018/01/index.html
INFO  Generated: archives/2019/06/index.html
...
再进行部署
hexo d

NFO  Deploying: git
INFO  Setting up Git deployment...
Initialized empty Git repository in /Users/Yuki/Documents/wiki/.deploy_git/.git/
[master (root-commit) 17350e4] First commit
 1 file changed, 0 insertions(+), 0 deletions(-)
 create mode 100644 placeholder
INFO  Clearing .deploy_git folder...
INFO  Copying files from public folder...
INFO  Copying files from extend dirs...
[master 9251e9f] Site updated: 2019-06-19 19:19:57
 179 files changed, 28176 insertions(+)

...
记得去掉布局测试颜色
